
Recreating the Darth Vader Lightsaber and the Luke Skywalker Lightsaber from ESB using vintage found parts.
It’s been a while since I’ve posted anything here so I thought I’d show something a little different. The goal was to try to recreate the original lightsaber filming props whilst getting as close as possible and using the same vintage parts as were used in Empire back in 1980. I’ve been working on these since 2010 in trying to acquire all of the parts and then assemble them after my interest had first been piqued when the Vader ESB/ROTJ Hero prop turned up at Hollywood Memories museum in Grantville, PA, USA in early 2008. Detailed pictures of the Vader ESB were available for the first time at this point.
The Darth Vader ESB Lightsaber
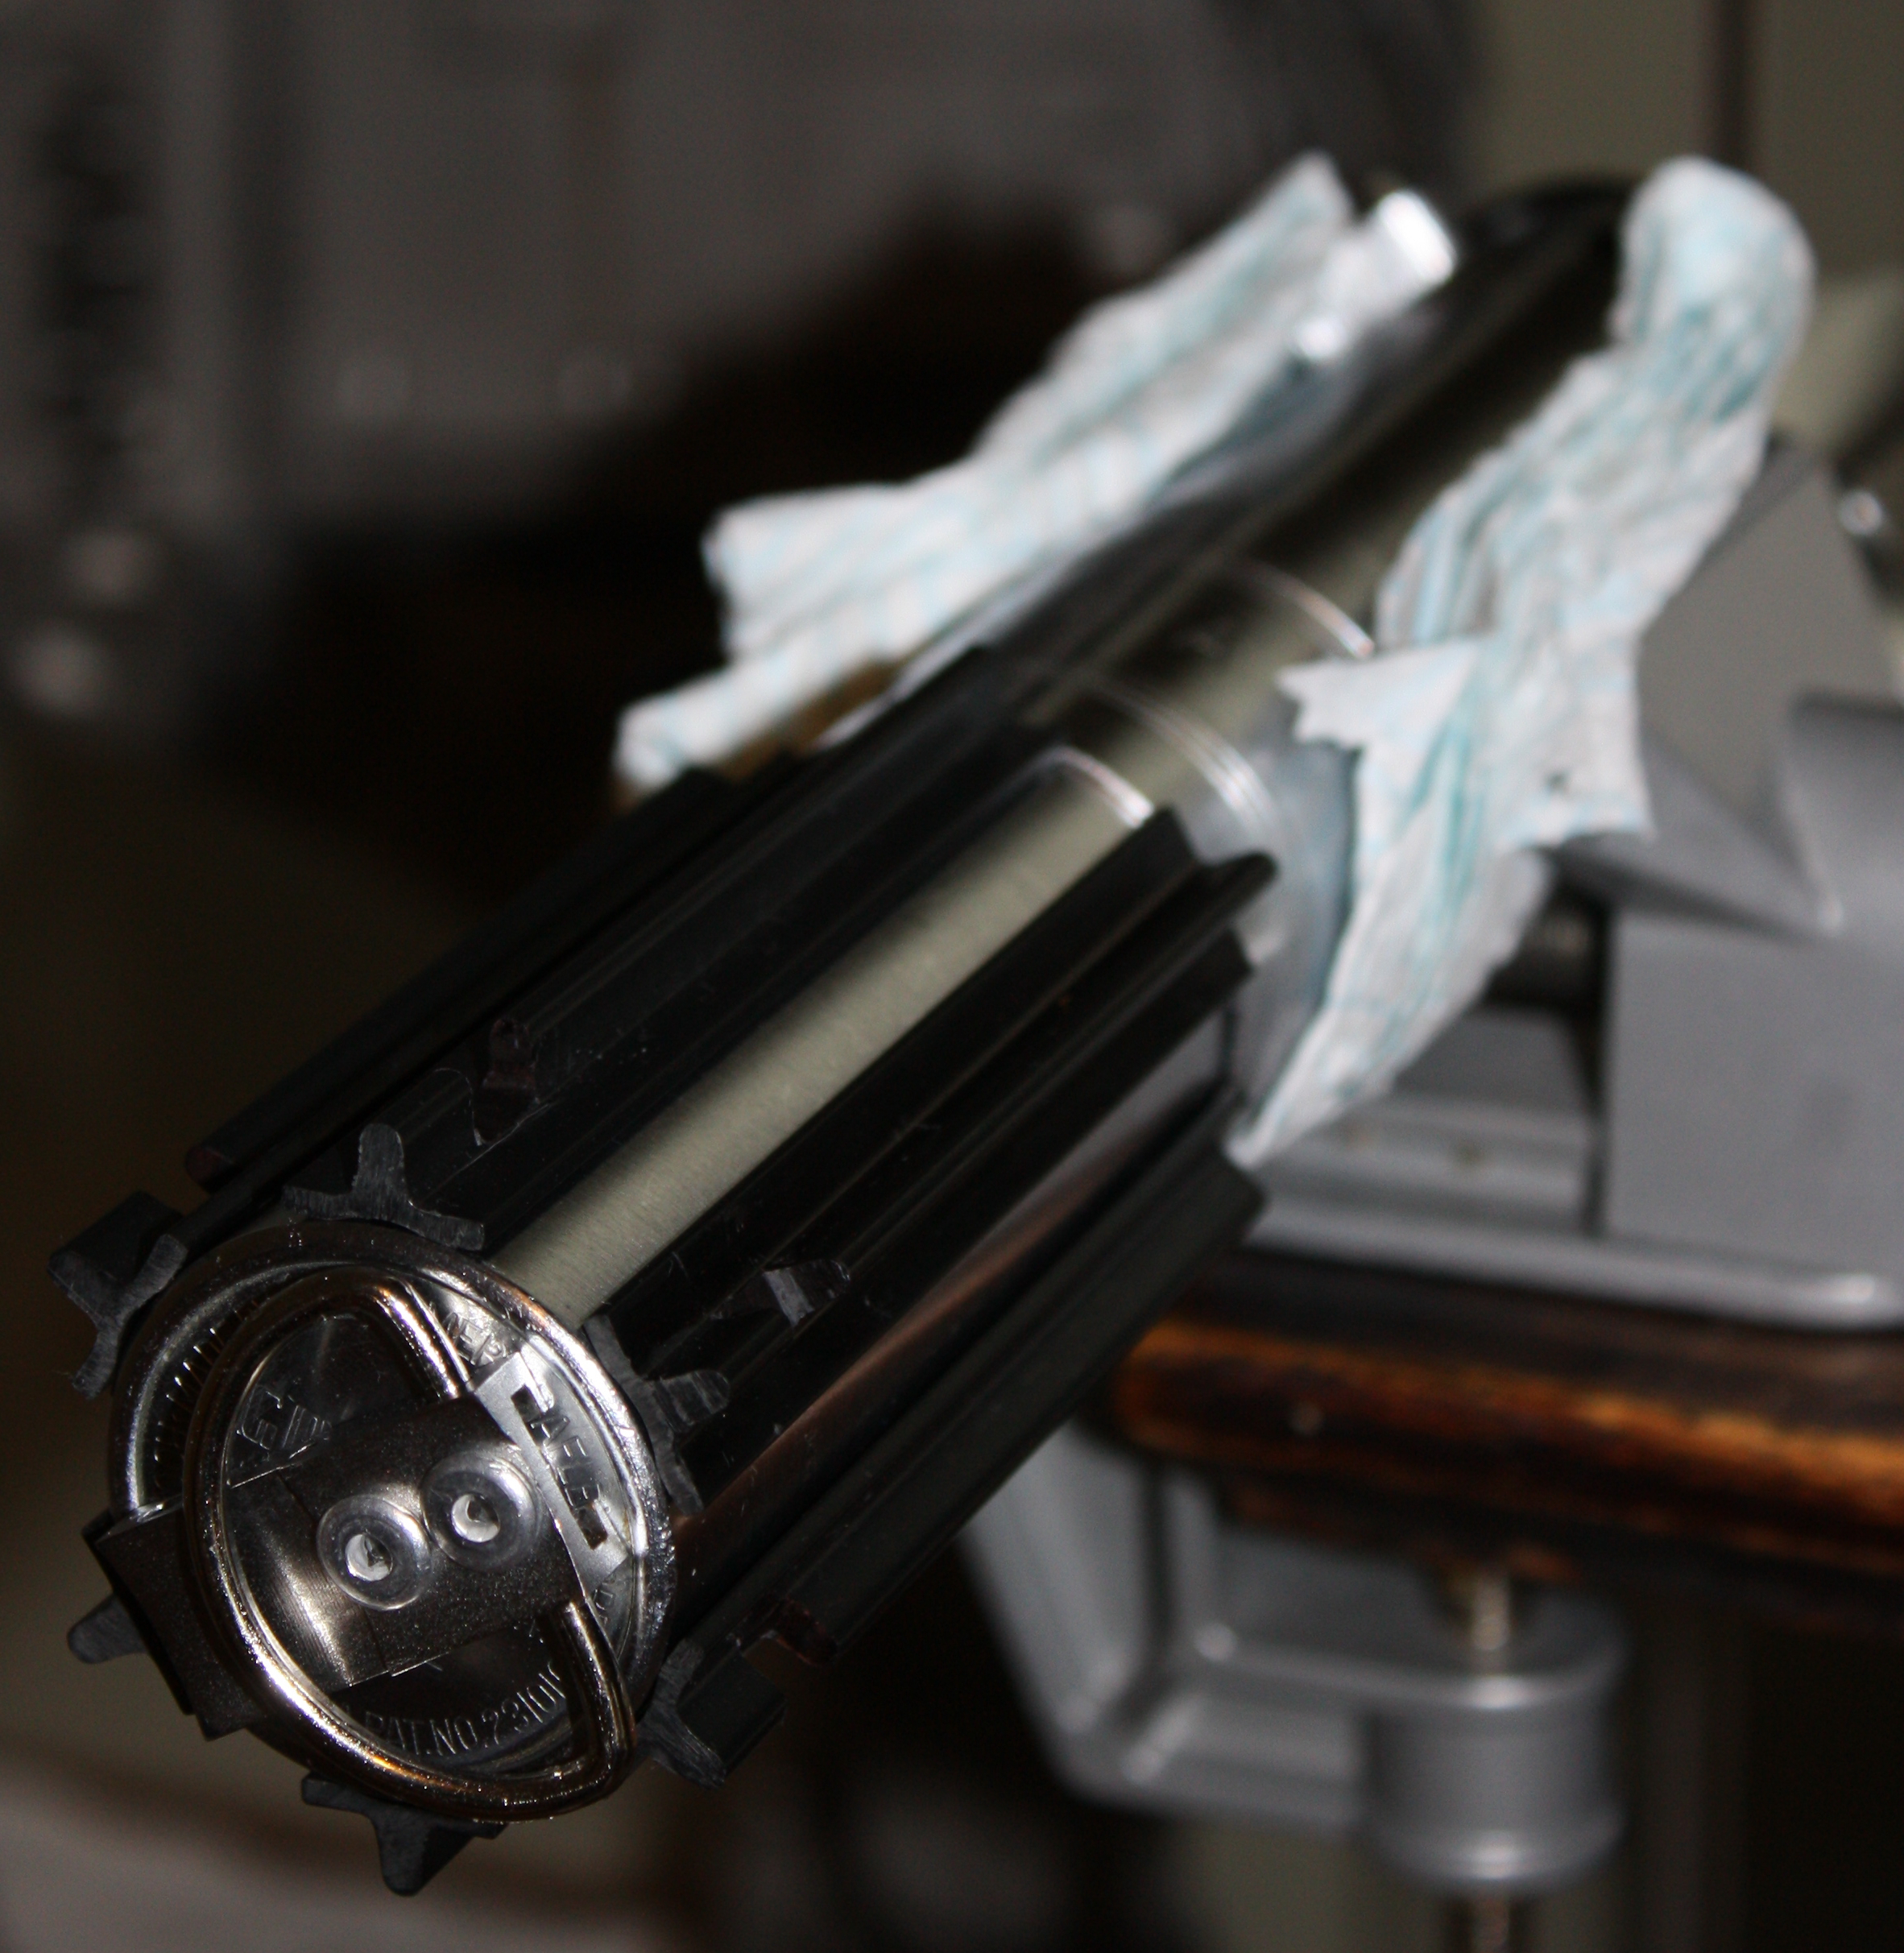
This one was a tough one because the main basis of the prop, the large format Micro Precision Products Microflash, is a very rare item. This is coupled with the fact that the version apparently used, and that has all the features necessary to faithfully replicate the original prop, is even rarer. Unfortunately MPP didn’t keep many records and since the company went out of business some time ago; there’s a very informative book on the company by Basil Skinner. There seem to be two main versions of the MPP Microflash and the easiest to spot difference between the two is the black protective housing for the bulb. The more common version has an extra stepped section on this housing whereas the ESB Vader does not. This housing is often referred to as the ‘Shroud’. Ultimately I needed three different MPP flash units to successfully copy all of the features of the ESB prop.
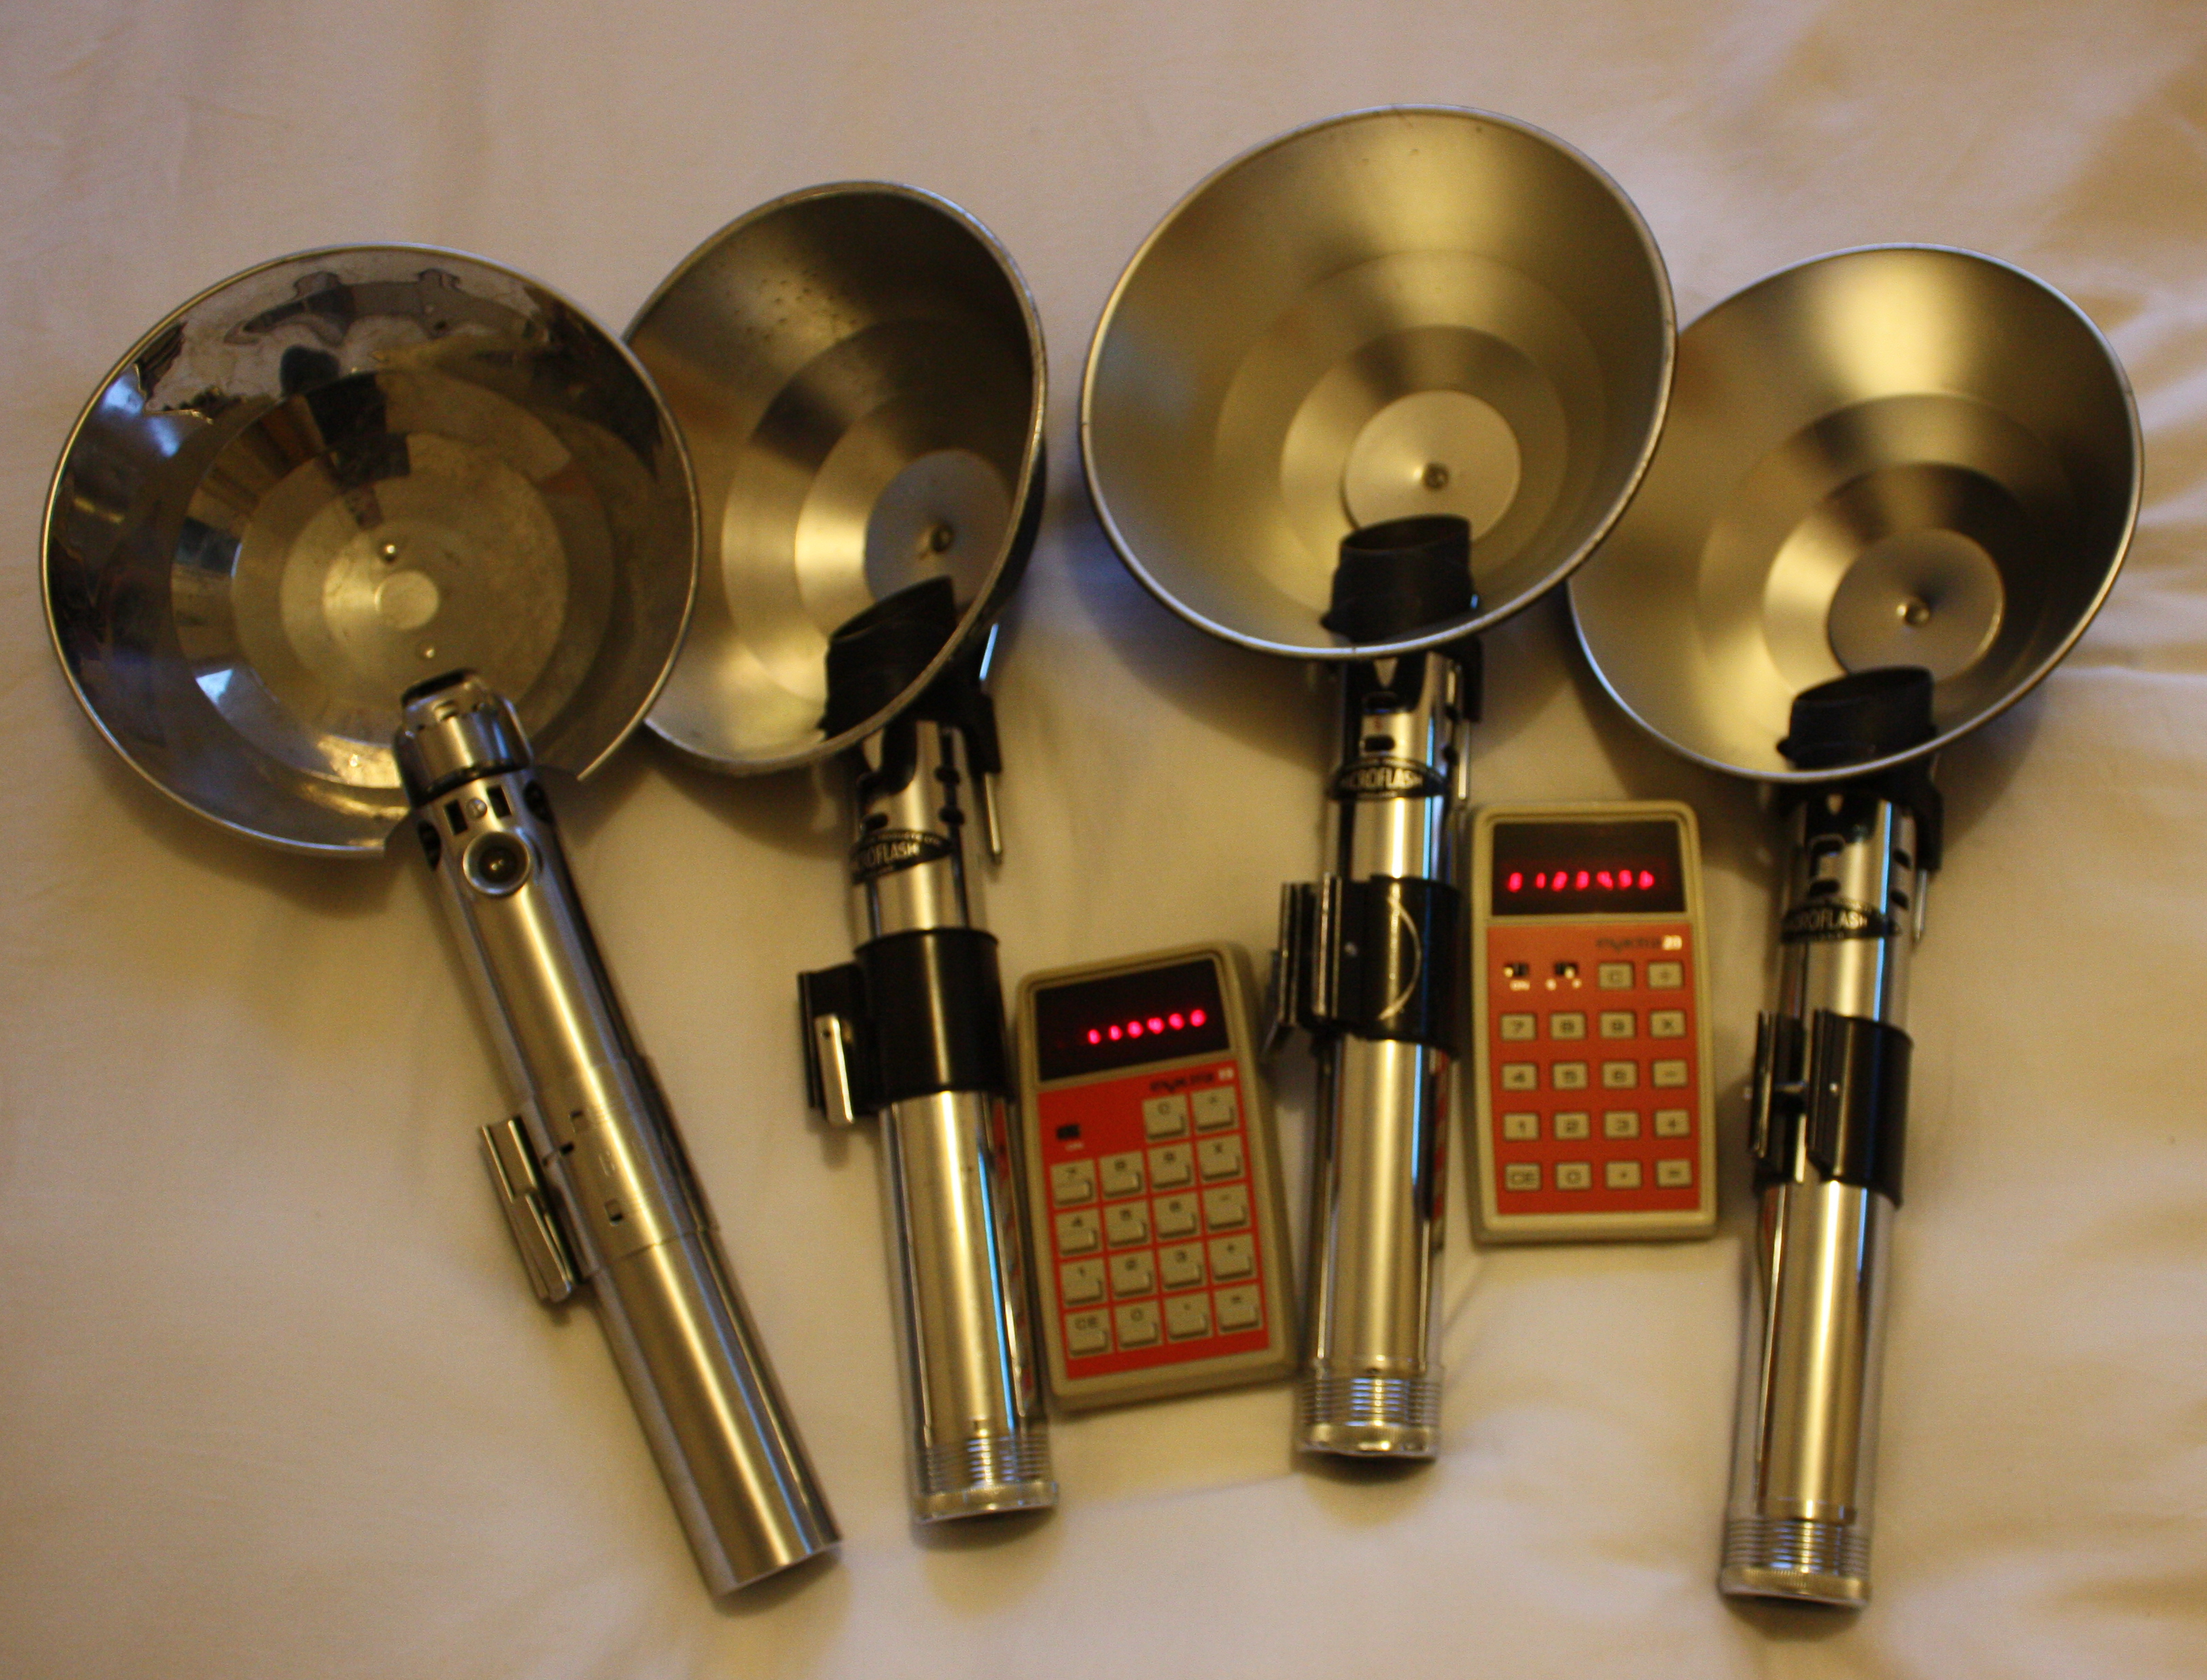
You should just be able to make out the the unit furthest to the right has the no stepped shroud and the other two have the additional stepped band.
Here’s a closeup of the two versions.
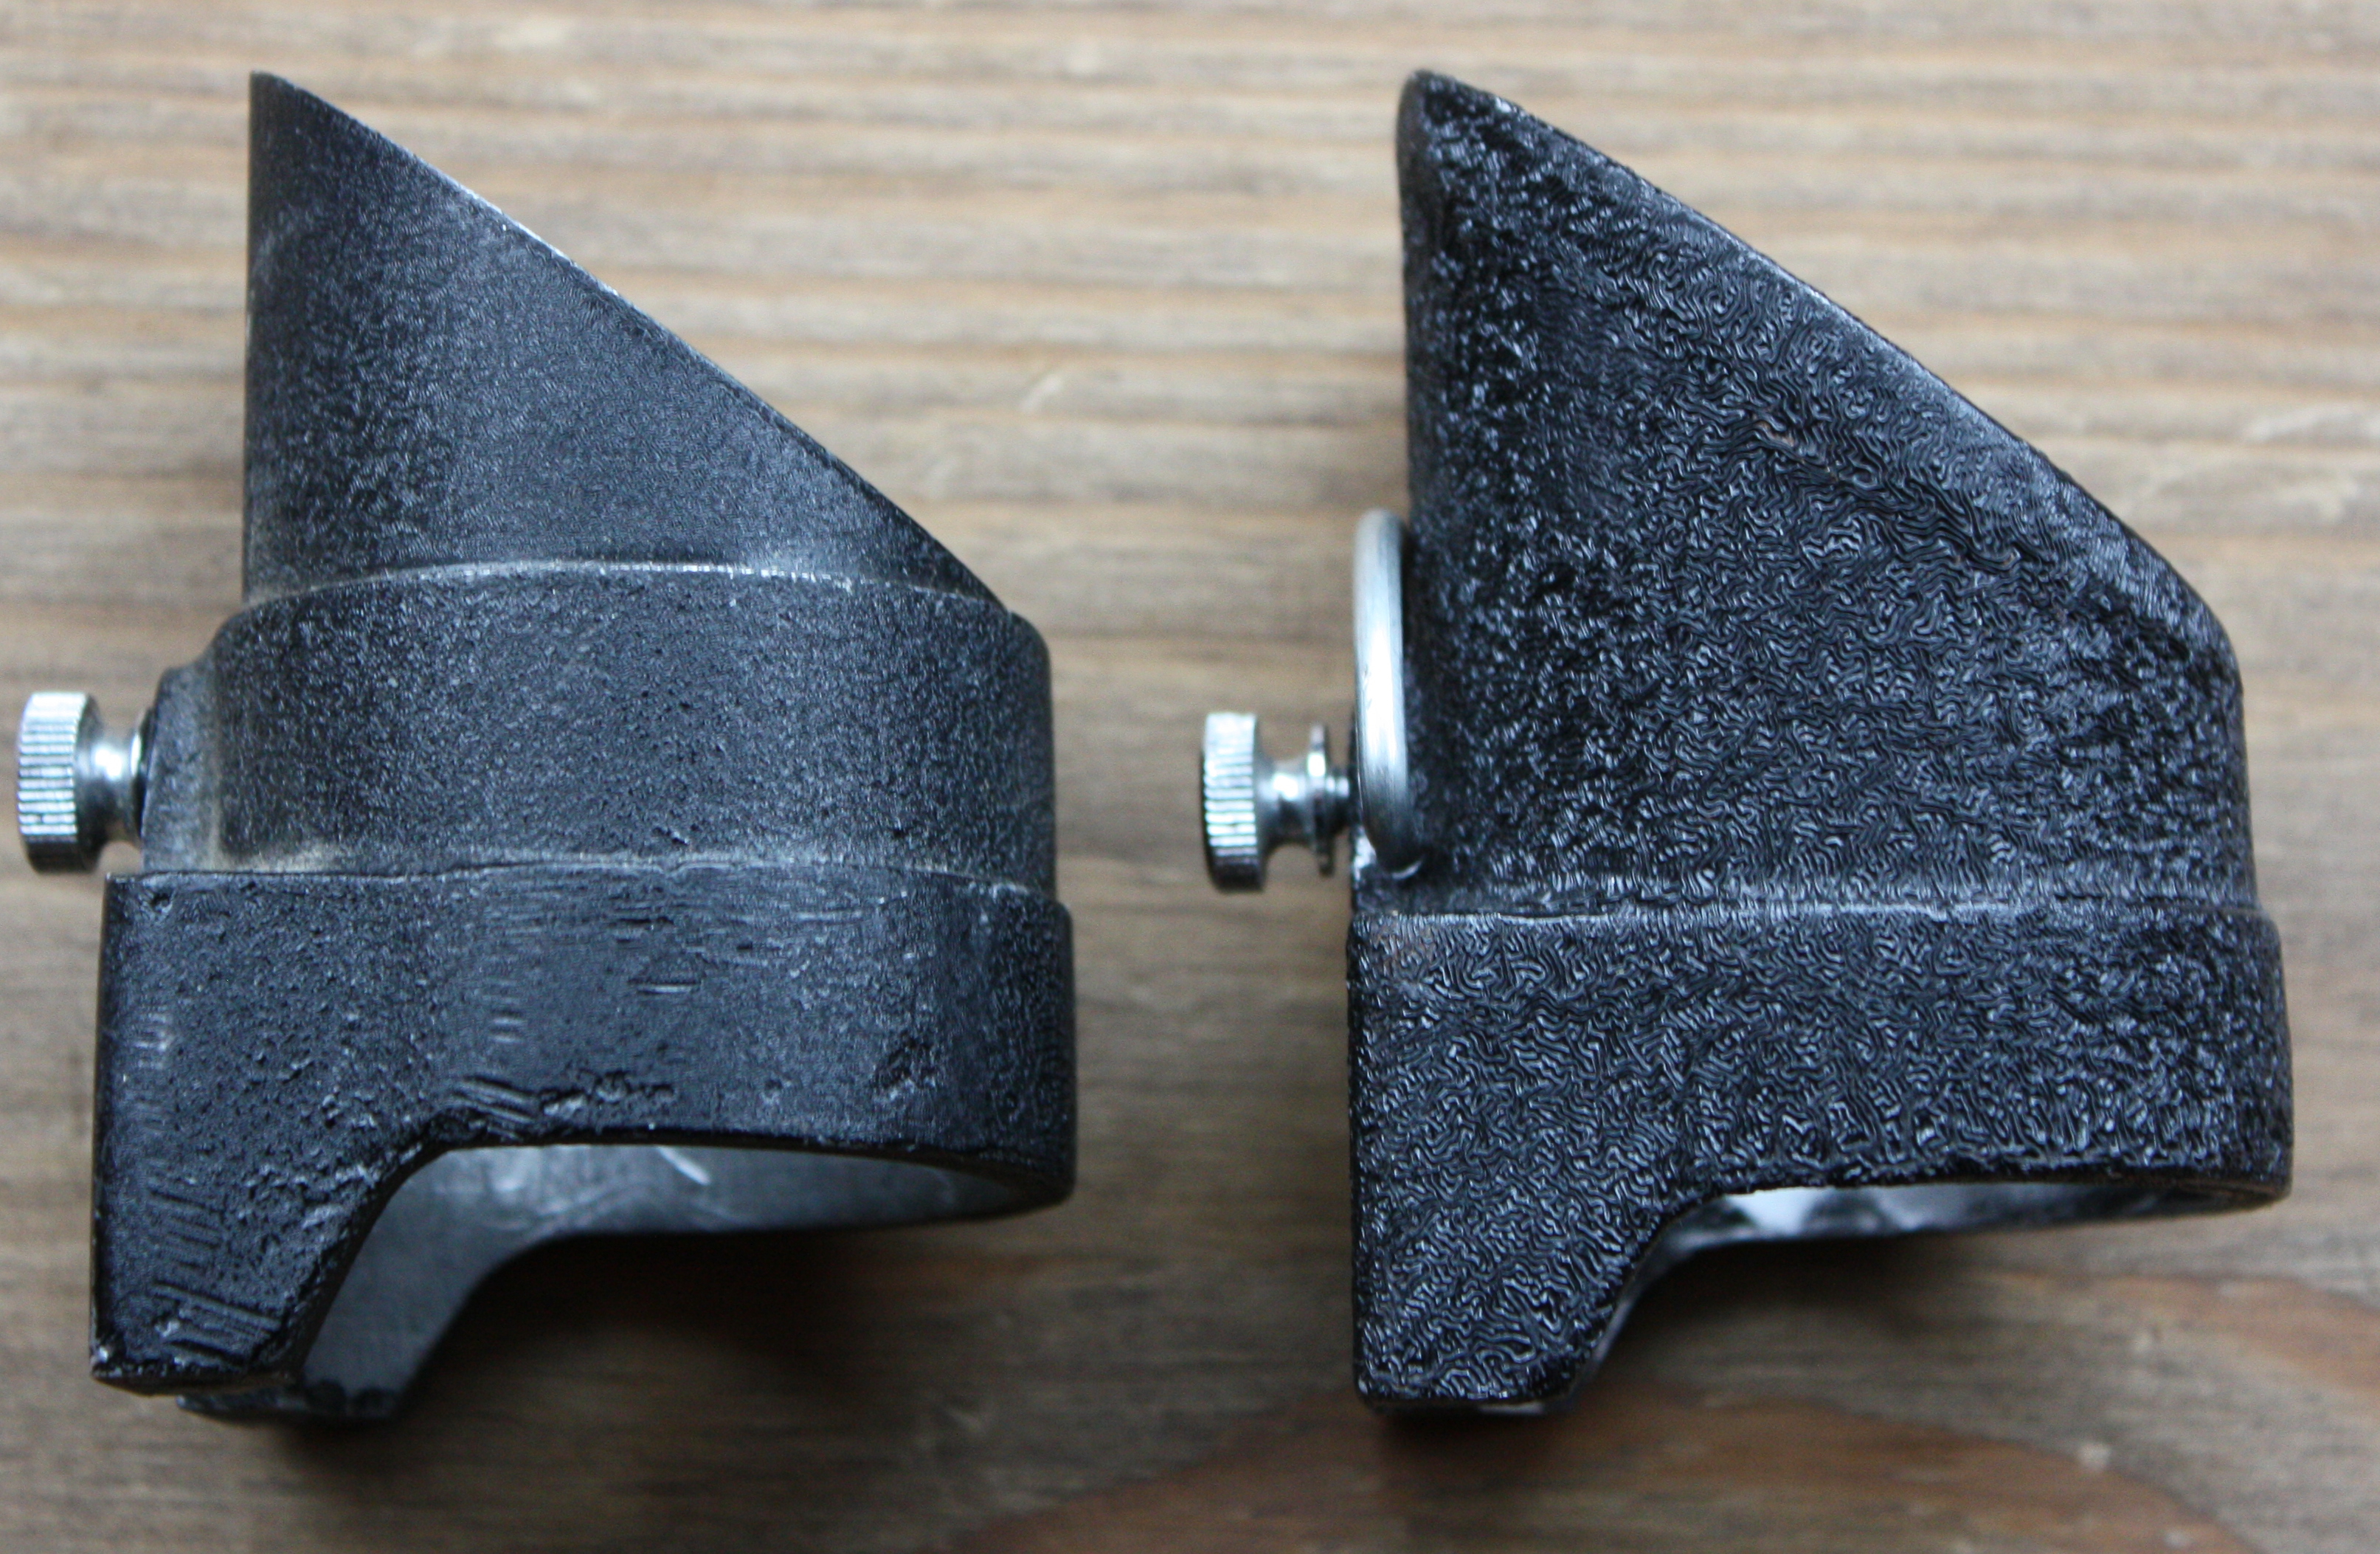
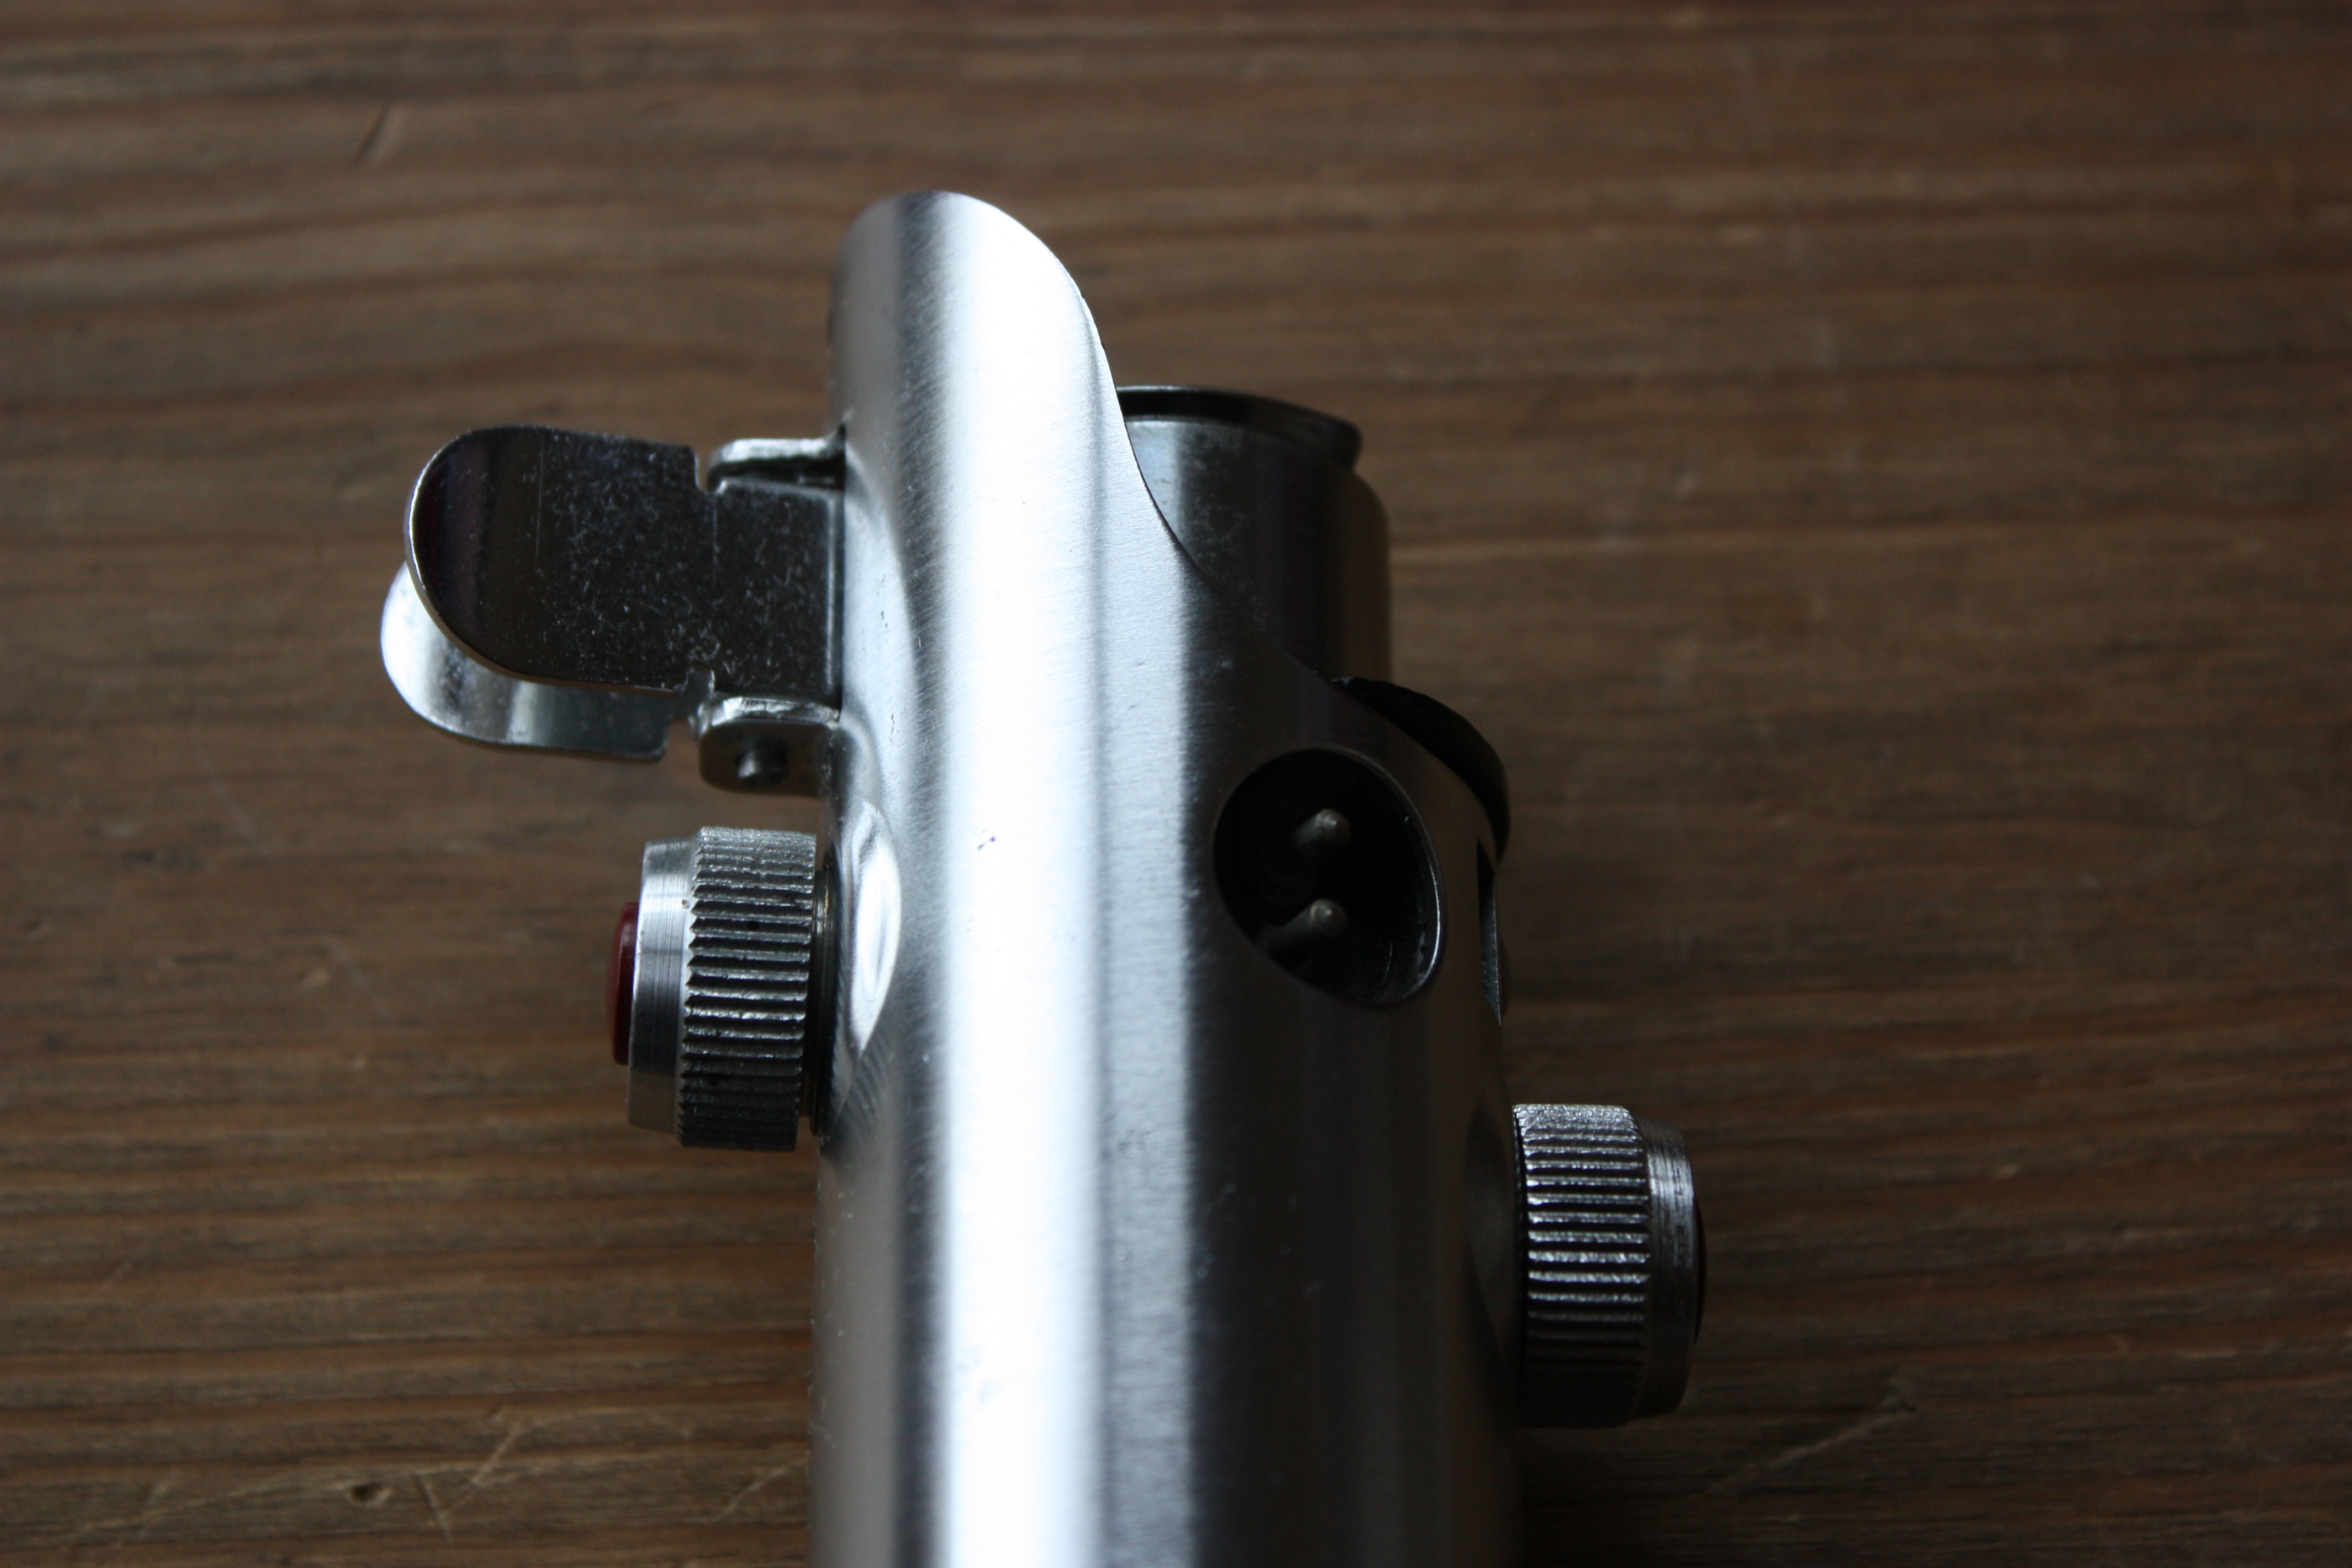
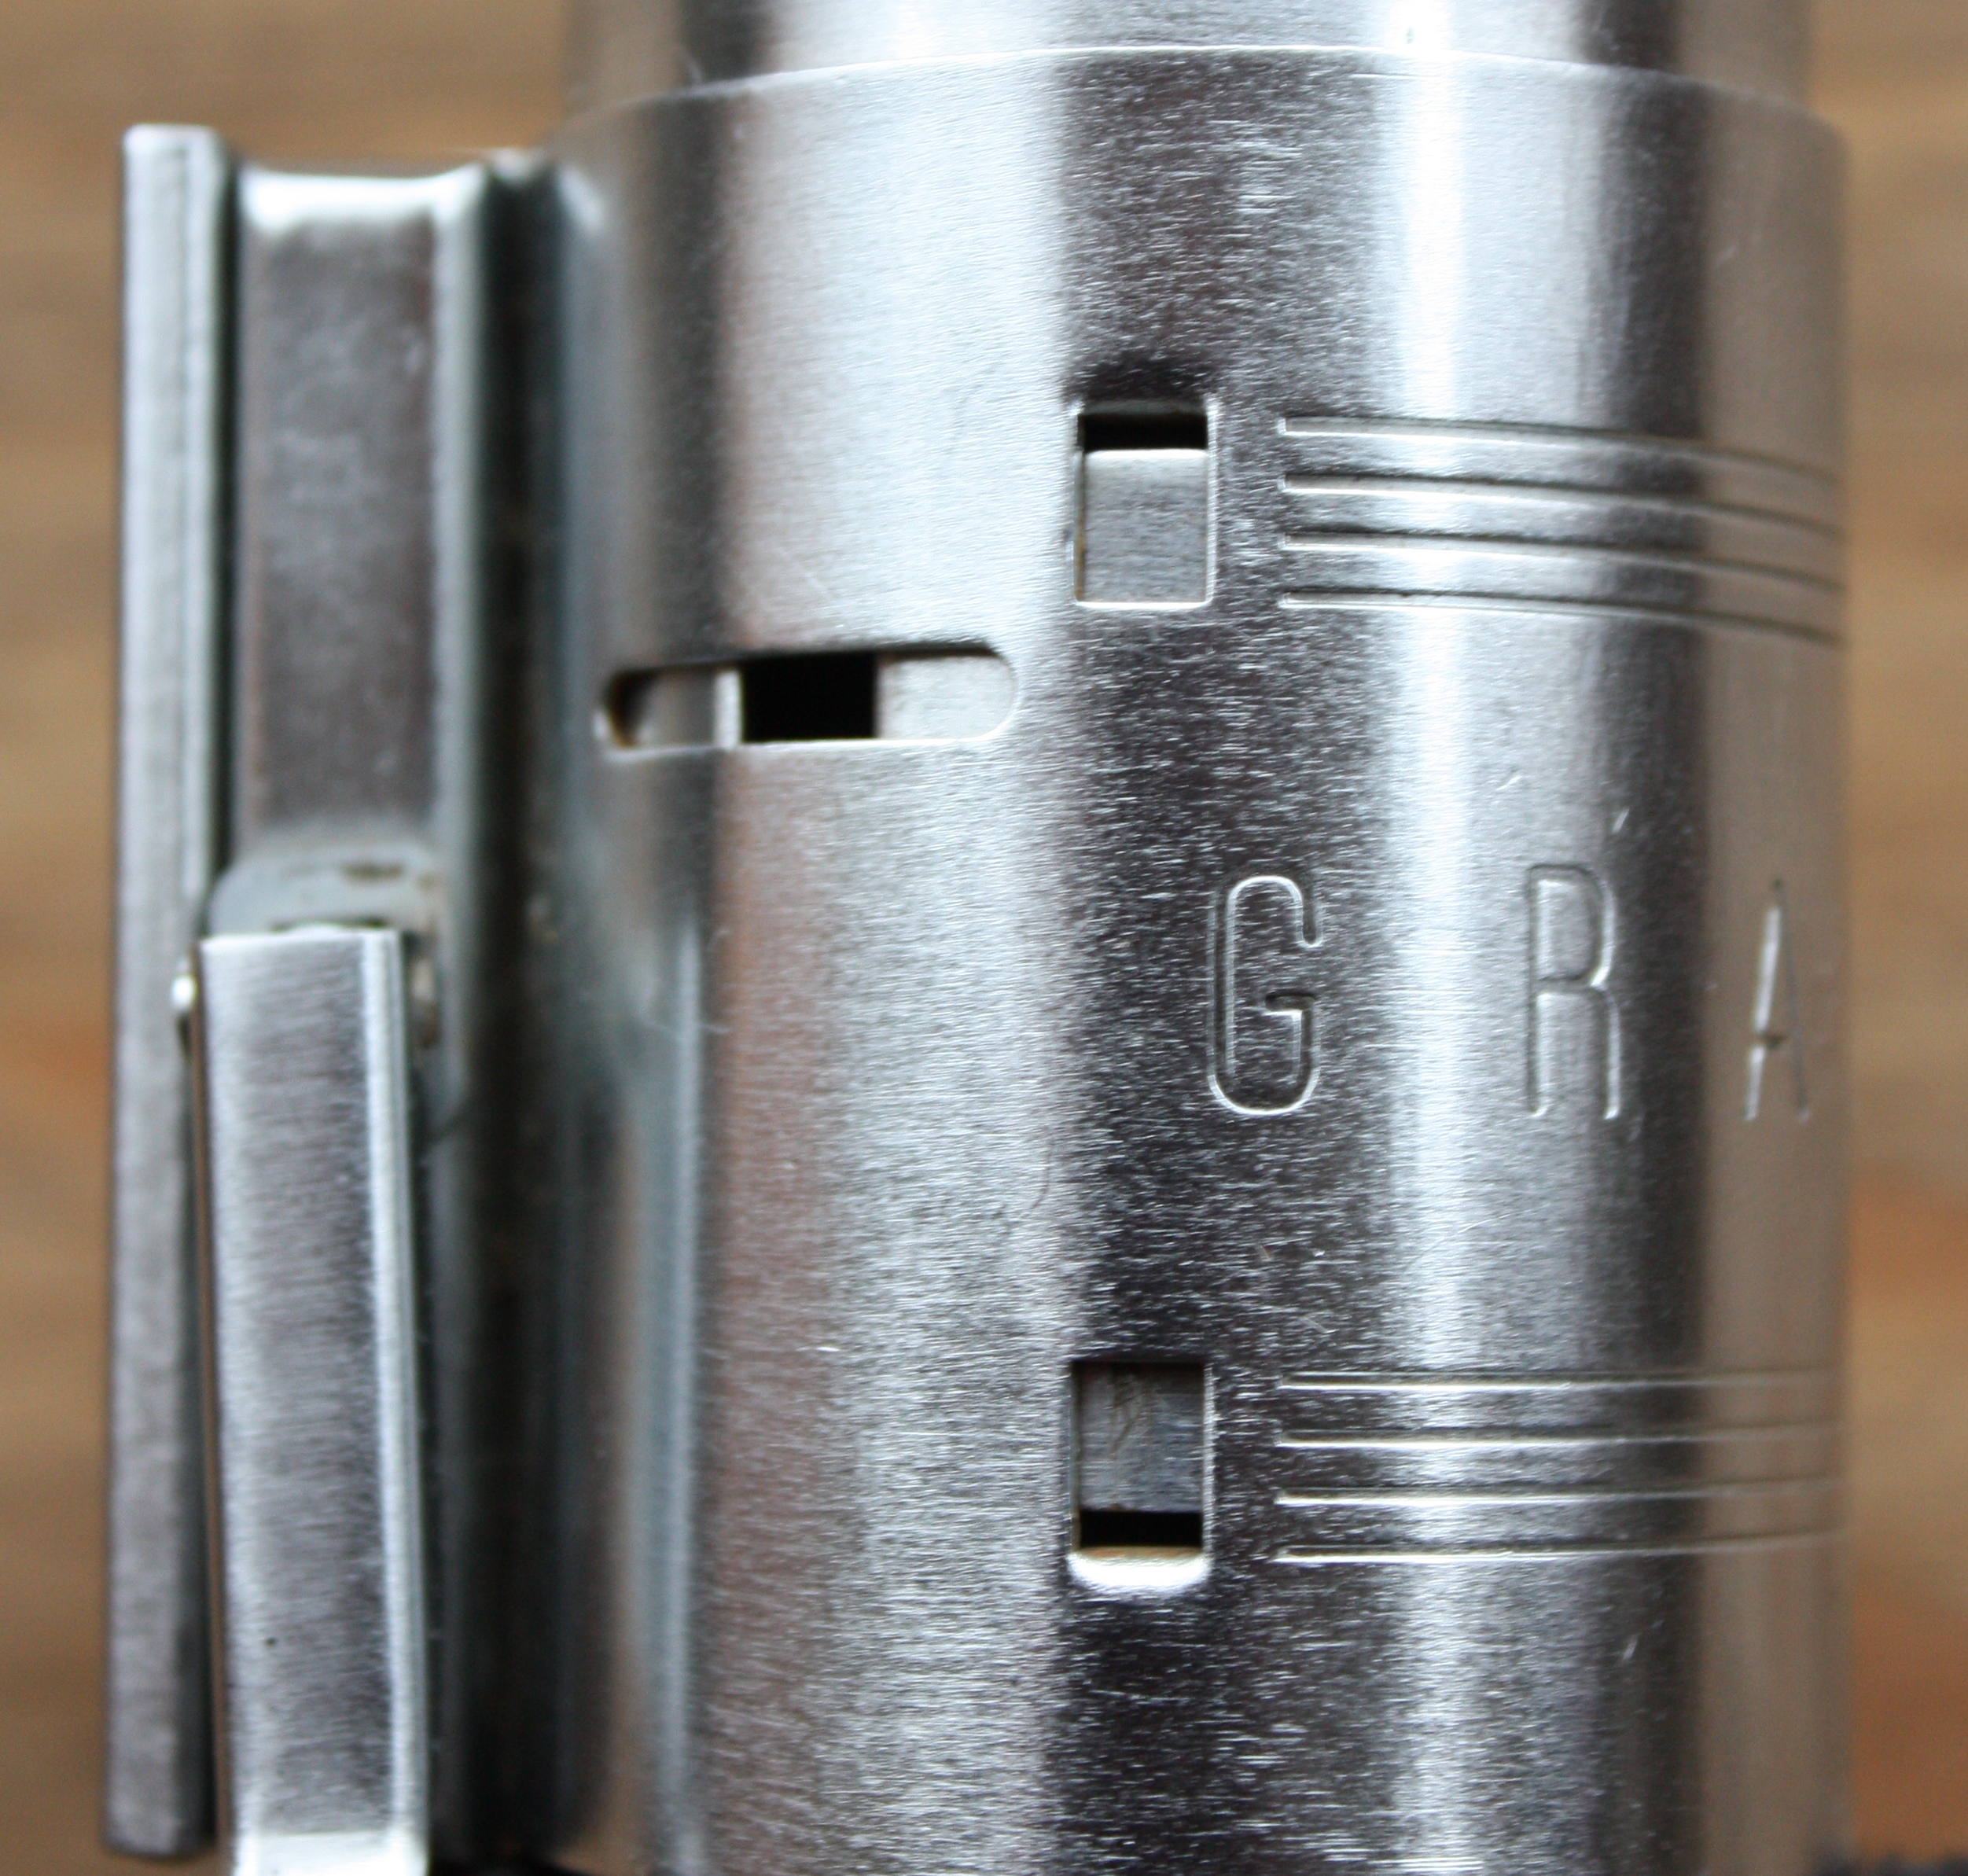
Another of the main differences is the sizing of the ‘B’ port on the side of the flash. The ESB prop features a large B port hole where as the stepped shroud units usually seem to feature the smaller B port. Incidentally when Master Replicas created their replica on the ESB saber in 2003 (yes, it’s really been 14 years) they replicated the smaller B port. I suspect this is because the fate of the ESB prop wasn’t known at that time so it wouldn’t have been possible to know this fact and because the small B port hole is a more common item they probably ended up replicating that.
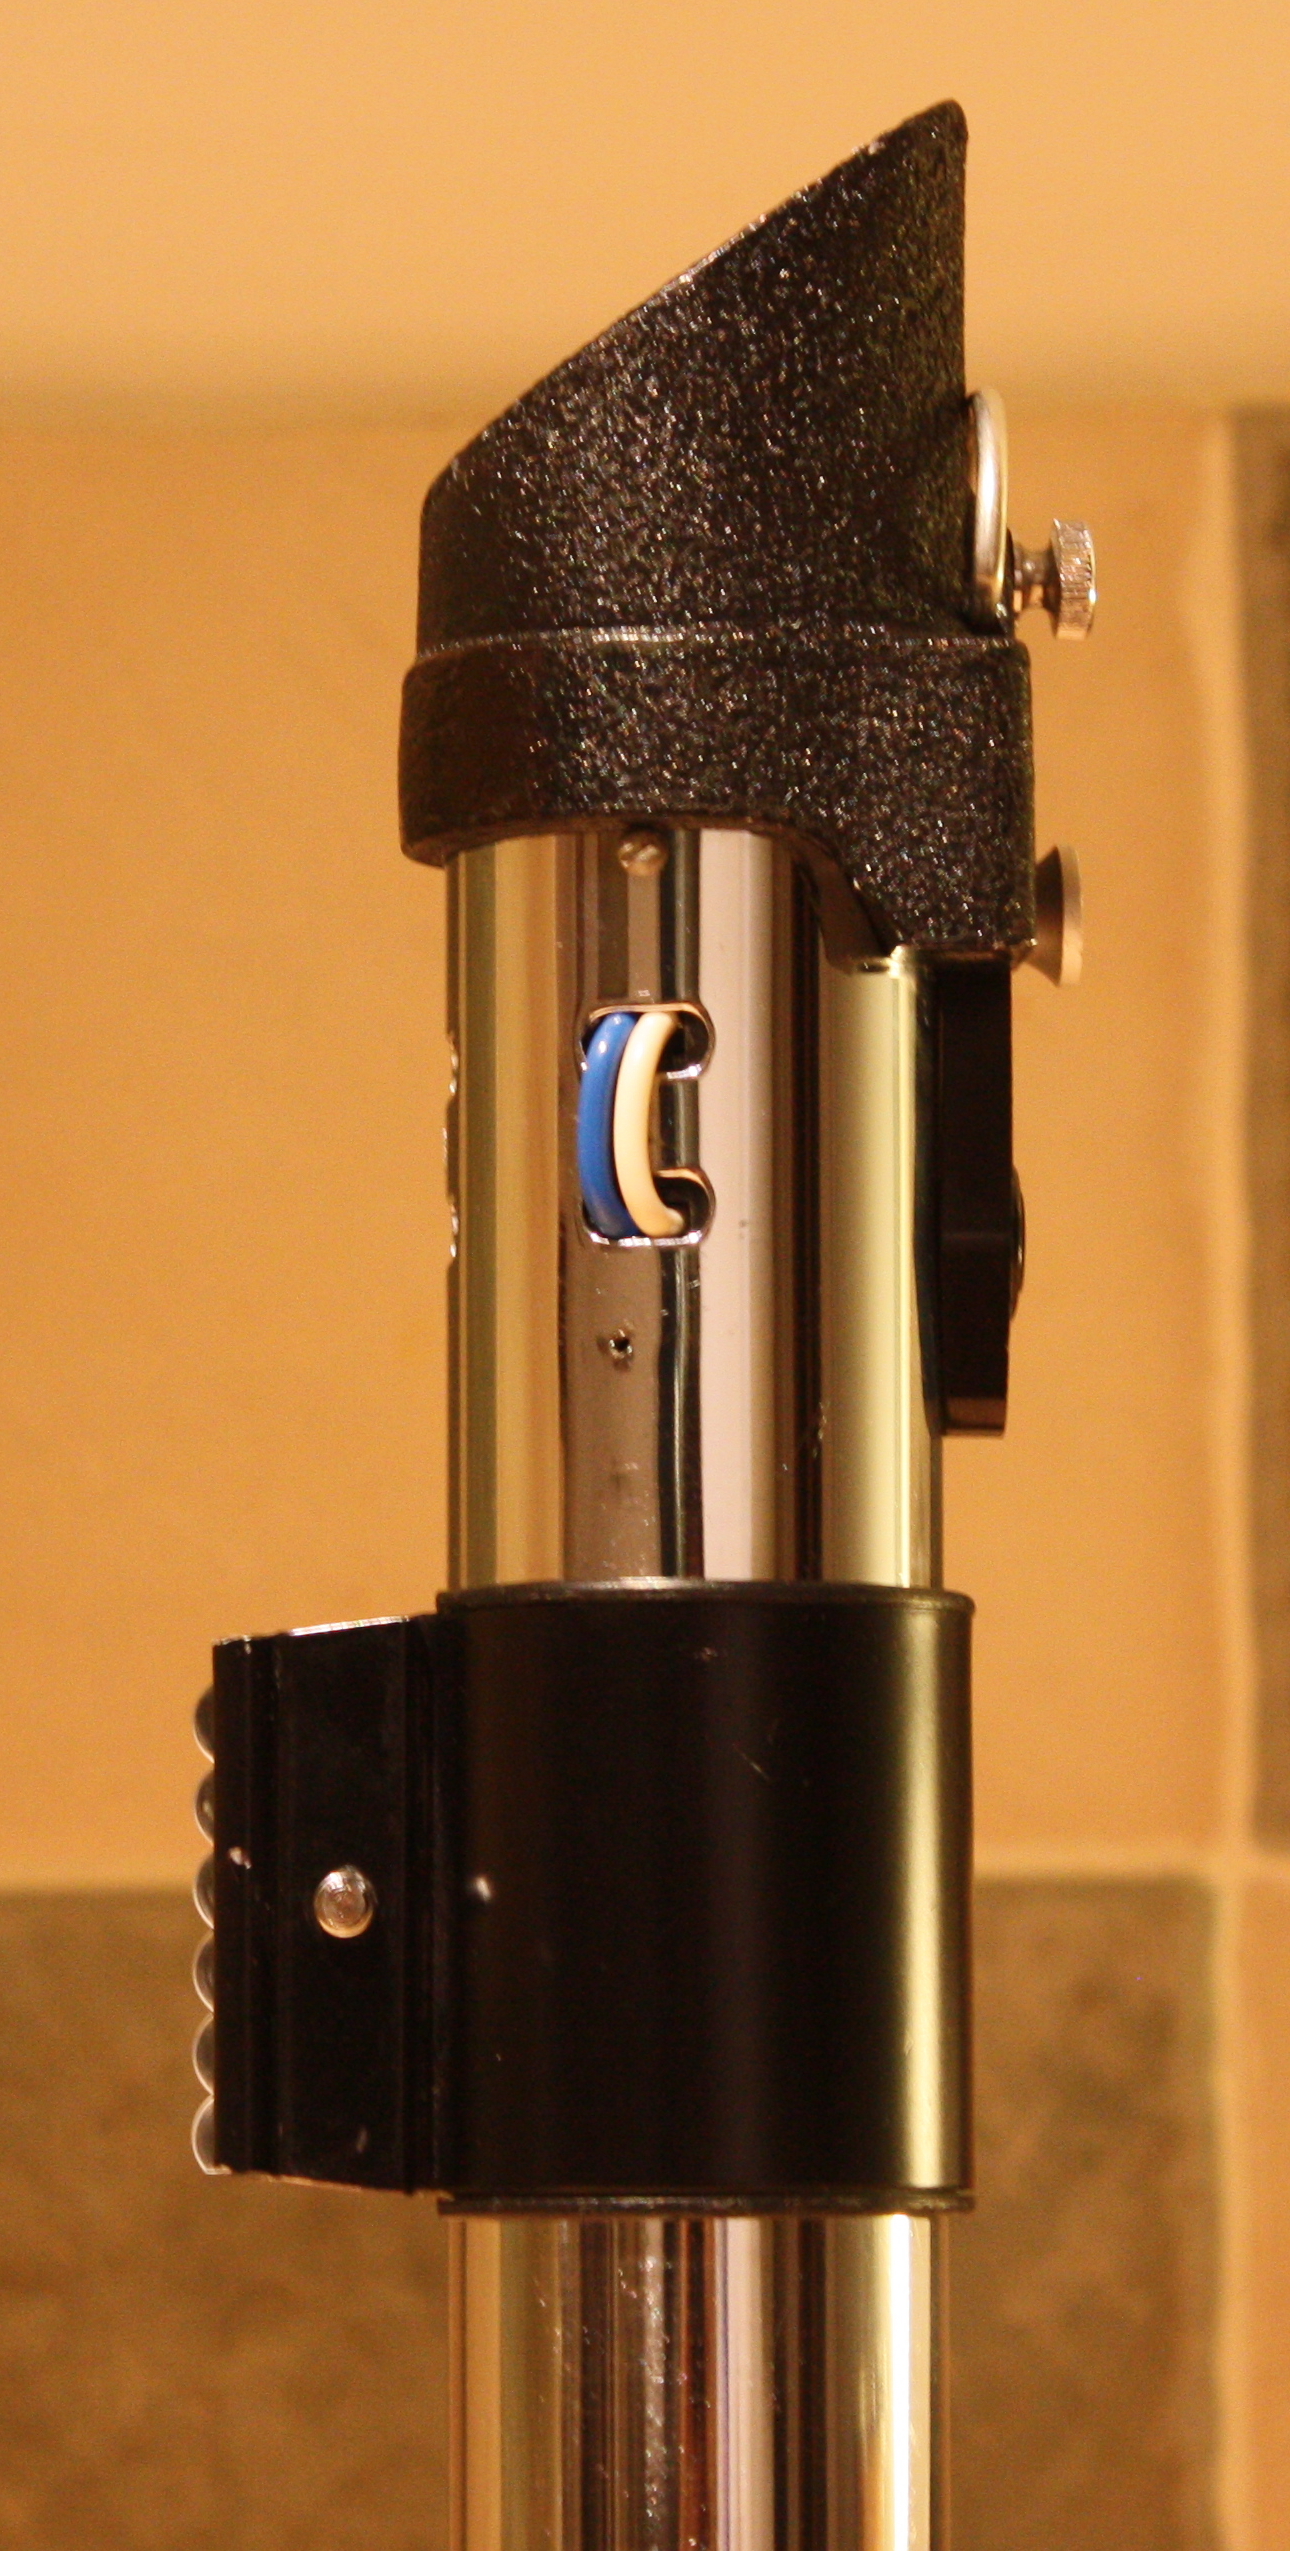
The clamp of the existing prop features angled black side bars and the lever has been snapped from the tightening screw. In order to copy the clamp I actually used pieces from the three different clamps I had on hand; one for the angled side bars, one for the plastic under sleeve that fit best and one for the main clamp piece and tightening screw. This part of the prop is supposed to serve as the on/off switch from an in universe point of view and the switch is made from a small strip of plastic bubbles. These bubbles are from and old, and also rare, Texas Instruments calculator with circuit board underneath. Only the Exactra 19, Exactra 20, and Exactra TI 2000 have the correct size and shape of the bubbles. The 19 and 20 are featured in the top shot. I found the colouration of the under circuit board of the 19 the more pleasing so I used that one.
The Clamp
This shot shows the angled side bar and the broken tightening screw.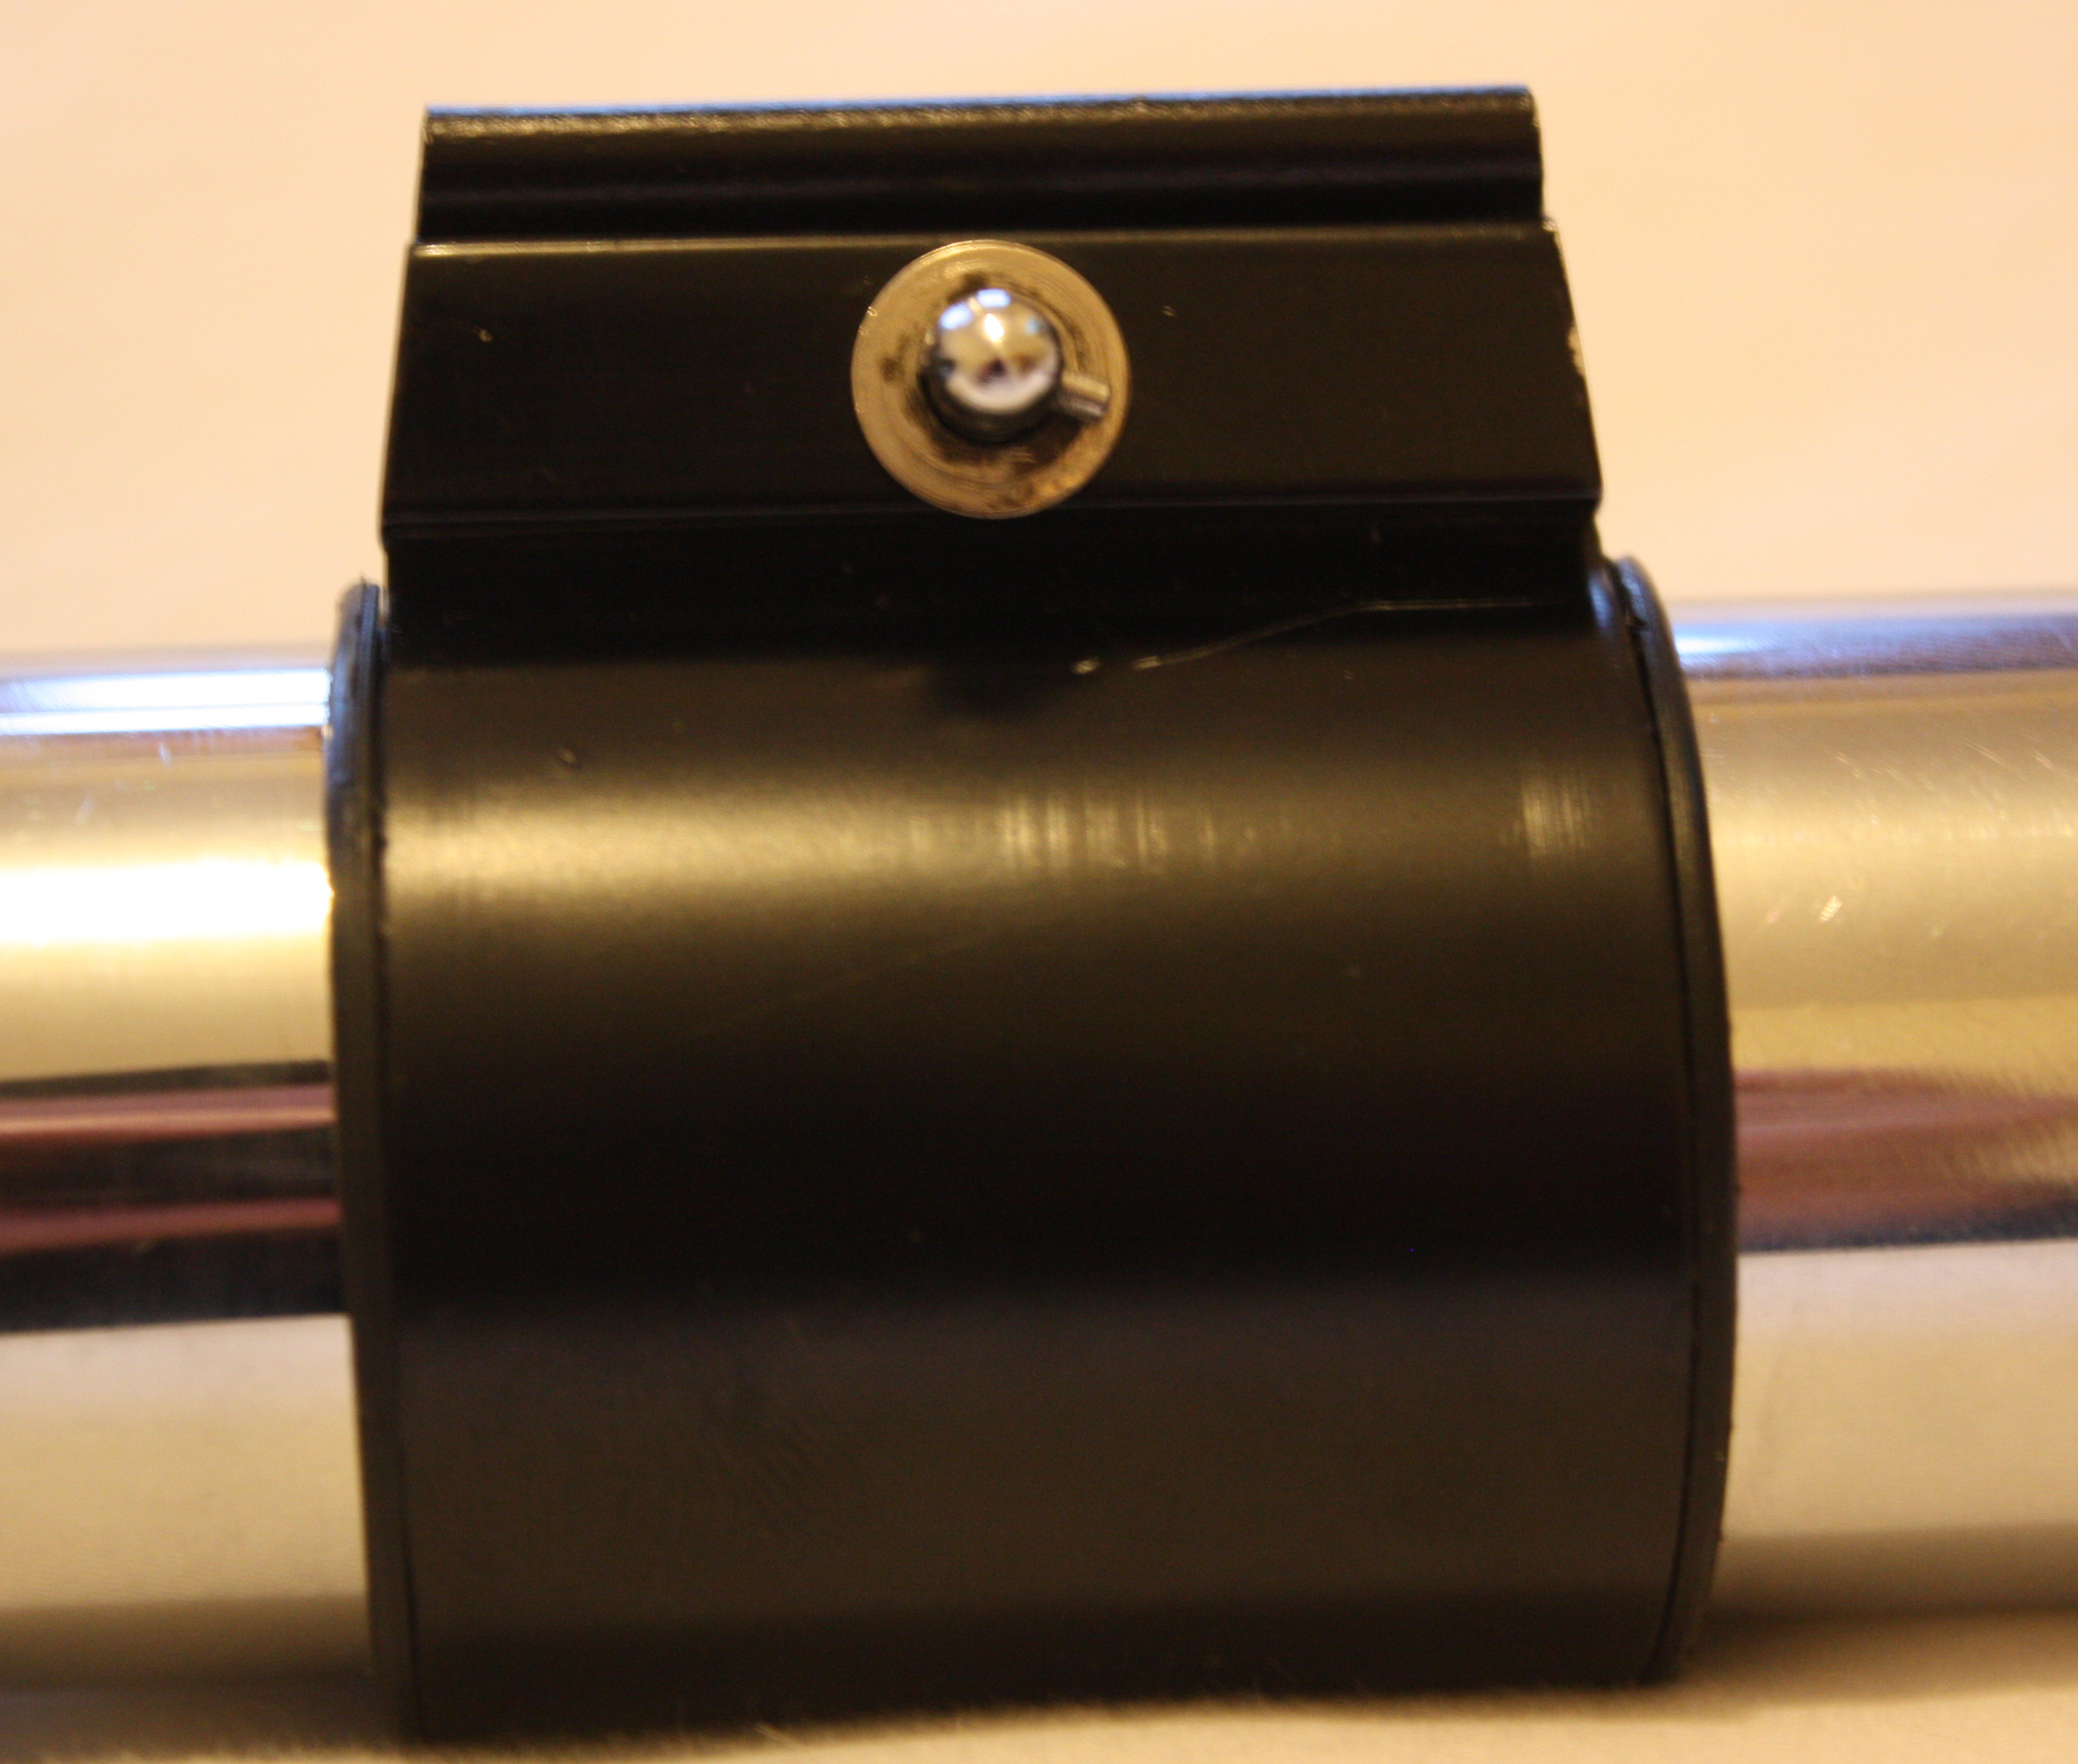
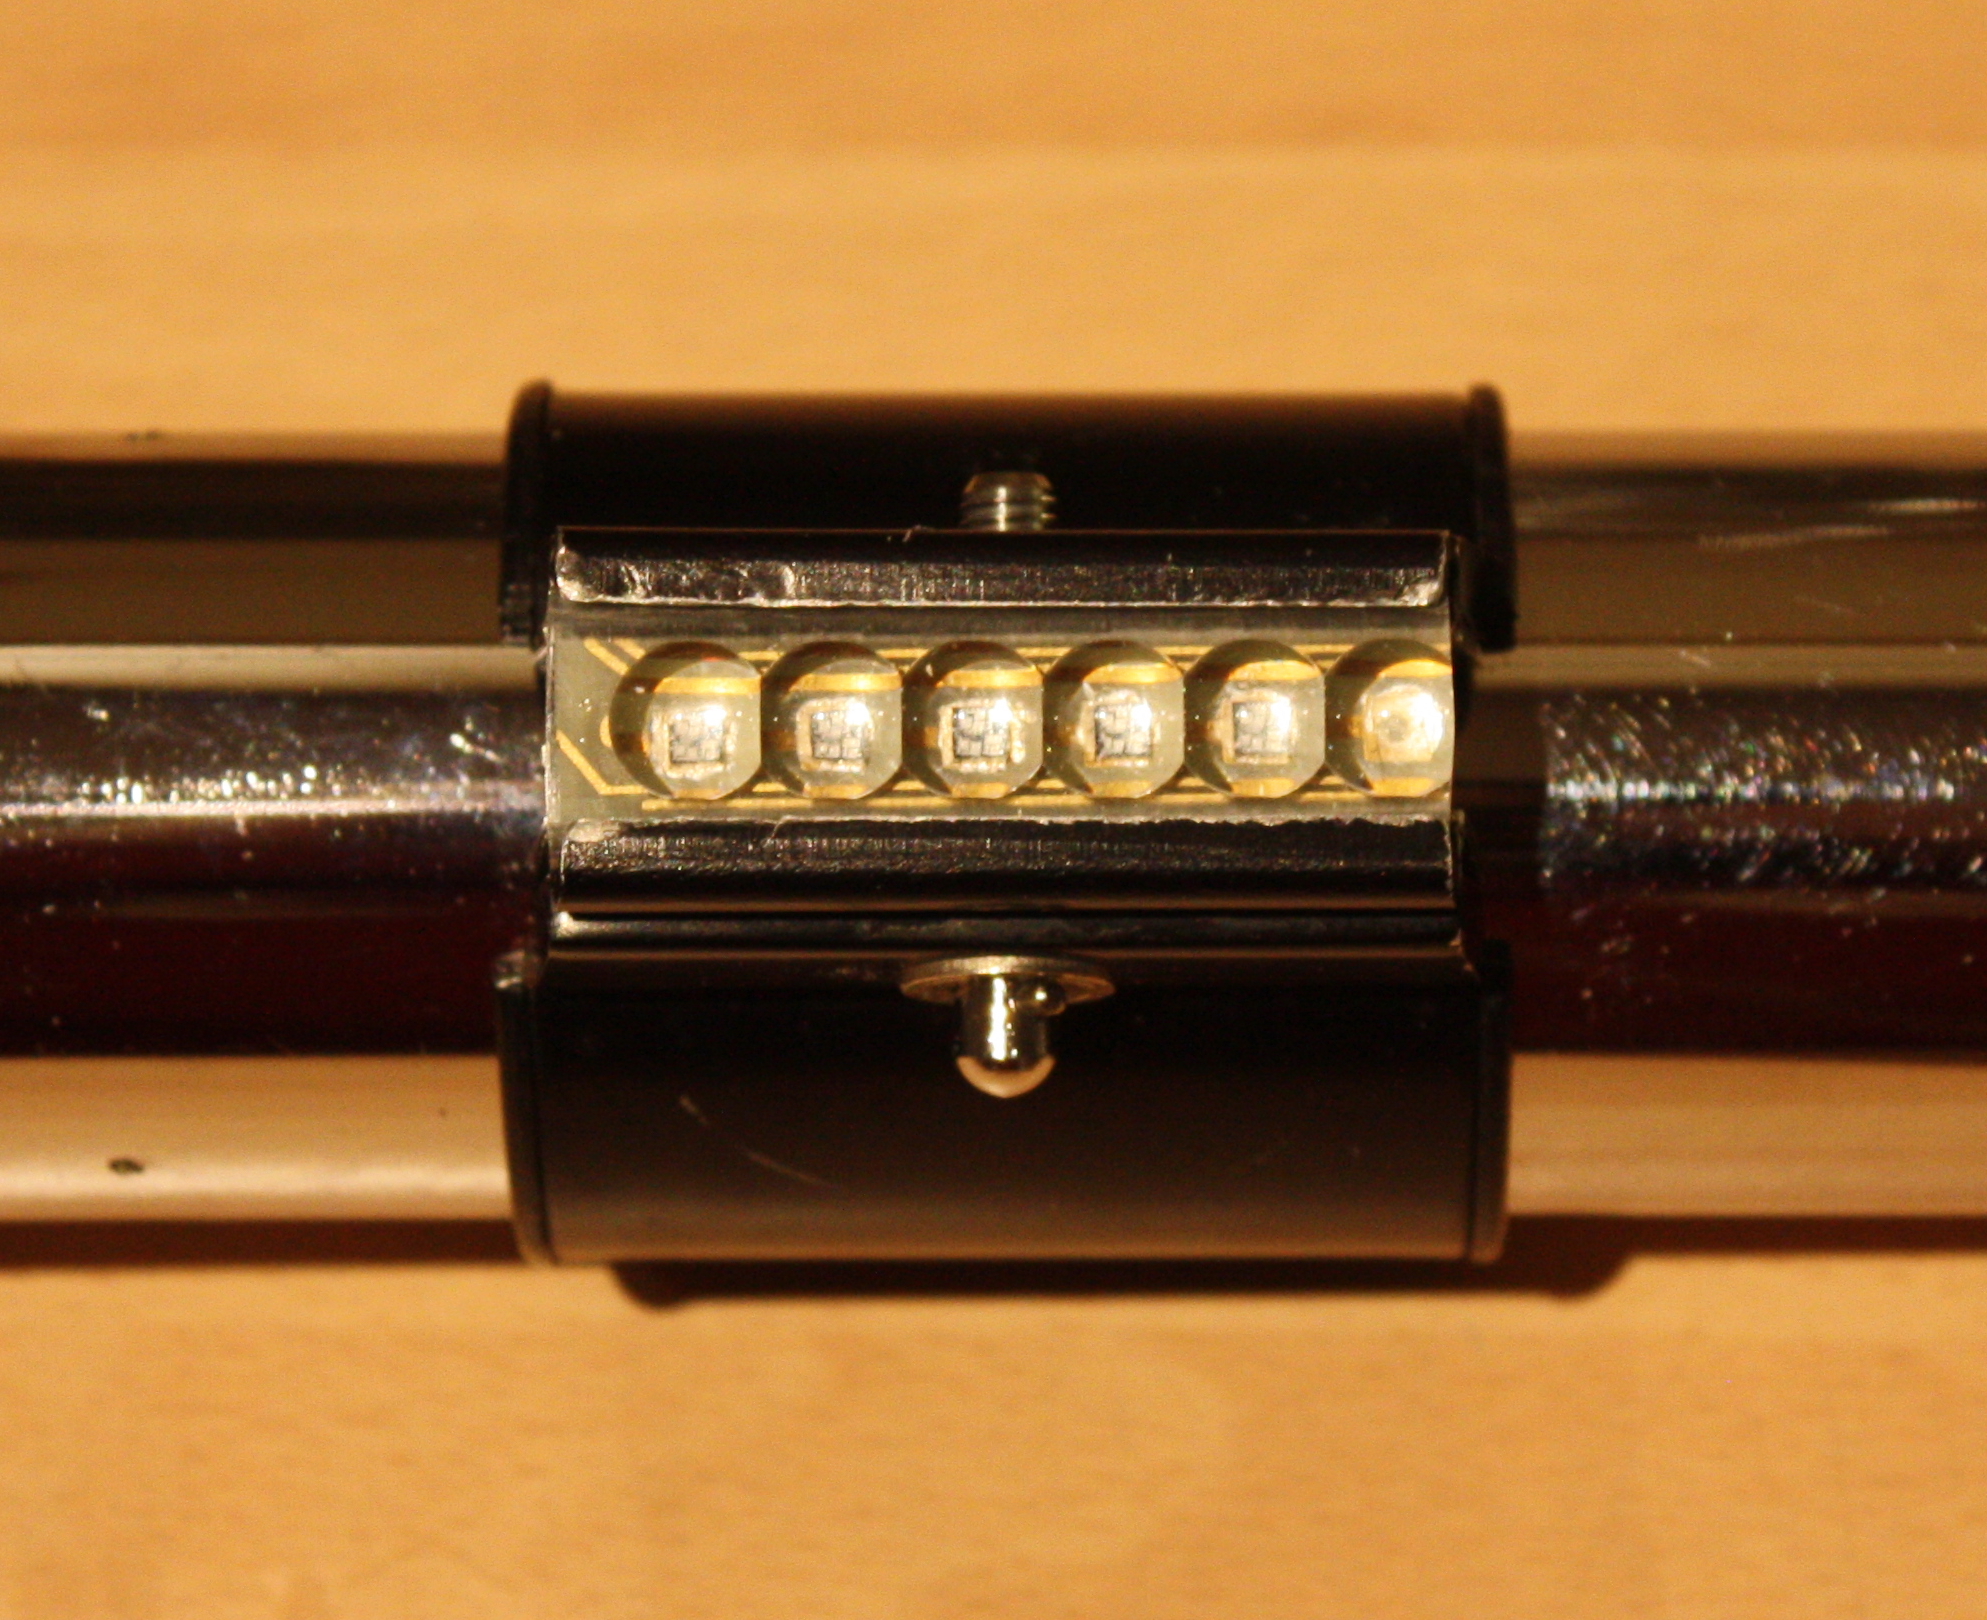
The bubbles mounted; these had to be cut down to match the prop and then gently sanded so the incomplete bubble looked the same. A painstaking process.
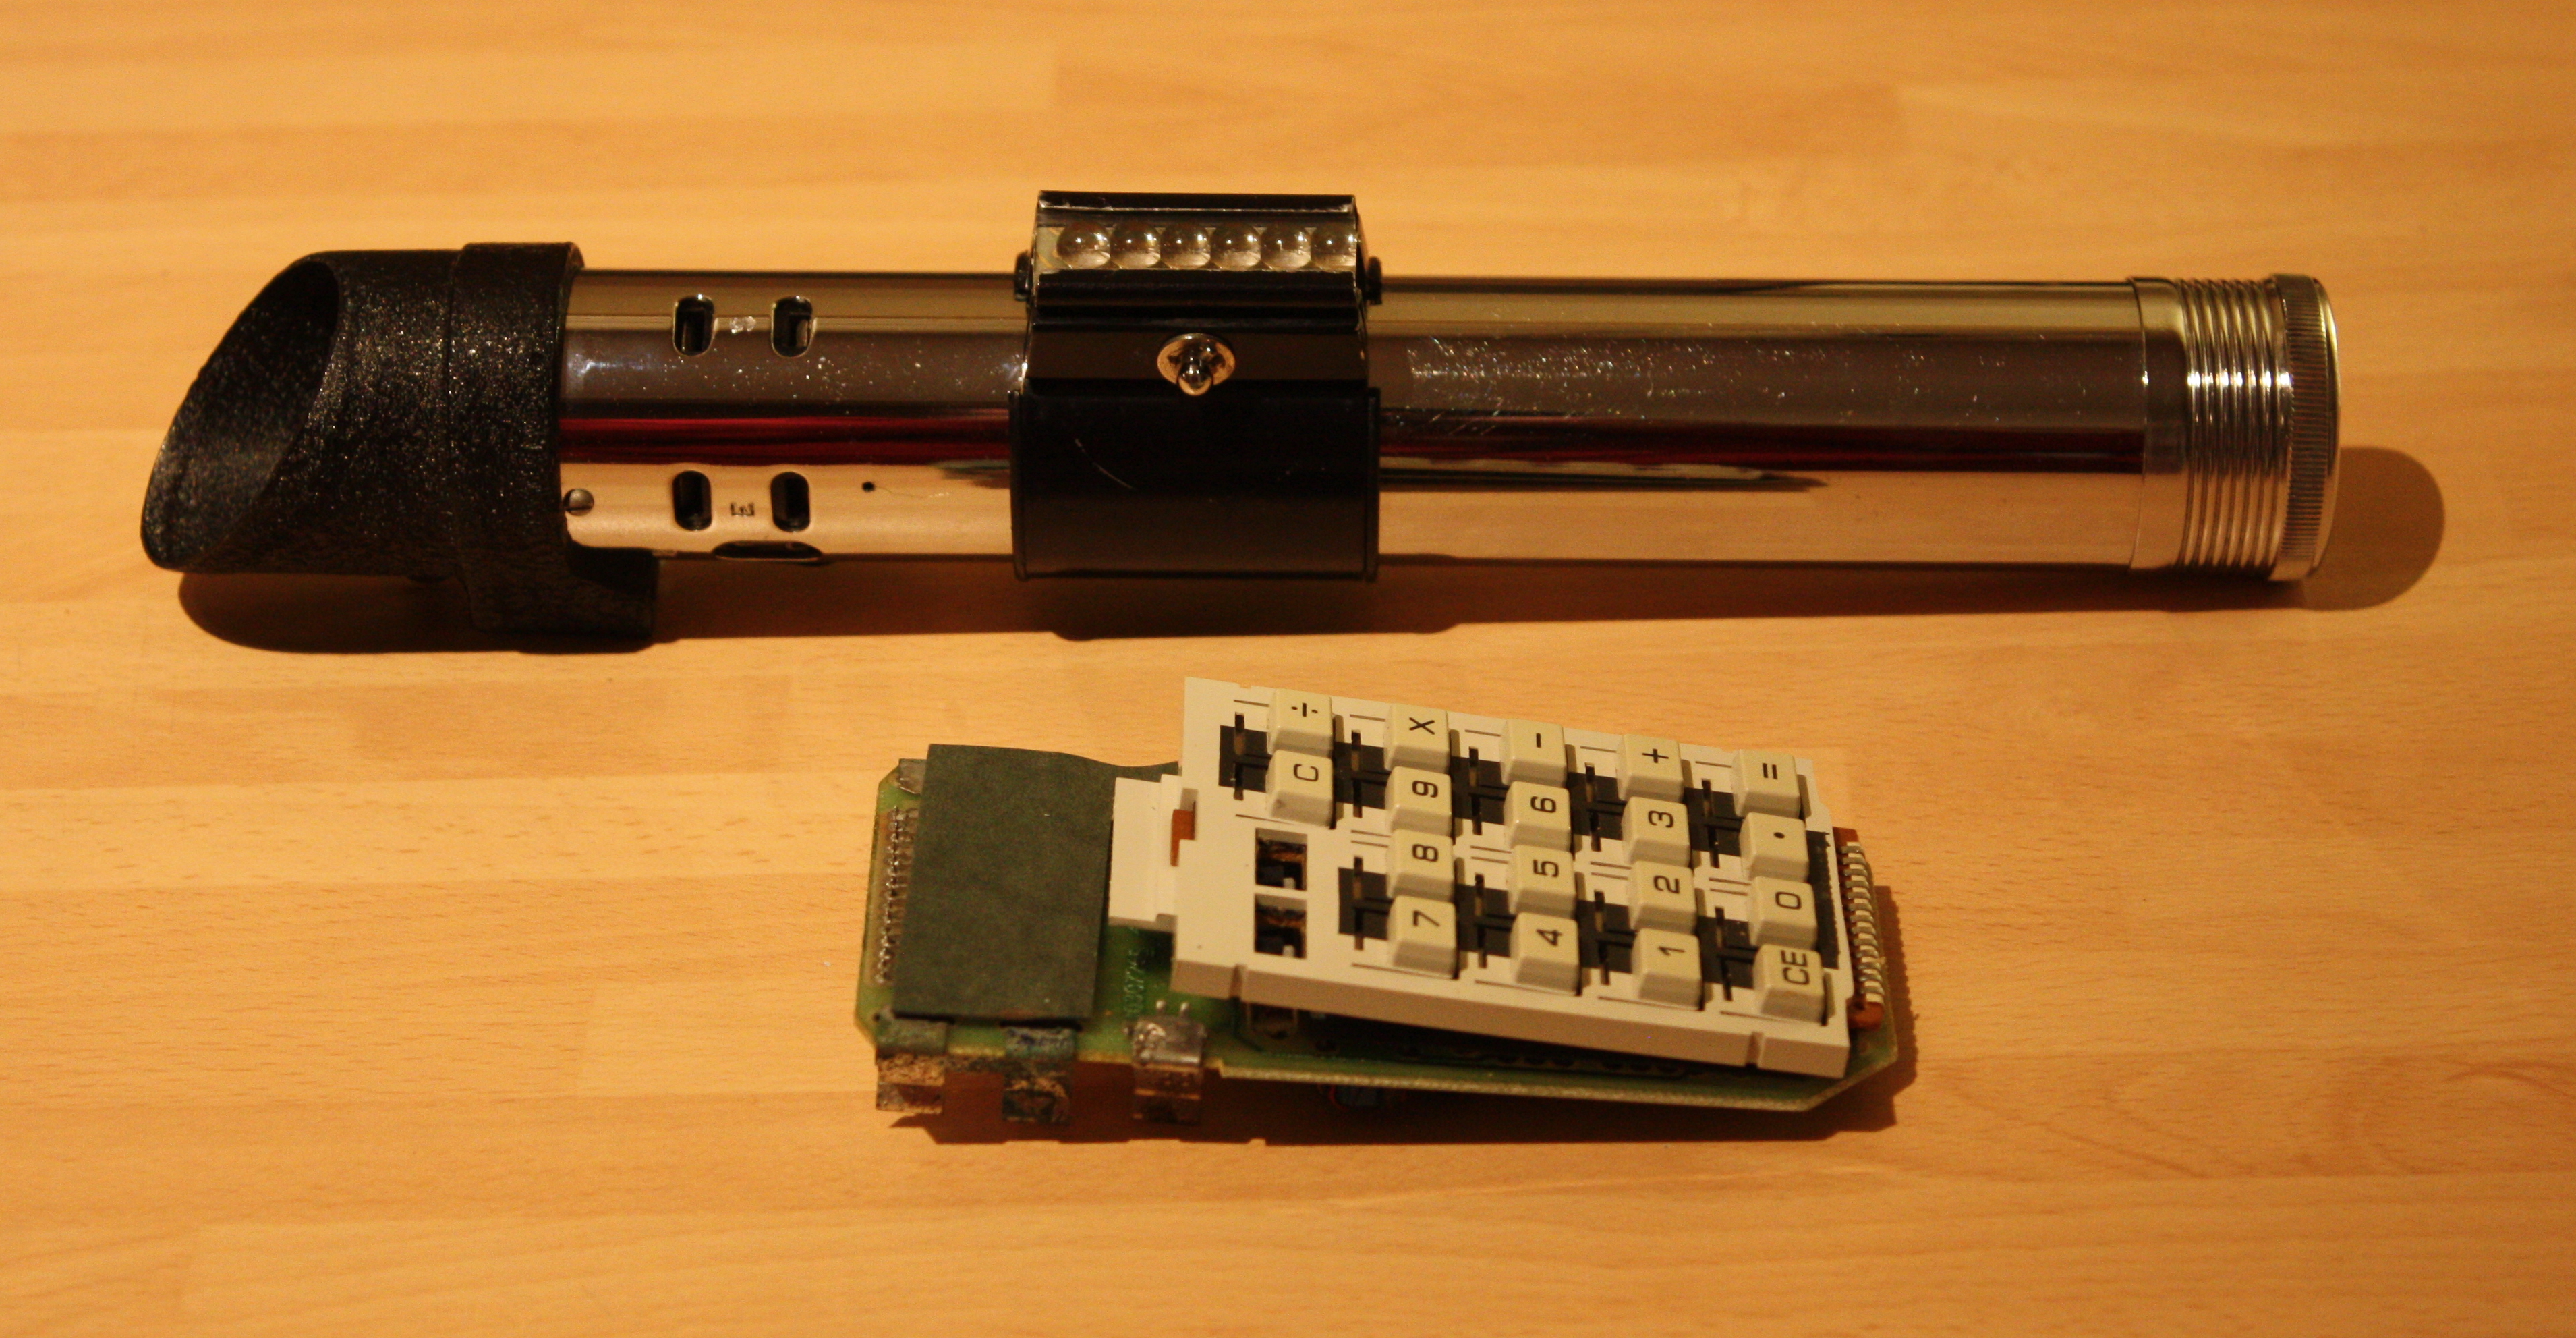
The guts of the calculator after I’d finished with it.
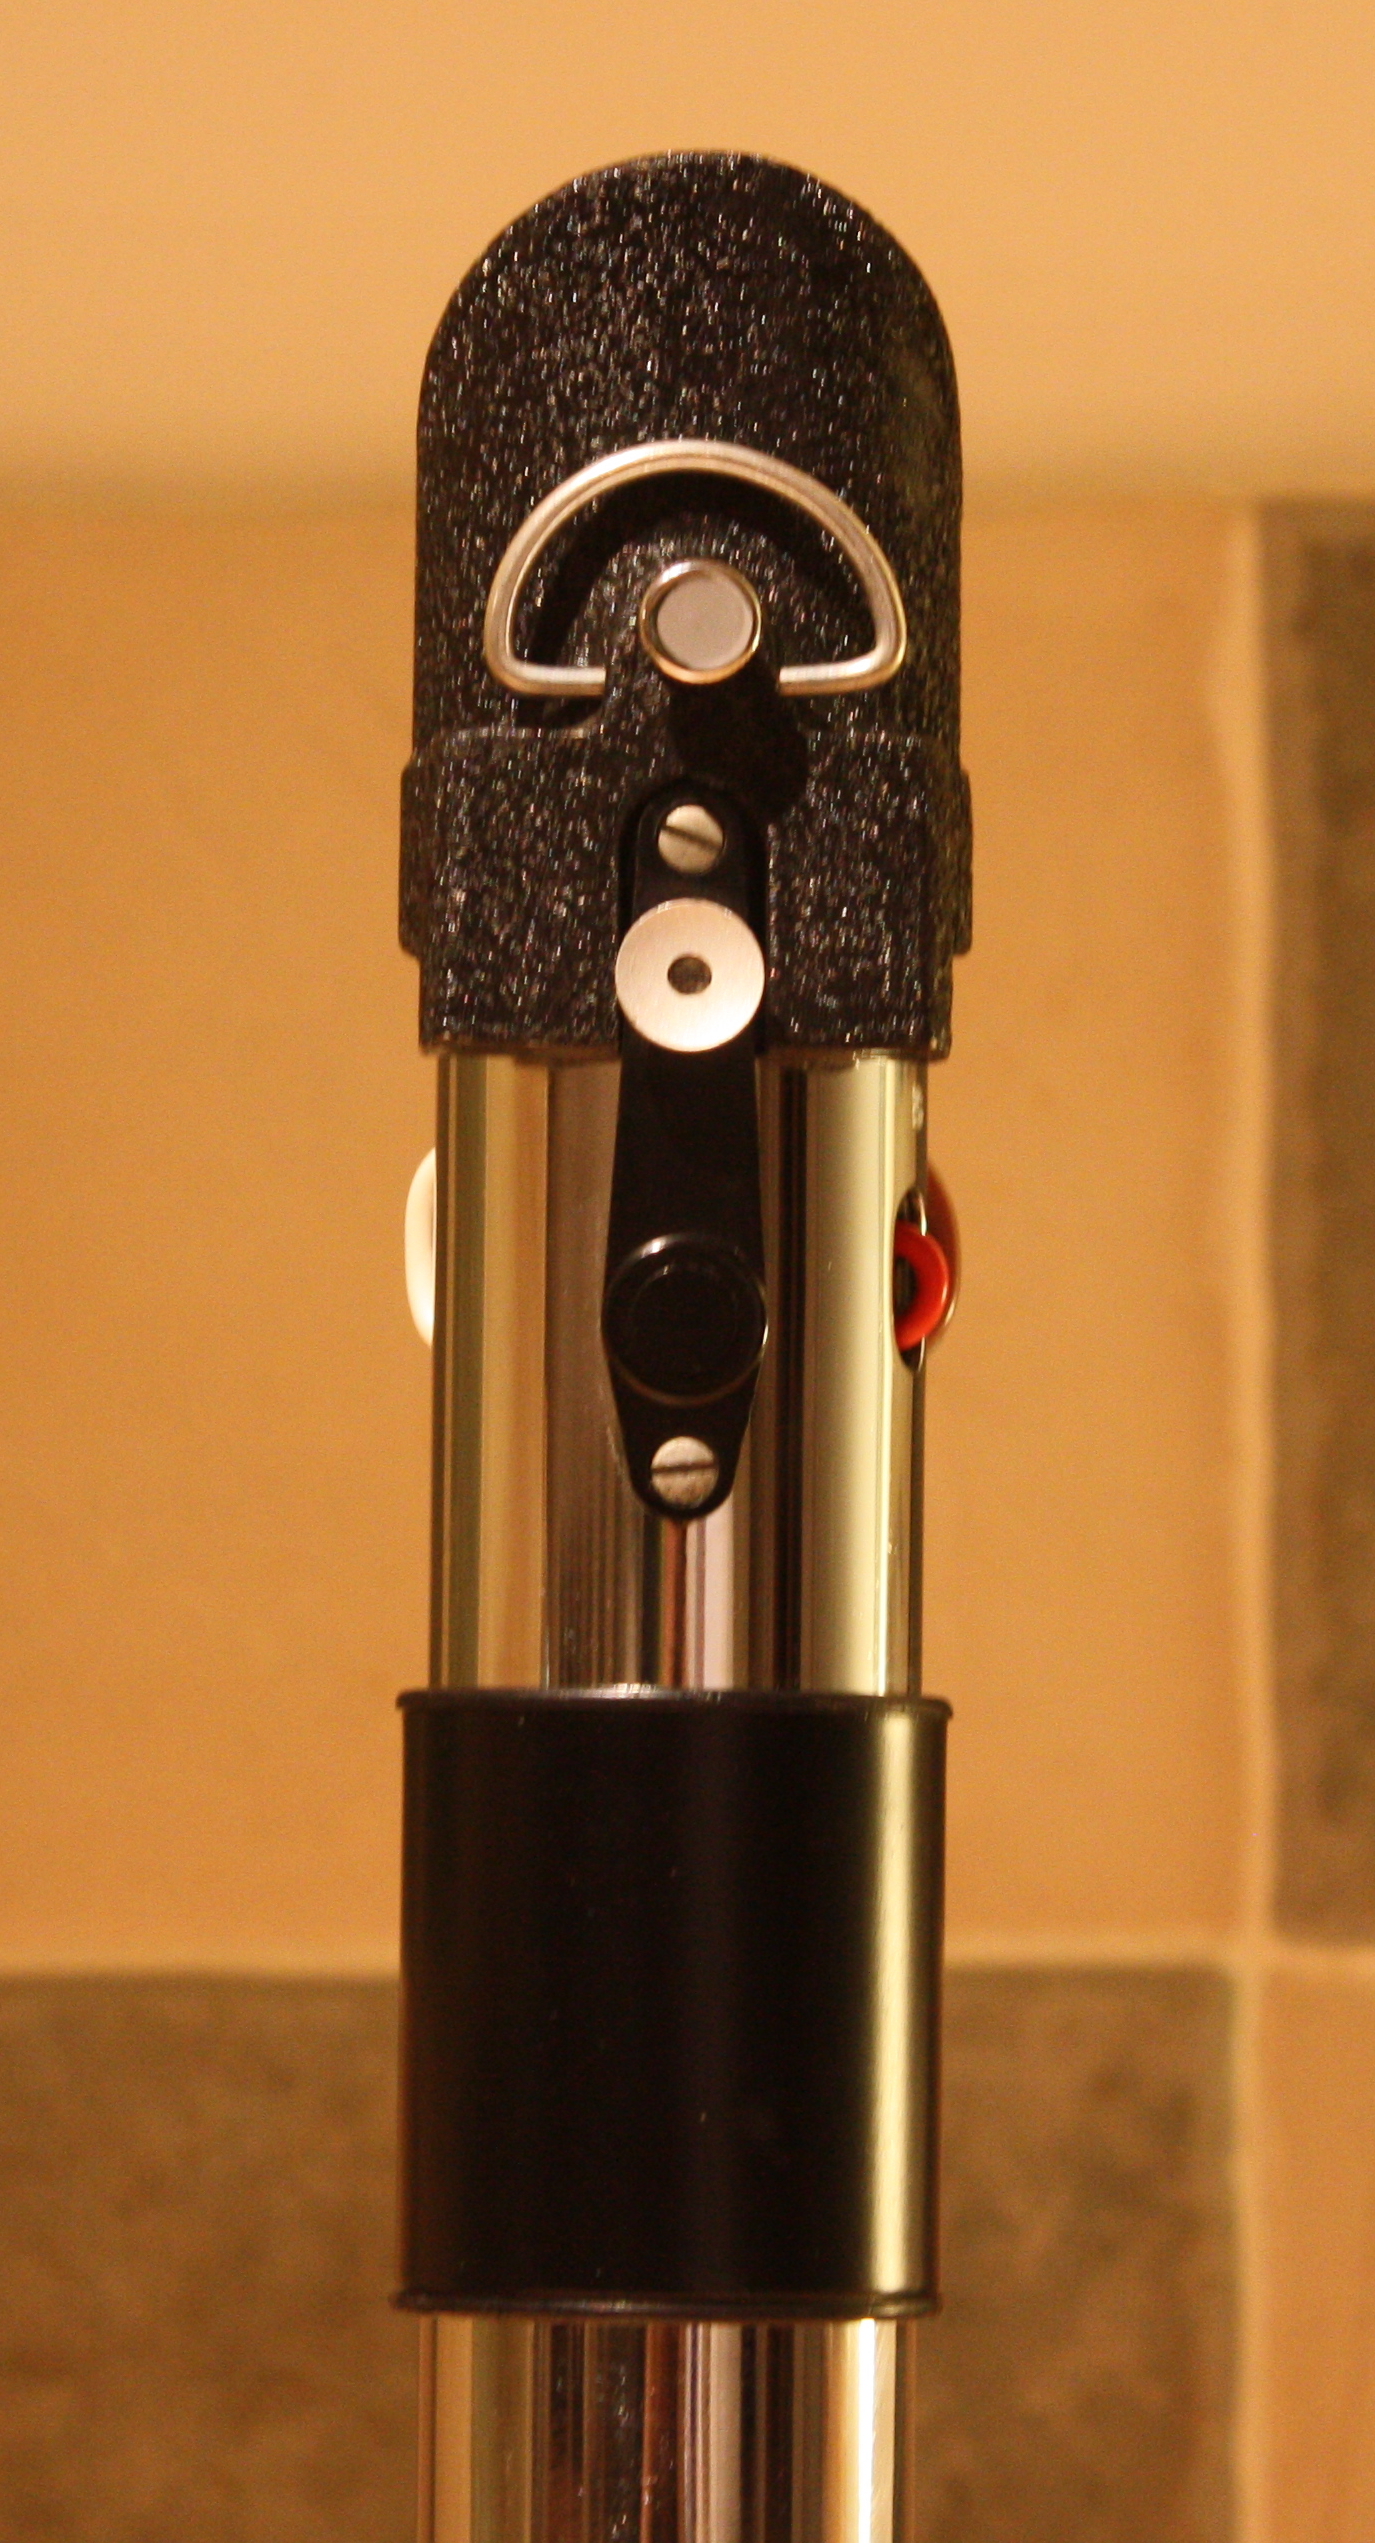
Then I added some wires from an old 1970s projector supplied to me by my friend, Chaim. I also removed the MPP name plate at this point. The name plate was rivetted on so once it’s off it’s off. A lot of people choose to leave these plates on even when using replica MPP units. This makes no sense to me at all as the props certainly didn’t have them present. I believe this is an attempt to preserve the value of the rare collectors item but, frankly, it looks silly and is pretty half arsed in my opinion.
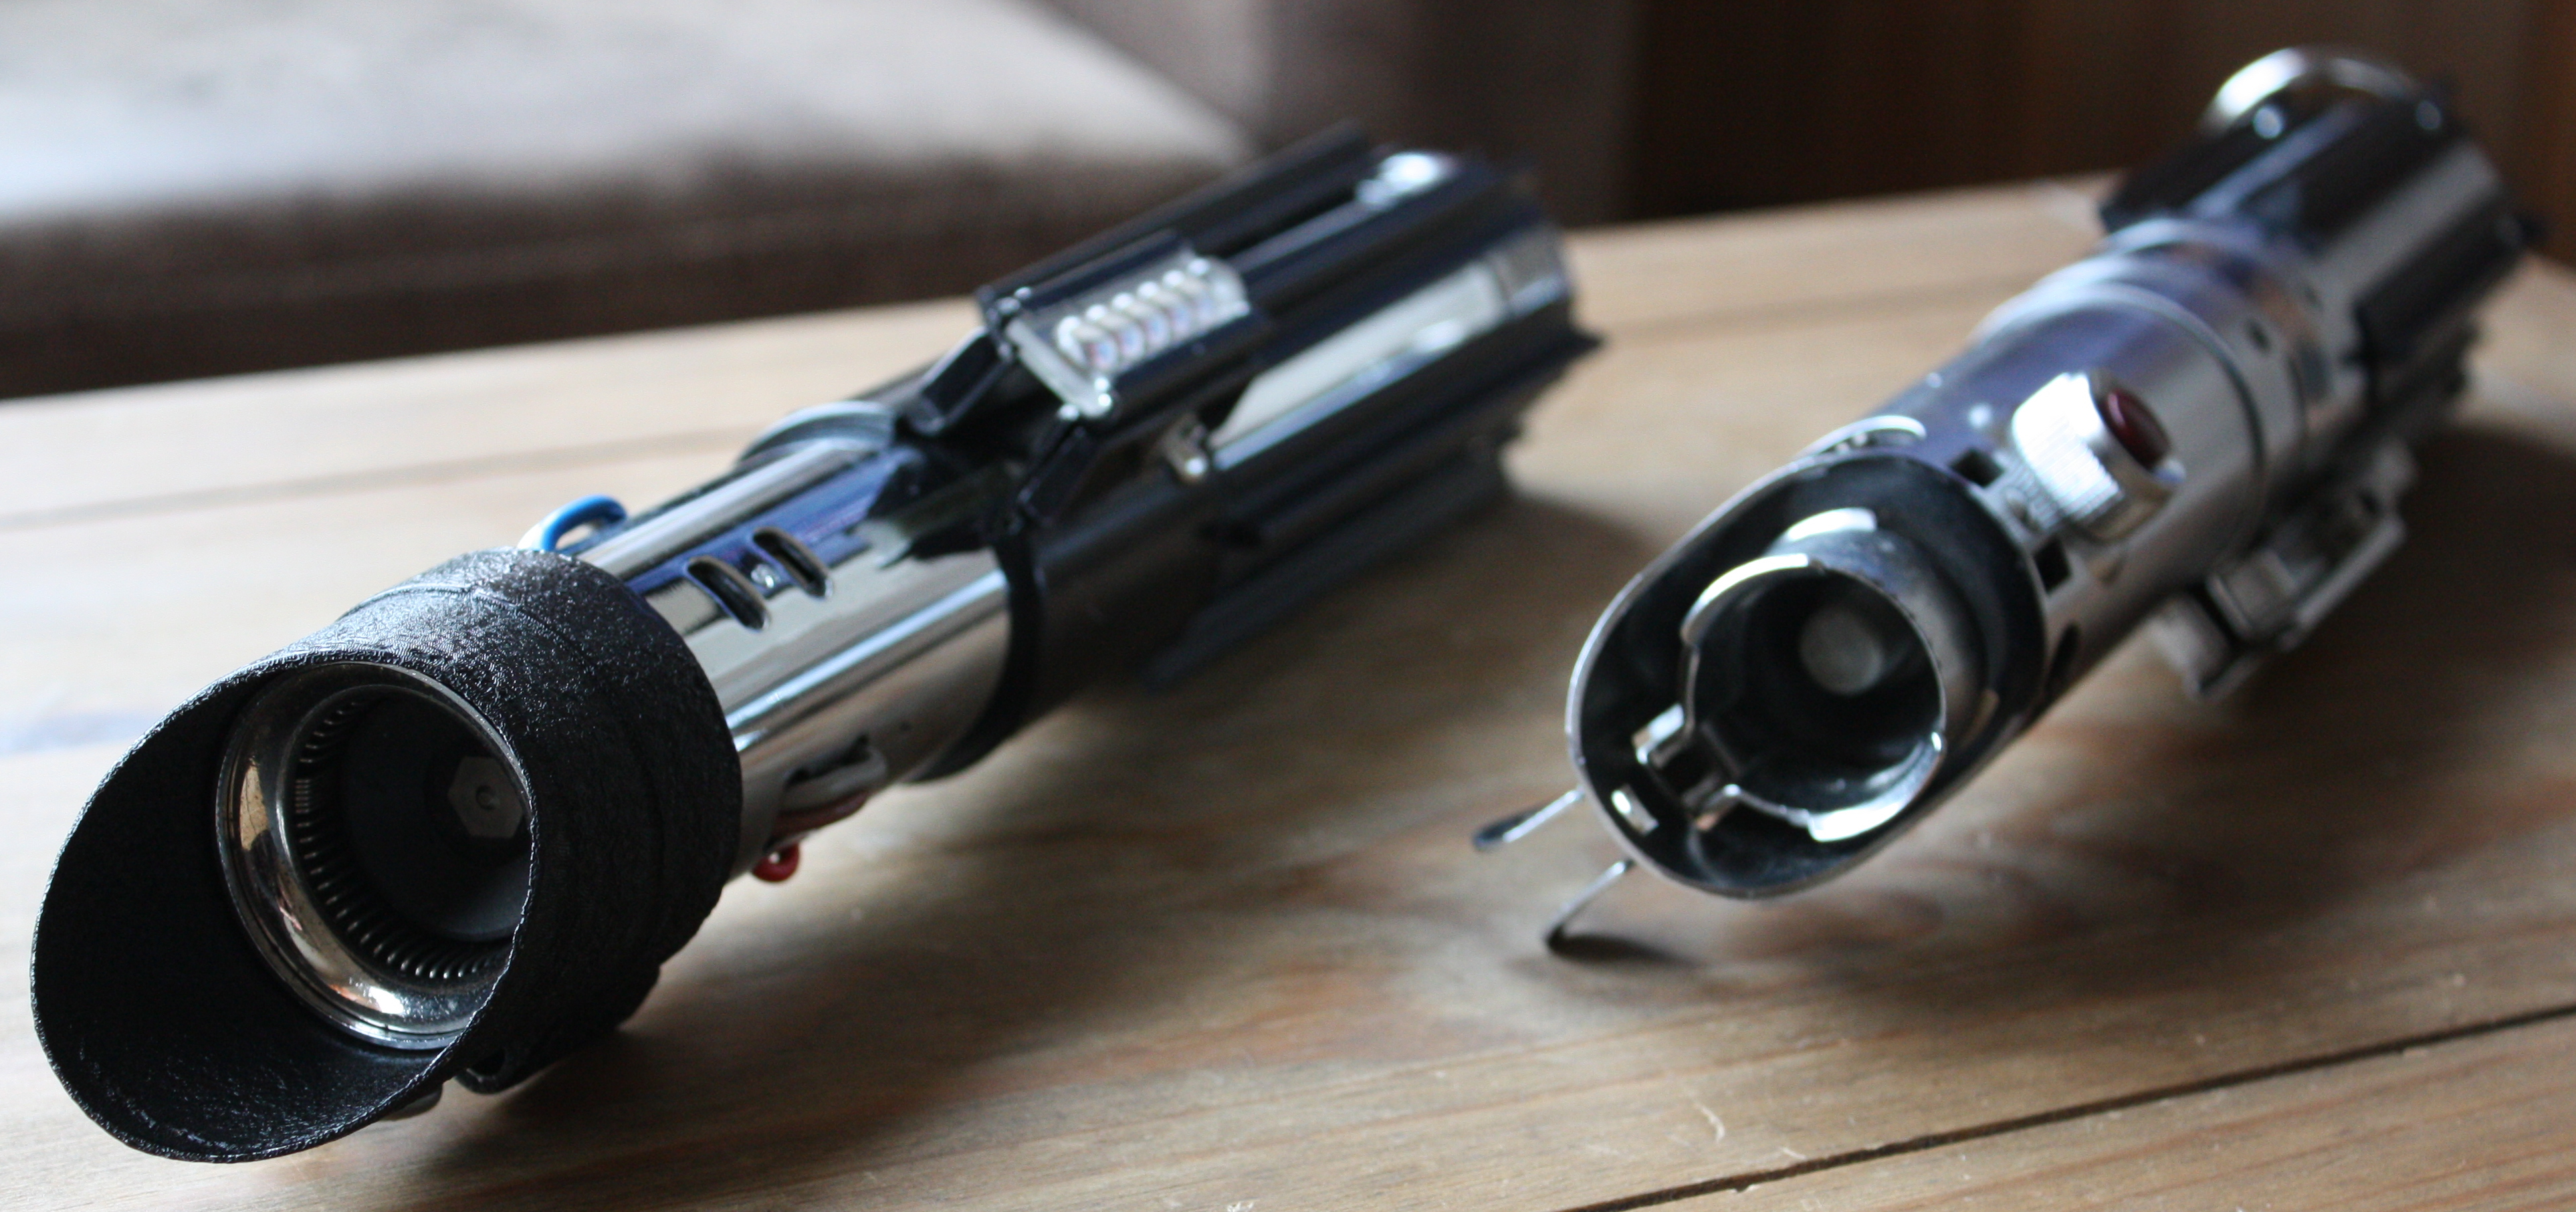
The Shroud
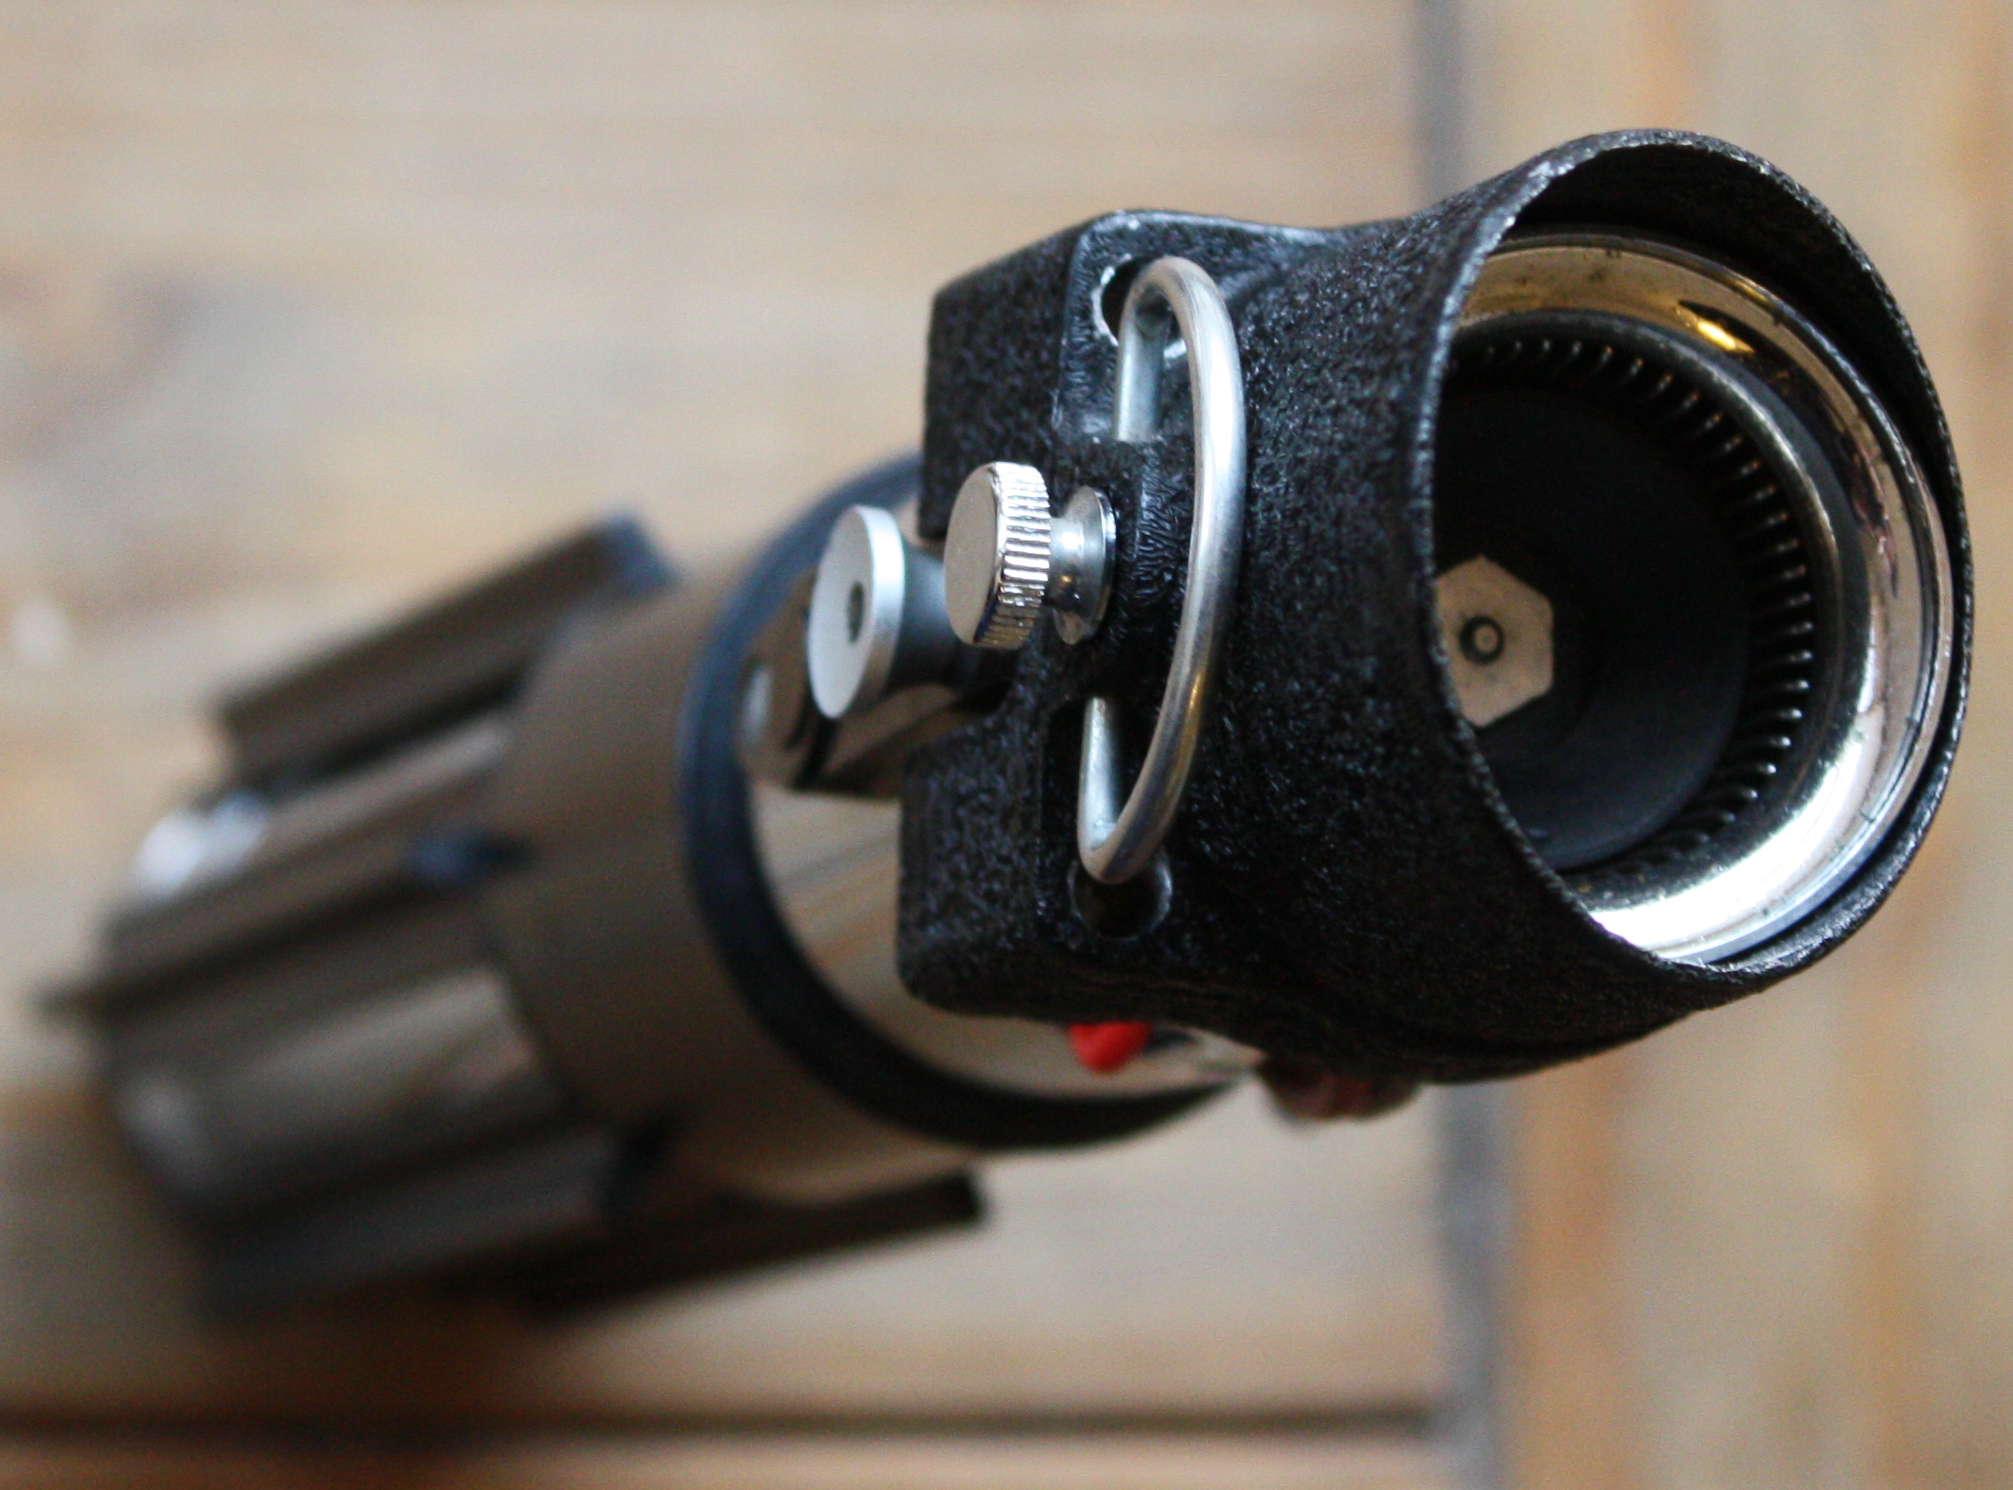
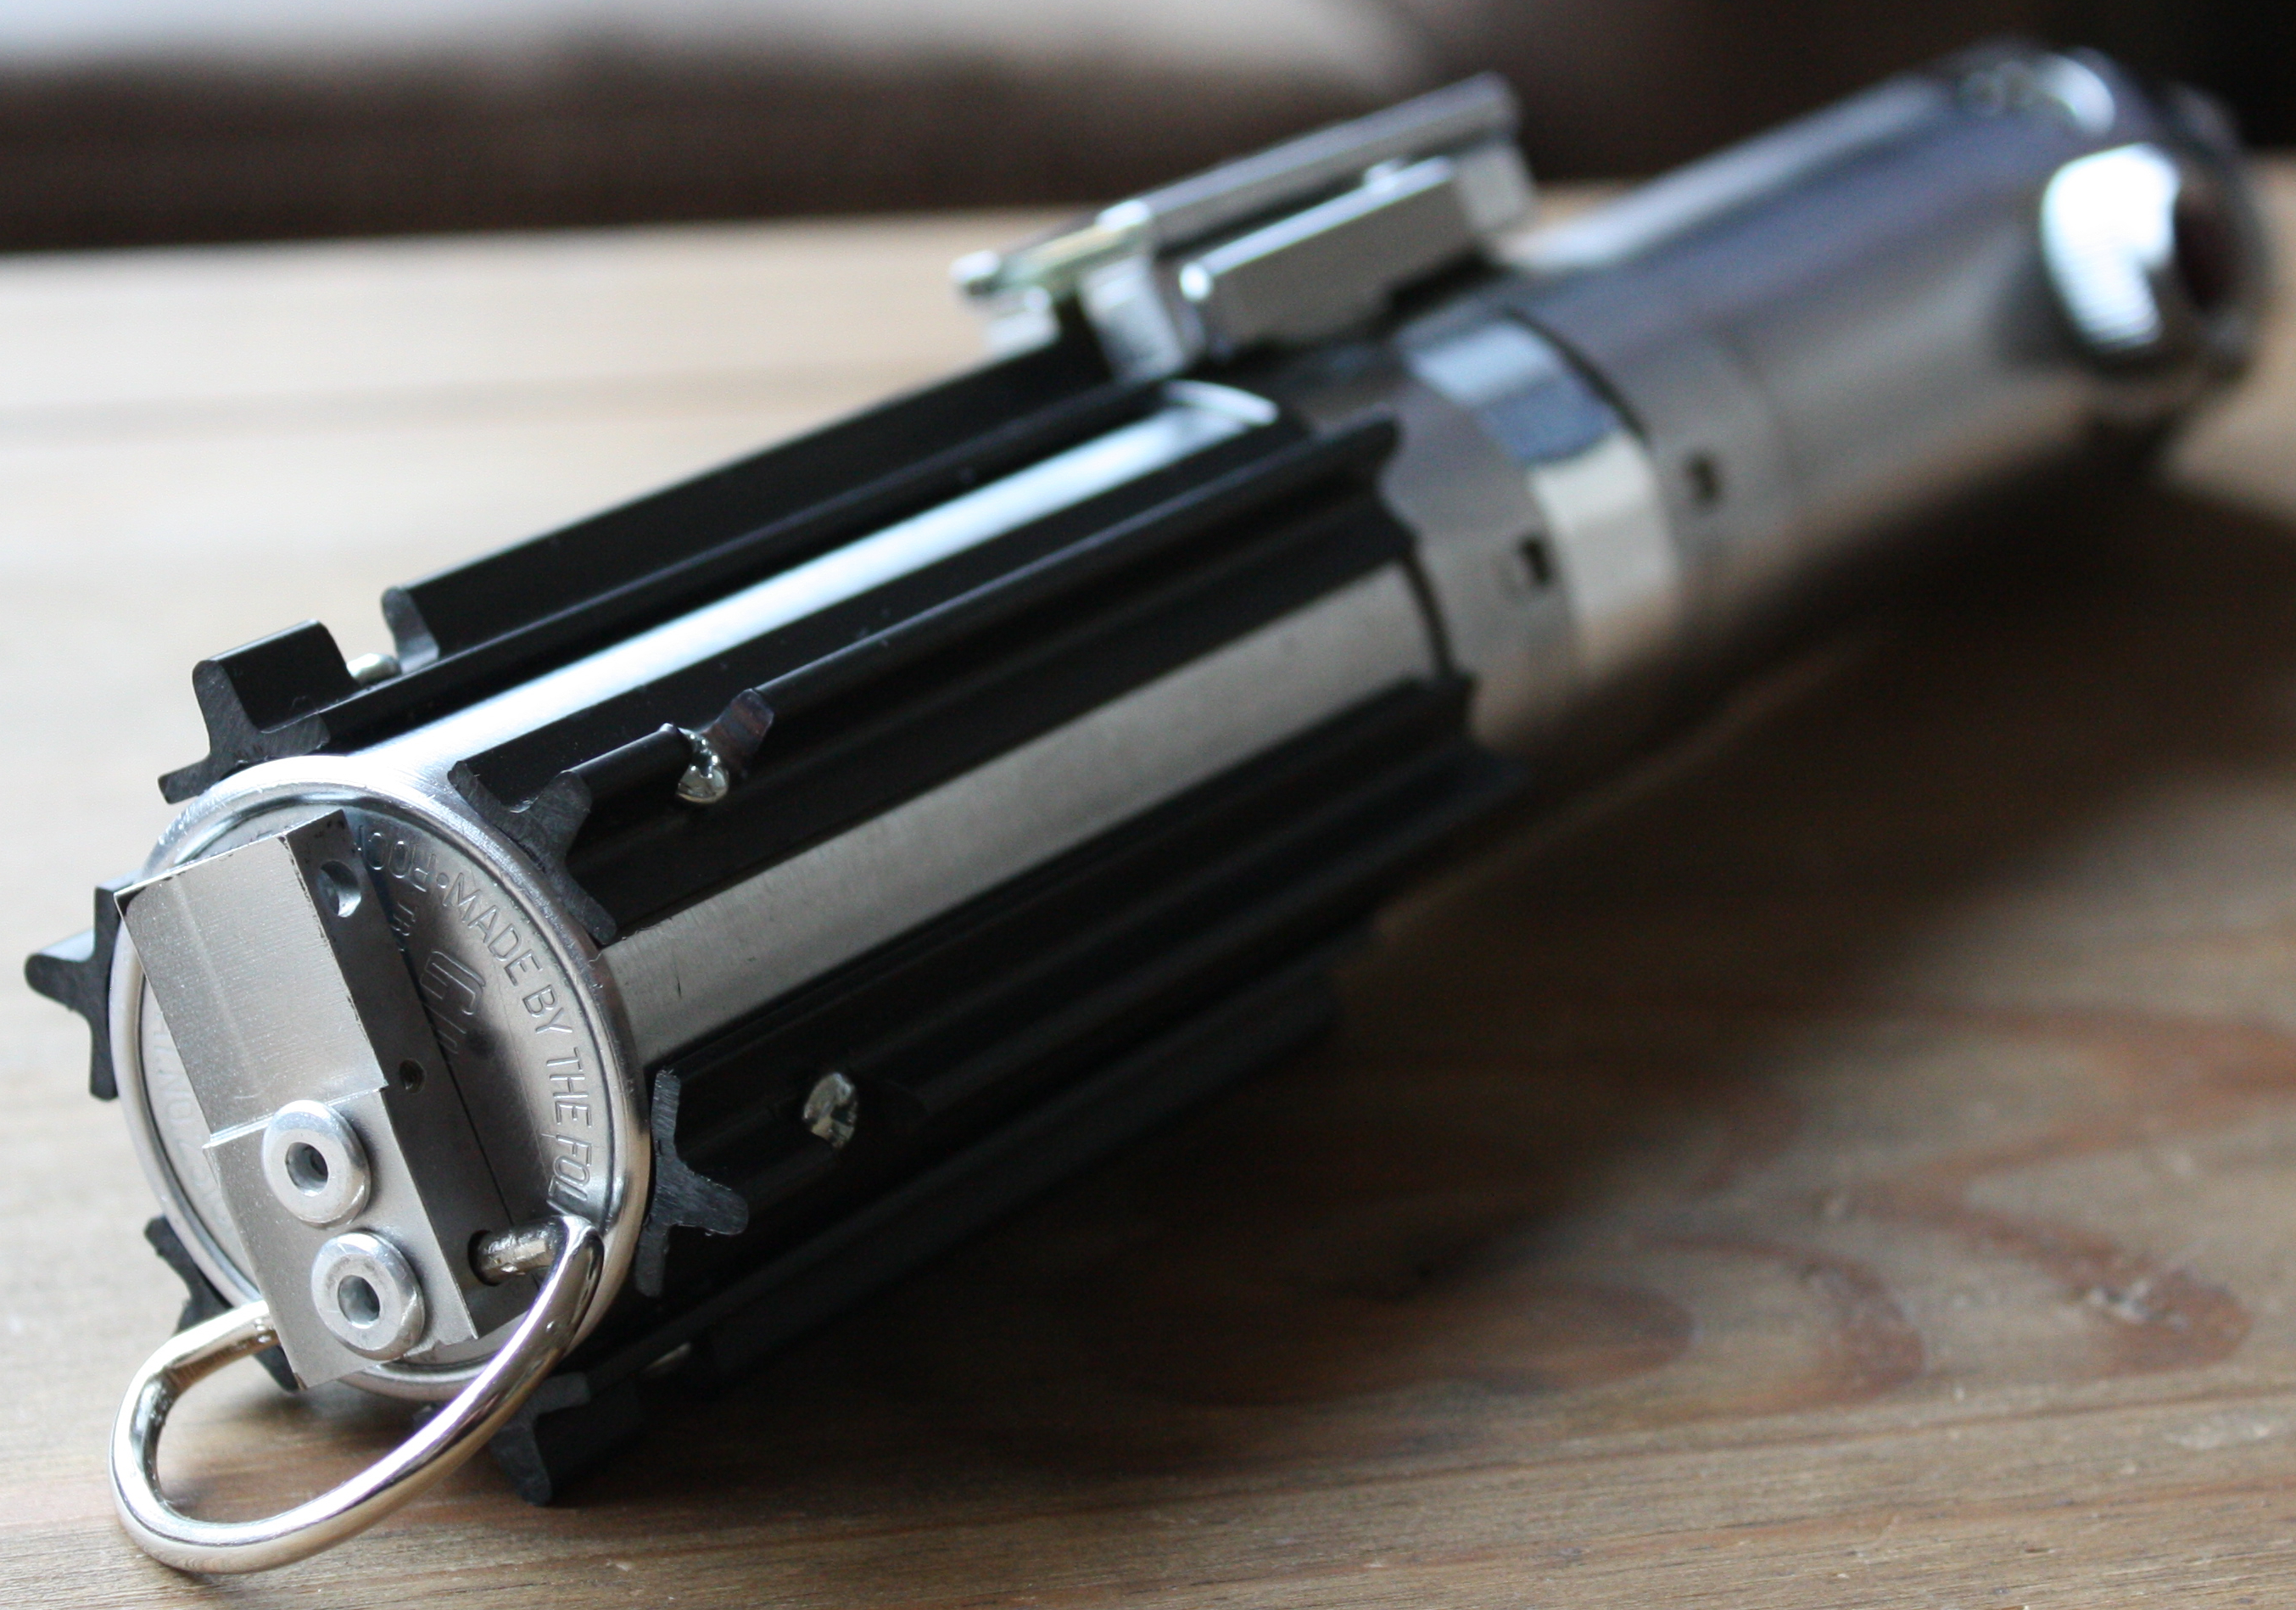
I’m all in with these old found parts so I drilled two small holes in the back of the shroud to attach the D ring.
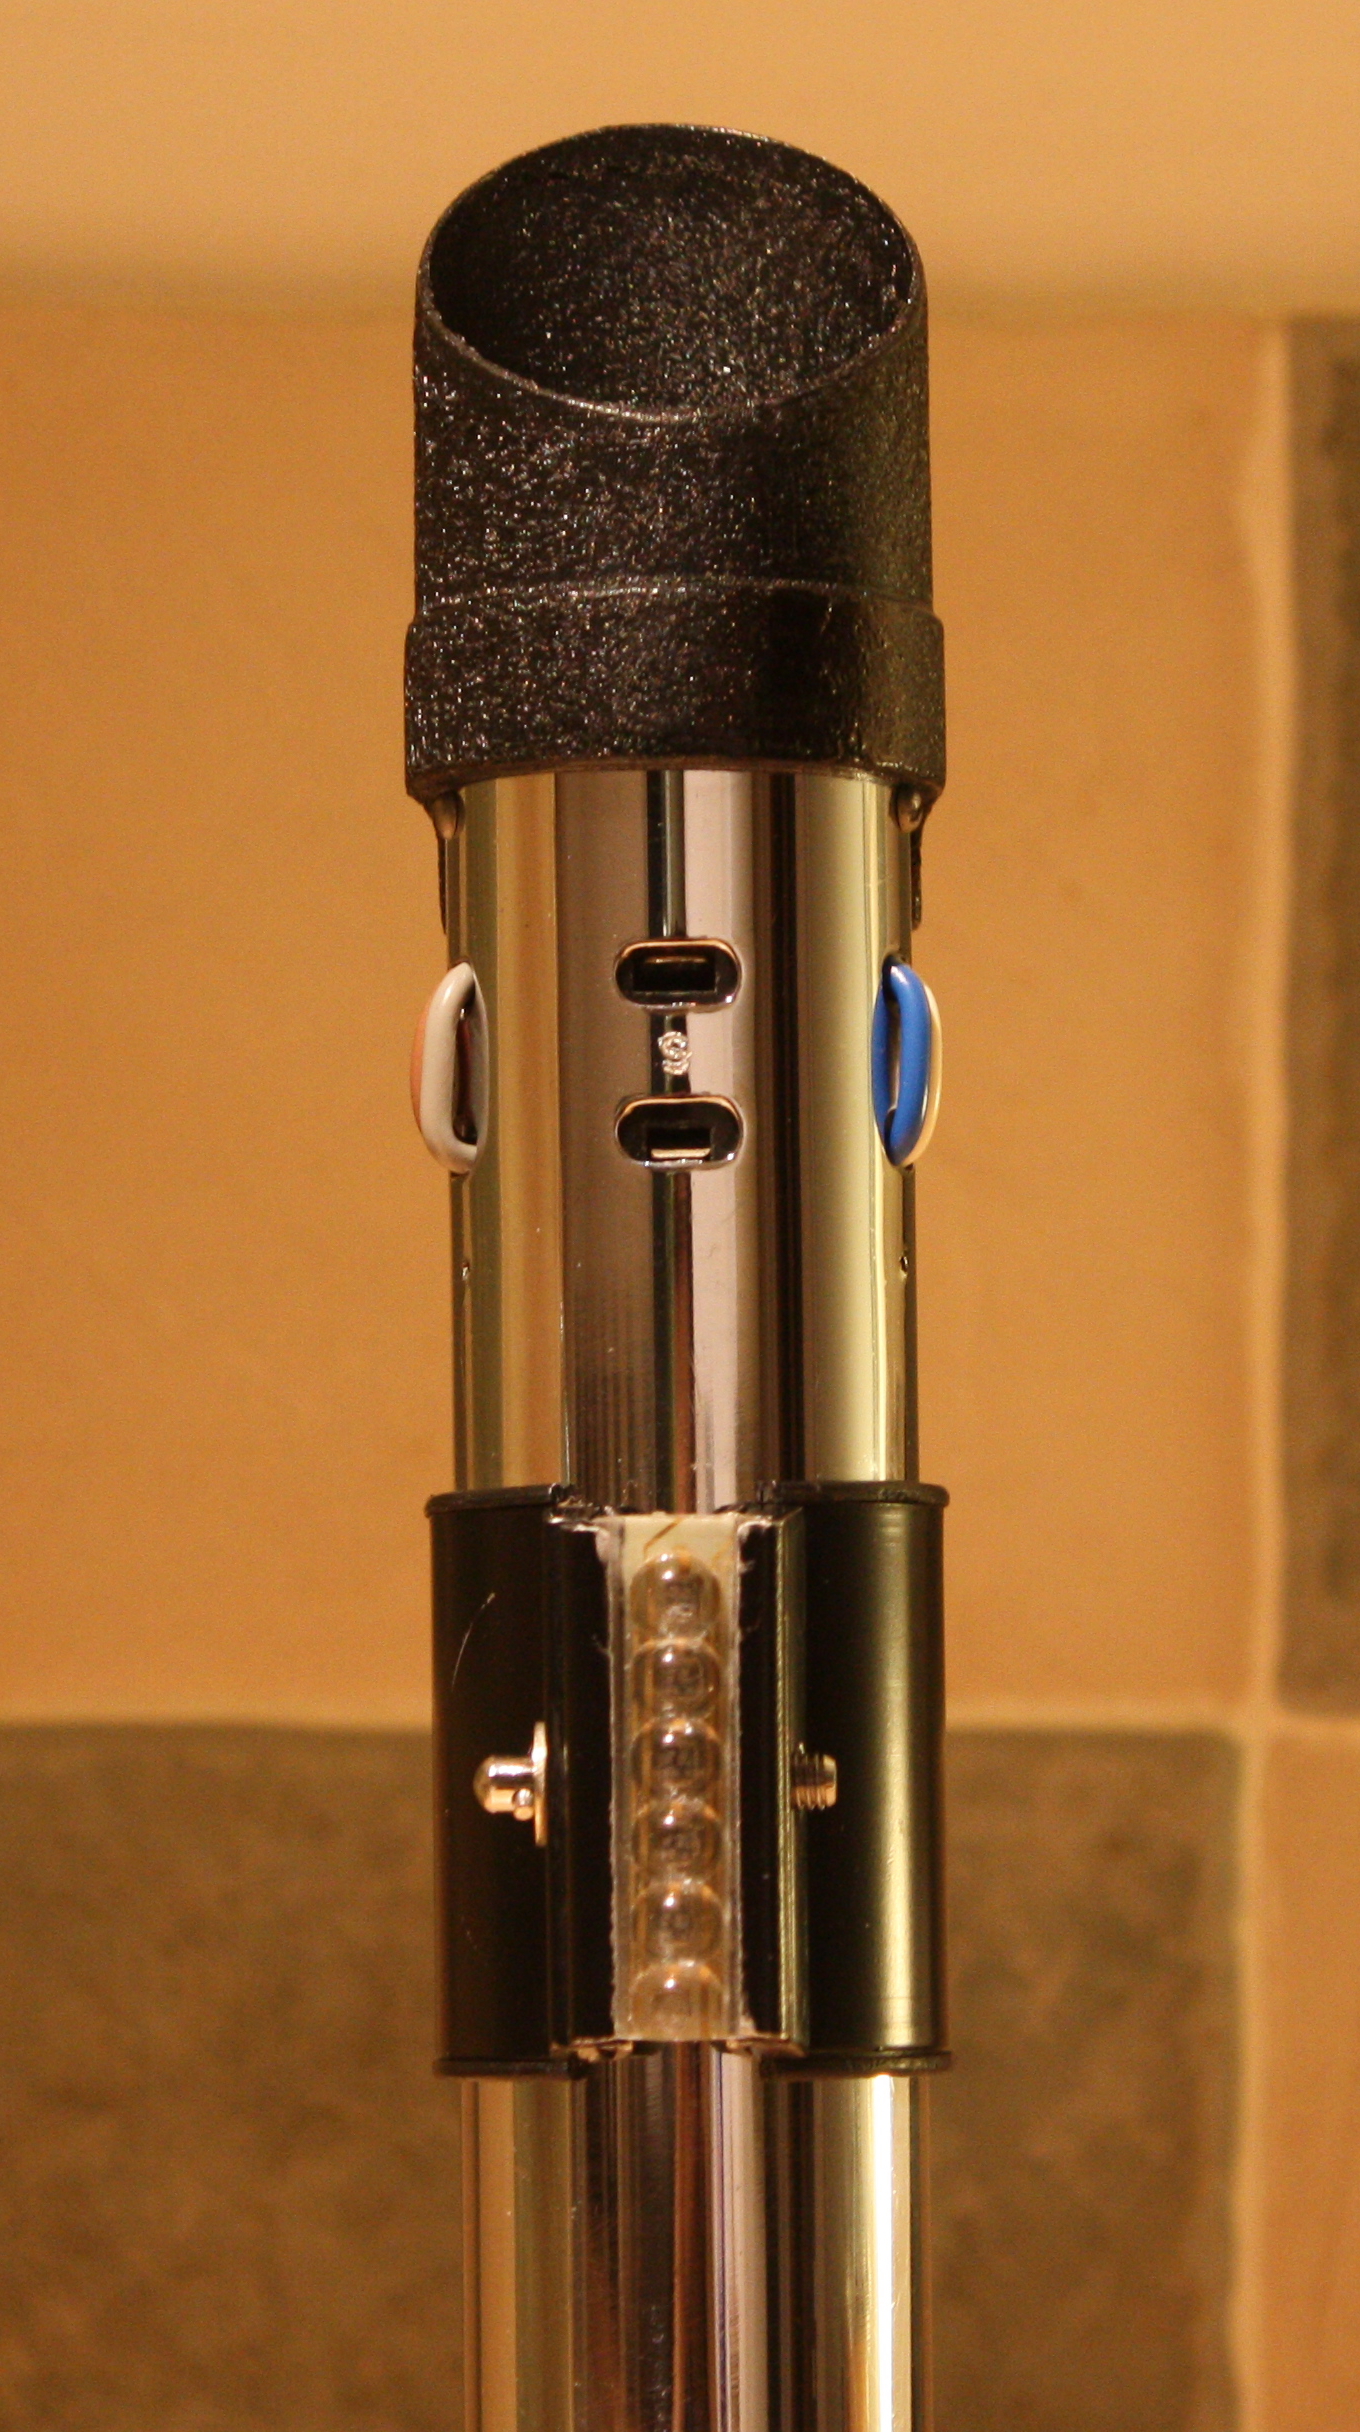
This shot shows the large B port (with the red wire).
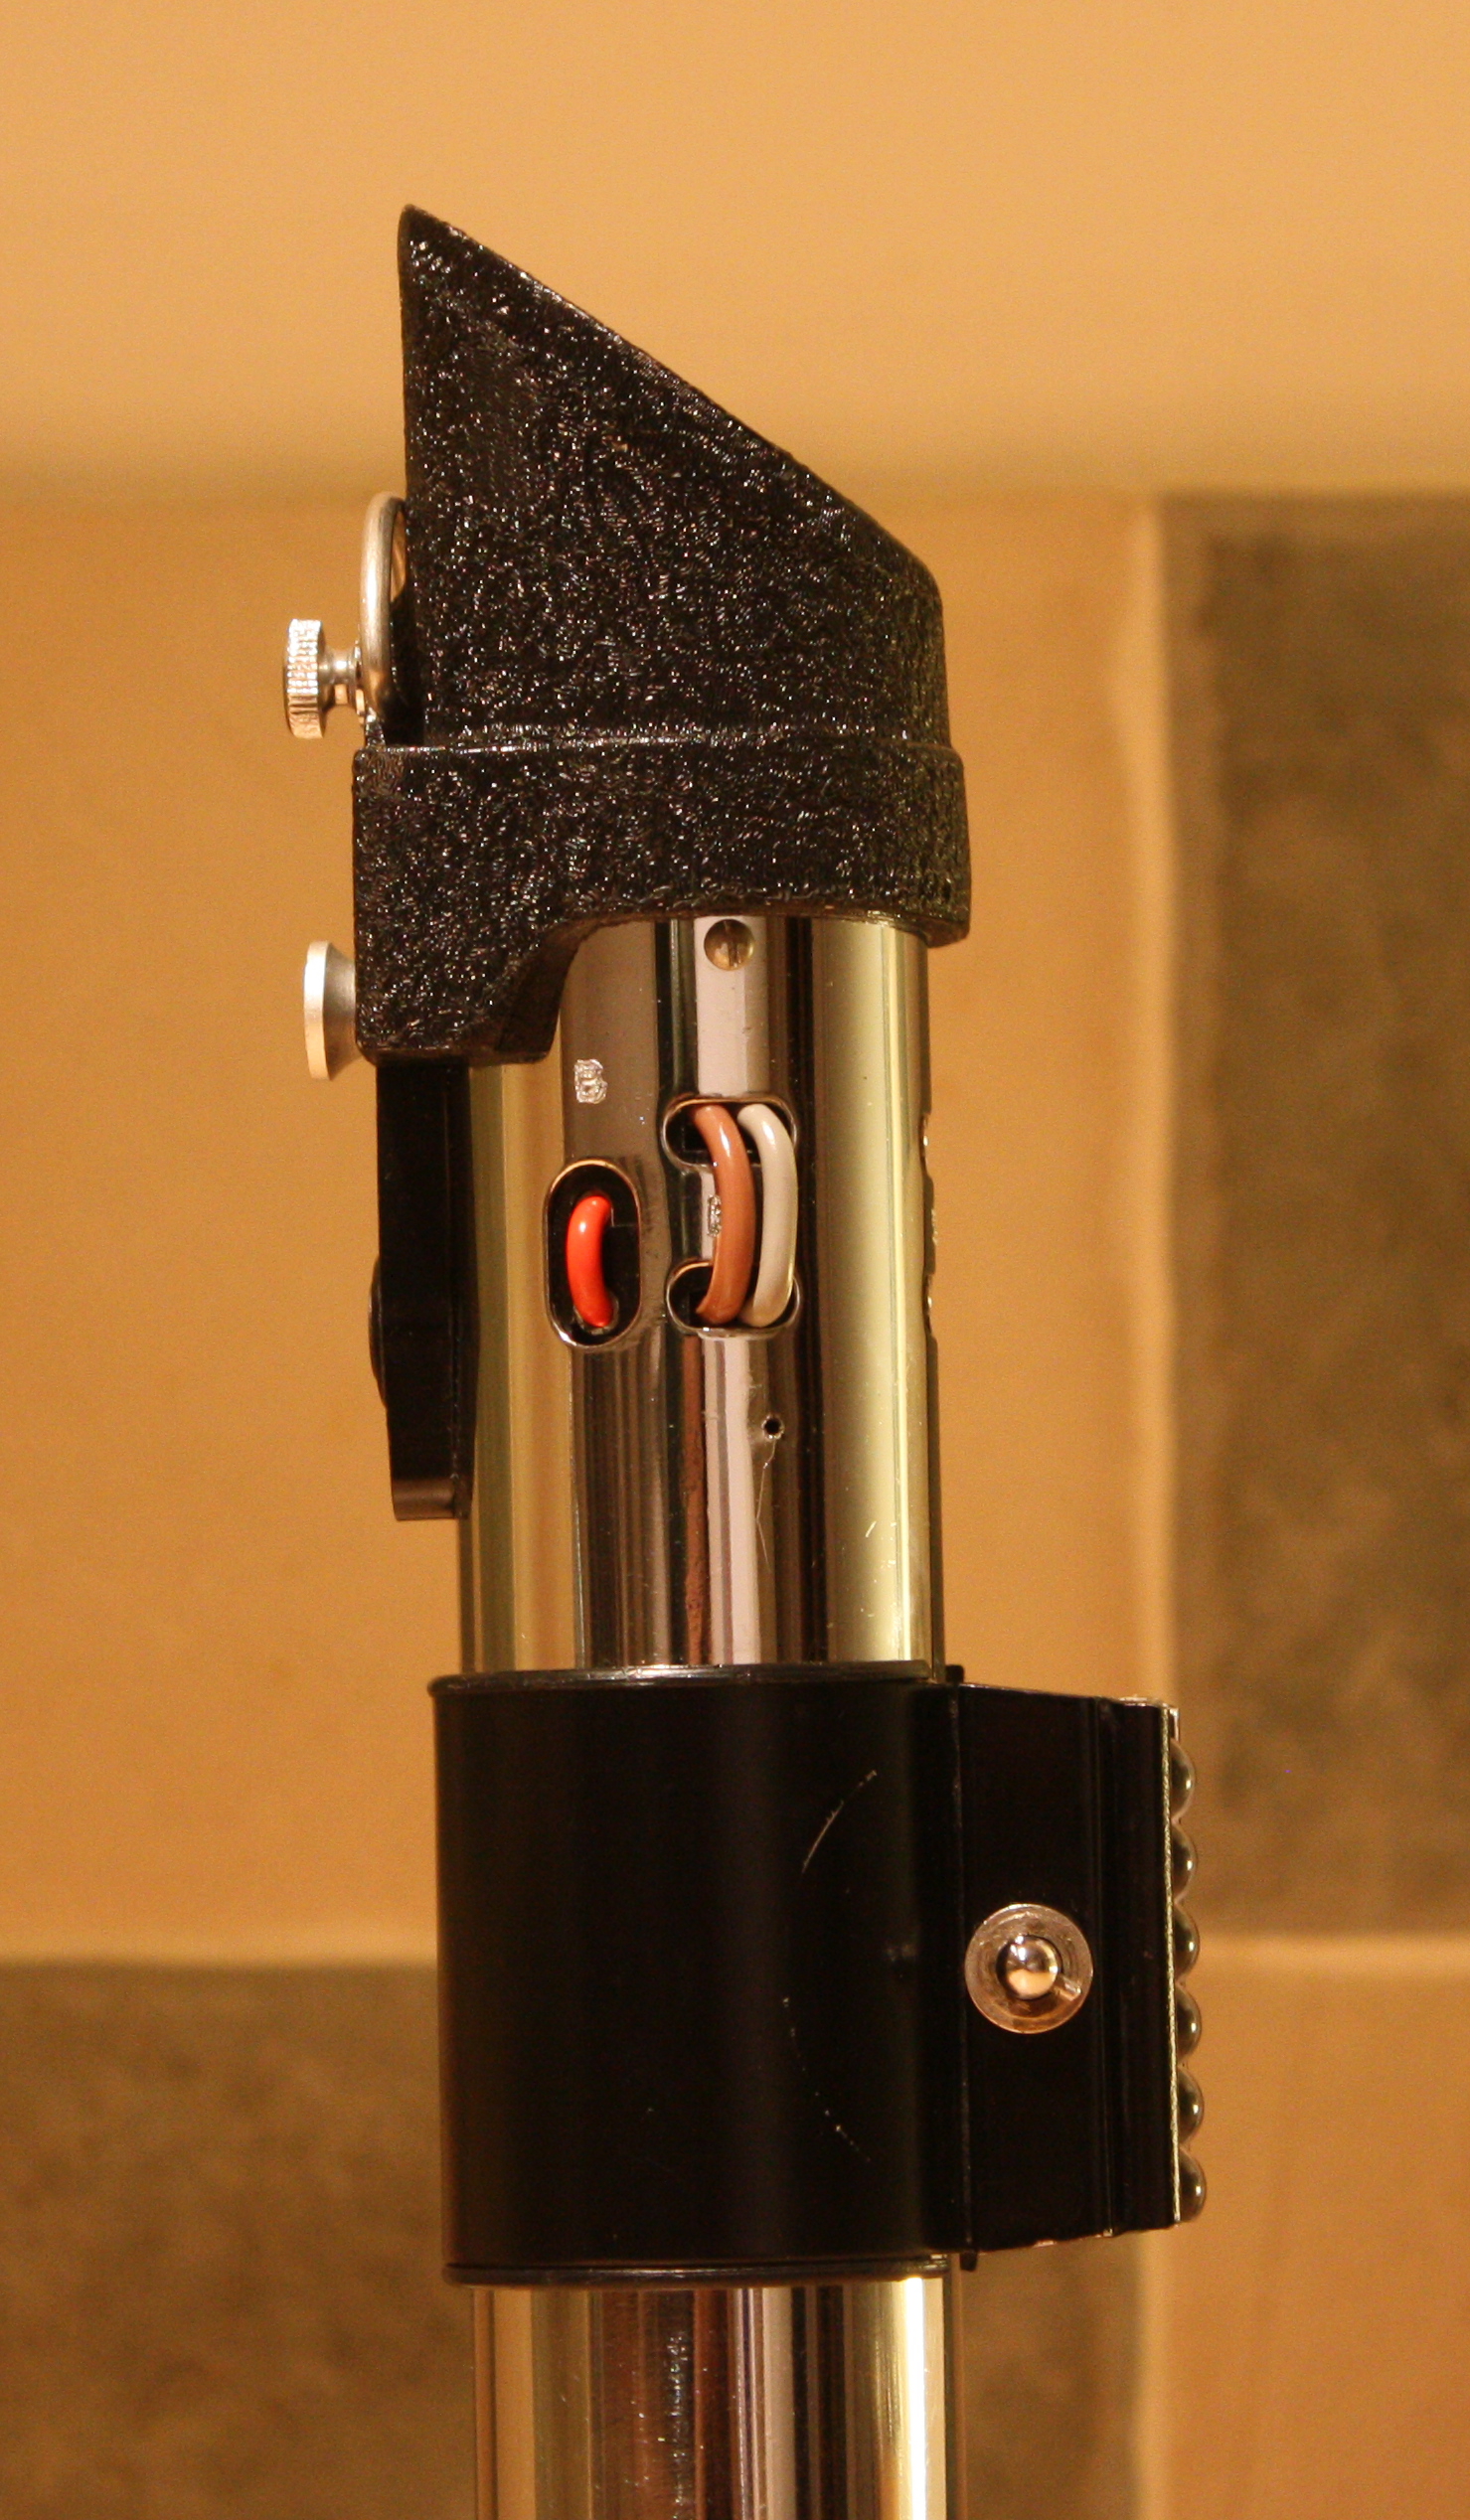
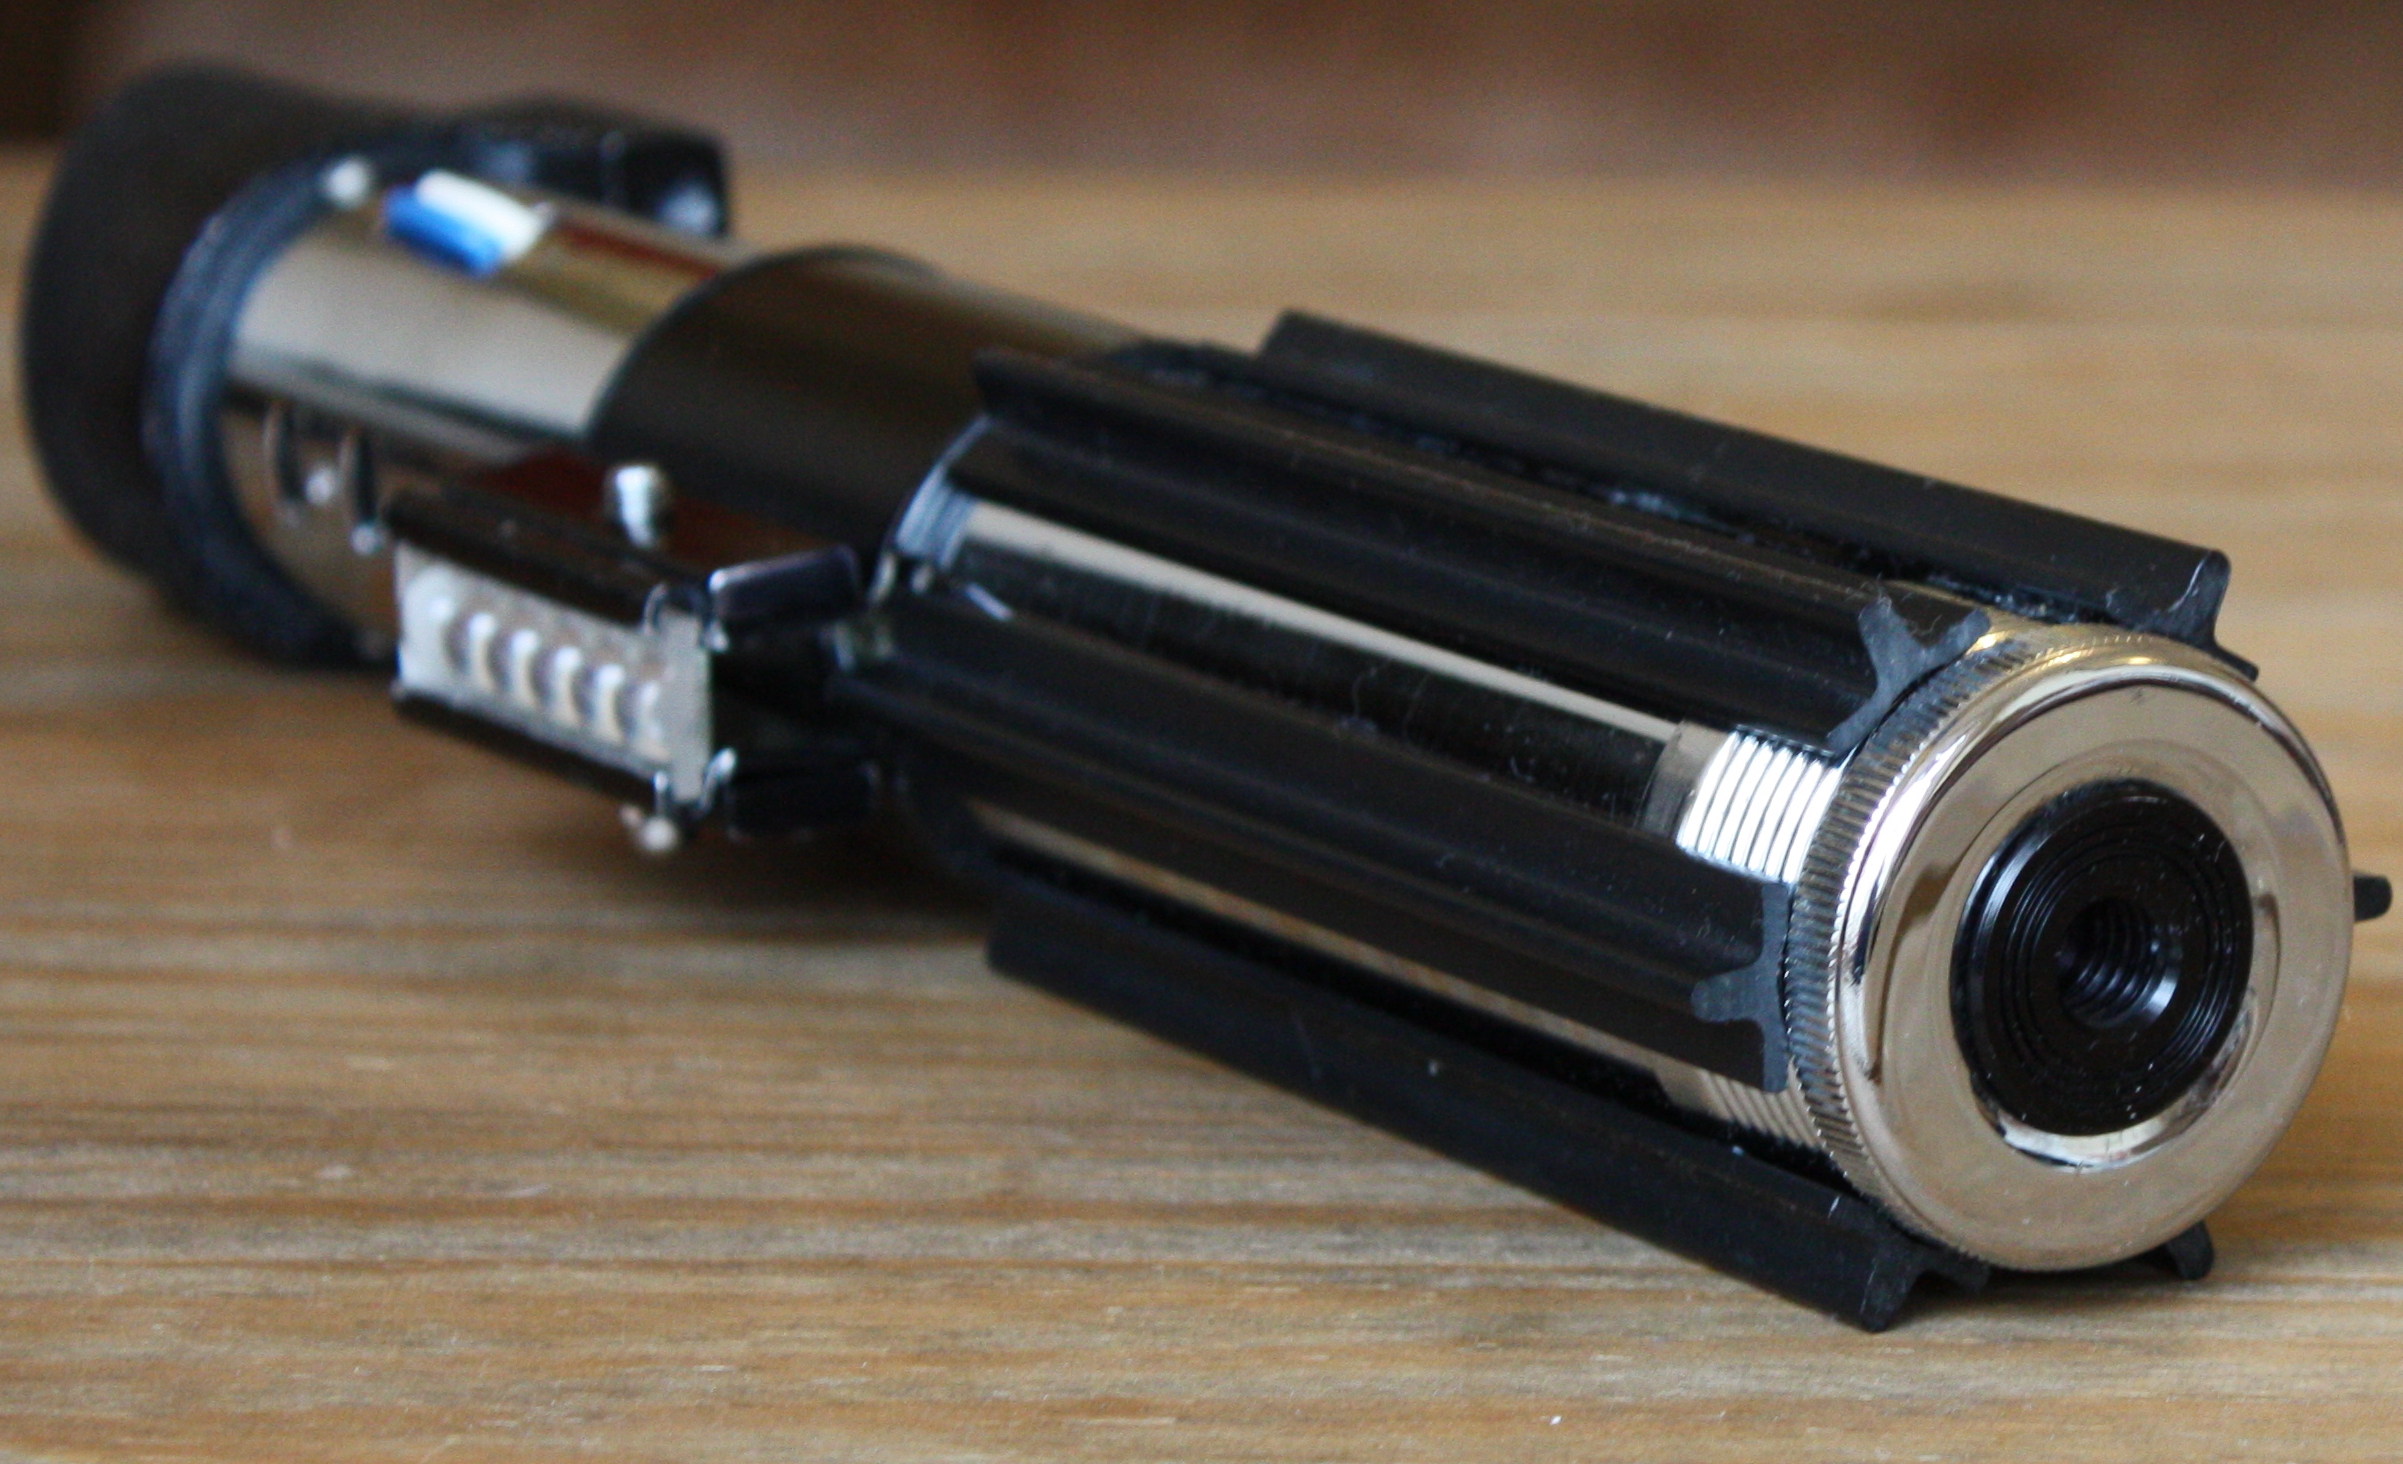
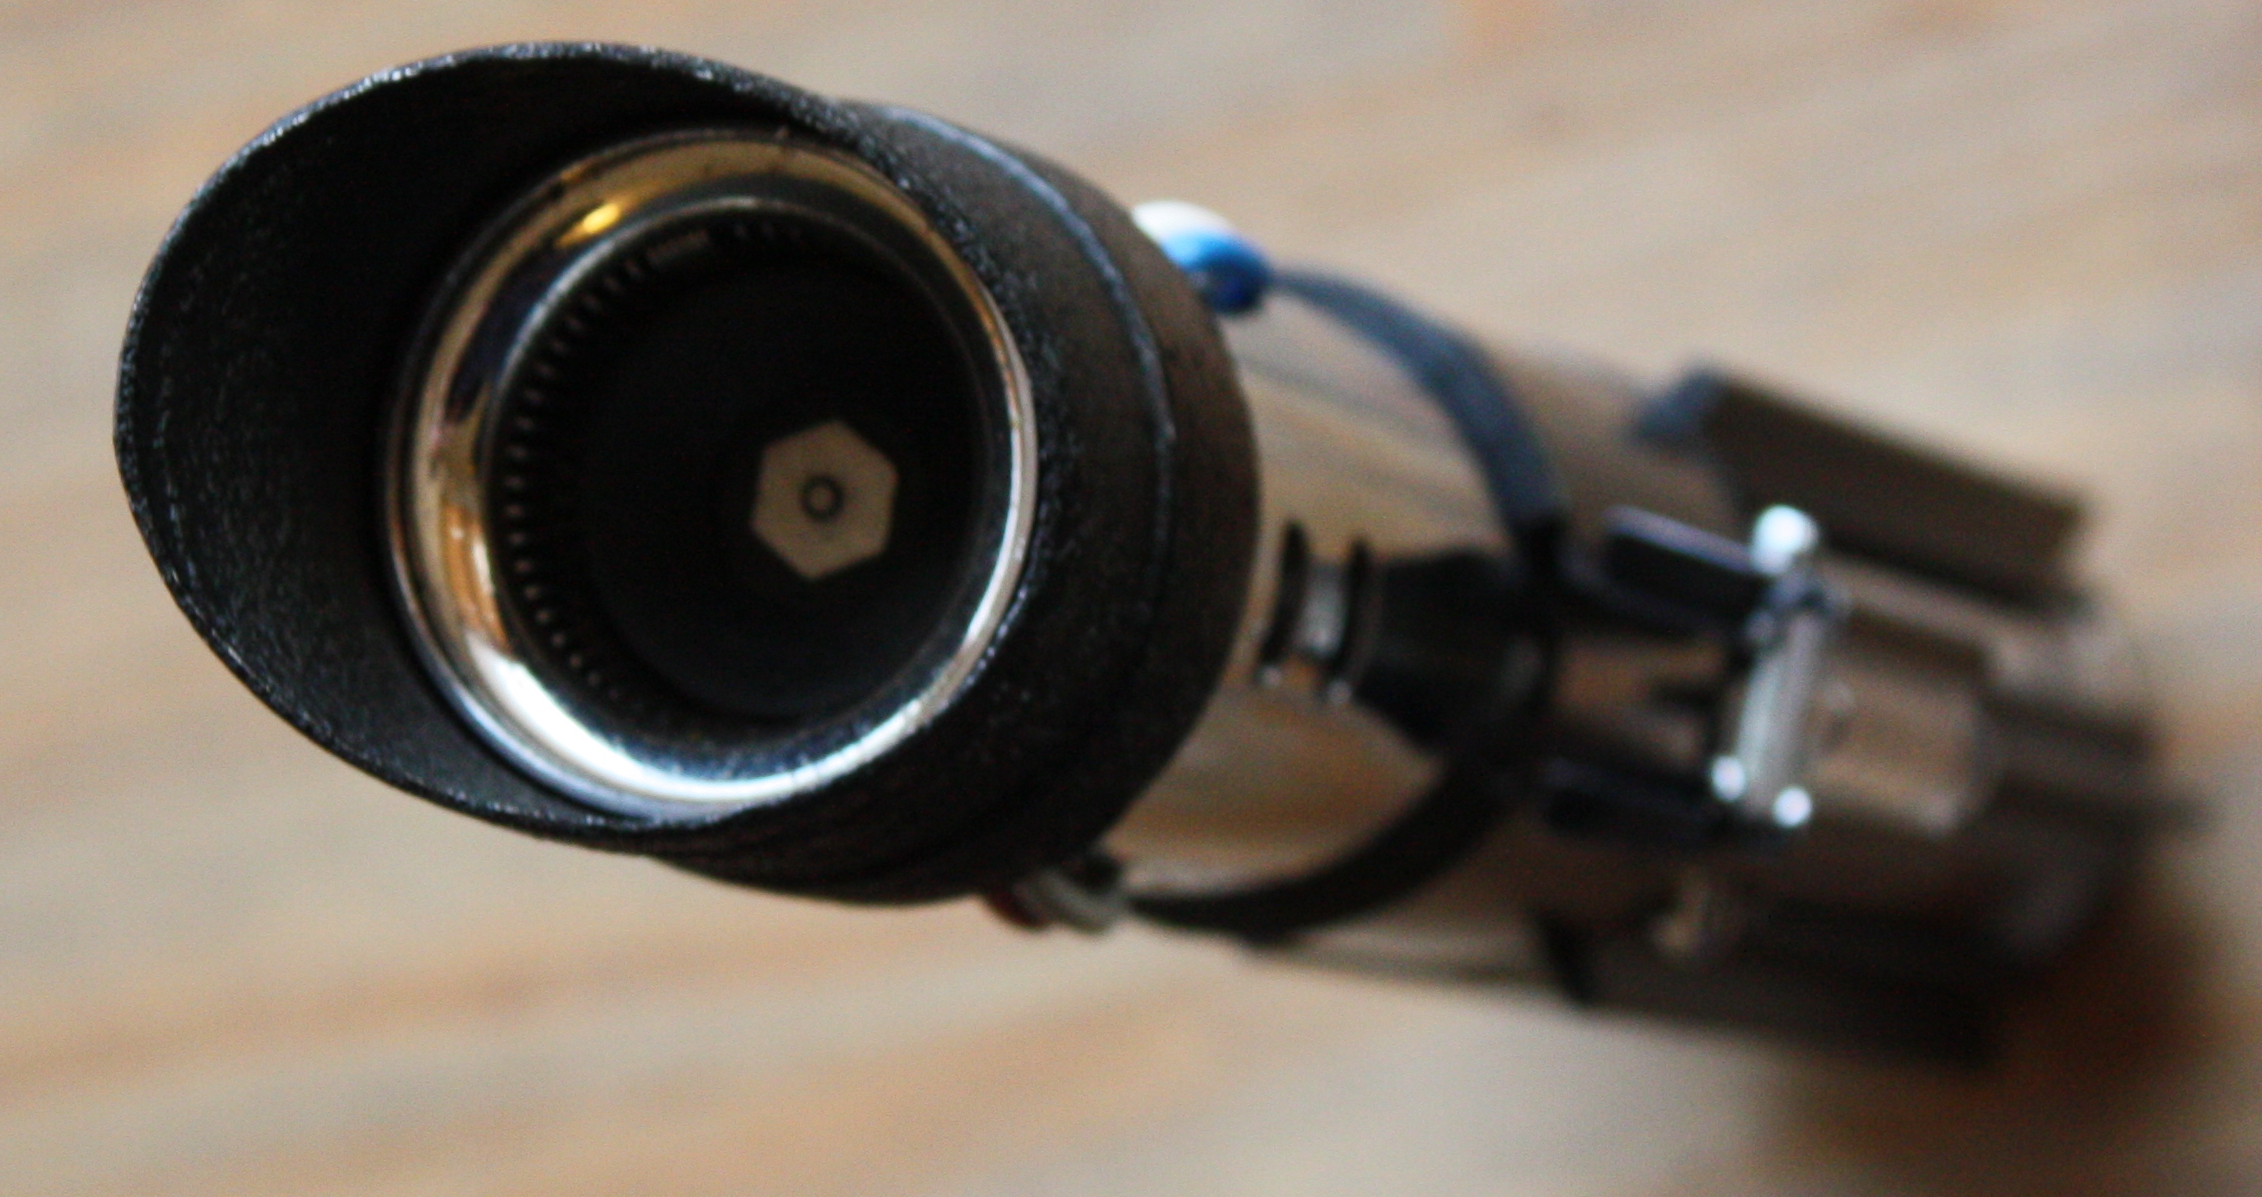
The next part to sort was the screw on end cap. The cap has a black circle in the middle and that circle has three very fine circles grooved into it. Two of my MPPs had this feature and I used the one in the best condition. It was fairly pristine; the other was in bad shape. You’ll be able to see that detail in shots of the finished piece. I also swapped the innards for one slightly less corroded than originally came with the main body but not the most pristine of the three.
The only remaining thing to do was attach the black grips. It used to be thought that these were rubber but it has now been established that these are hard plastic. No one knows for sure what these were but the most popular theory is the they were plastic tracking used in sliding doors on furniture. Several people make replicas of this stuff but the best are generally to be considered Gino’s and Roy Wannawanga’s. They’re extremely similar to one another. I went with Roy’s. I trimmed it to length and stuck it on using two part epoxy resin.
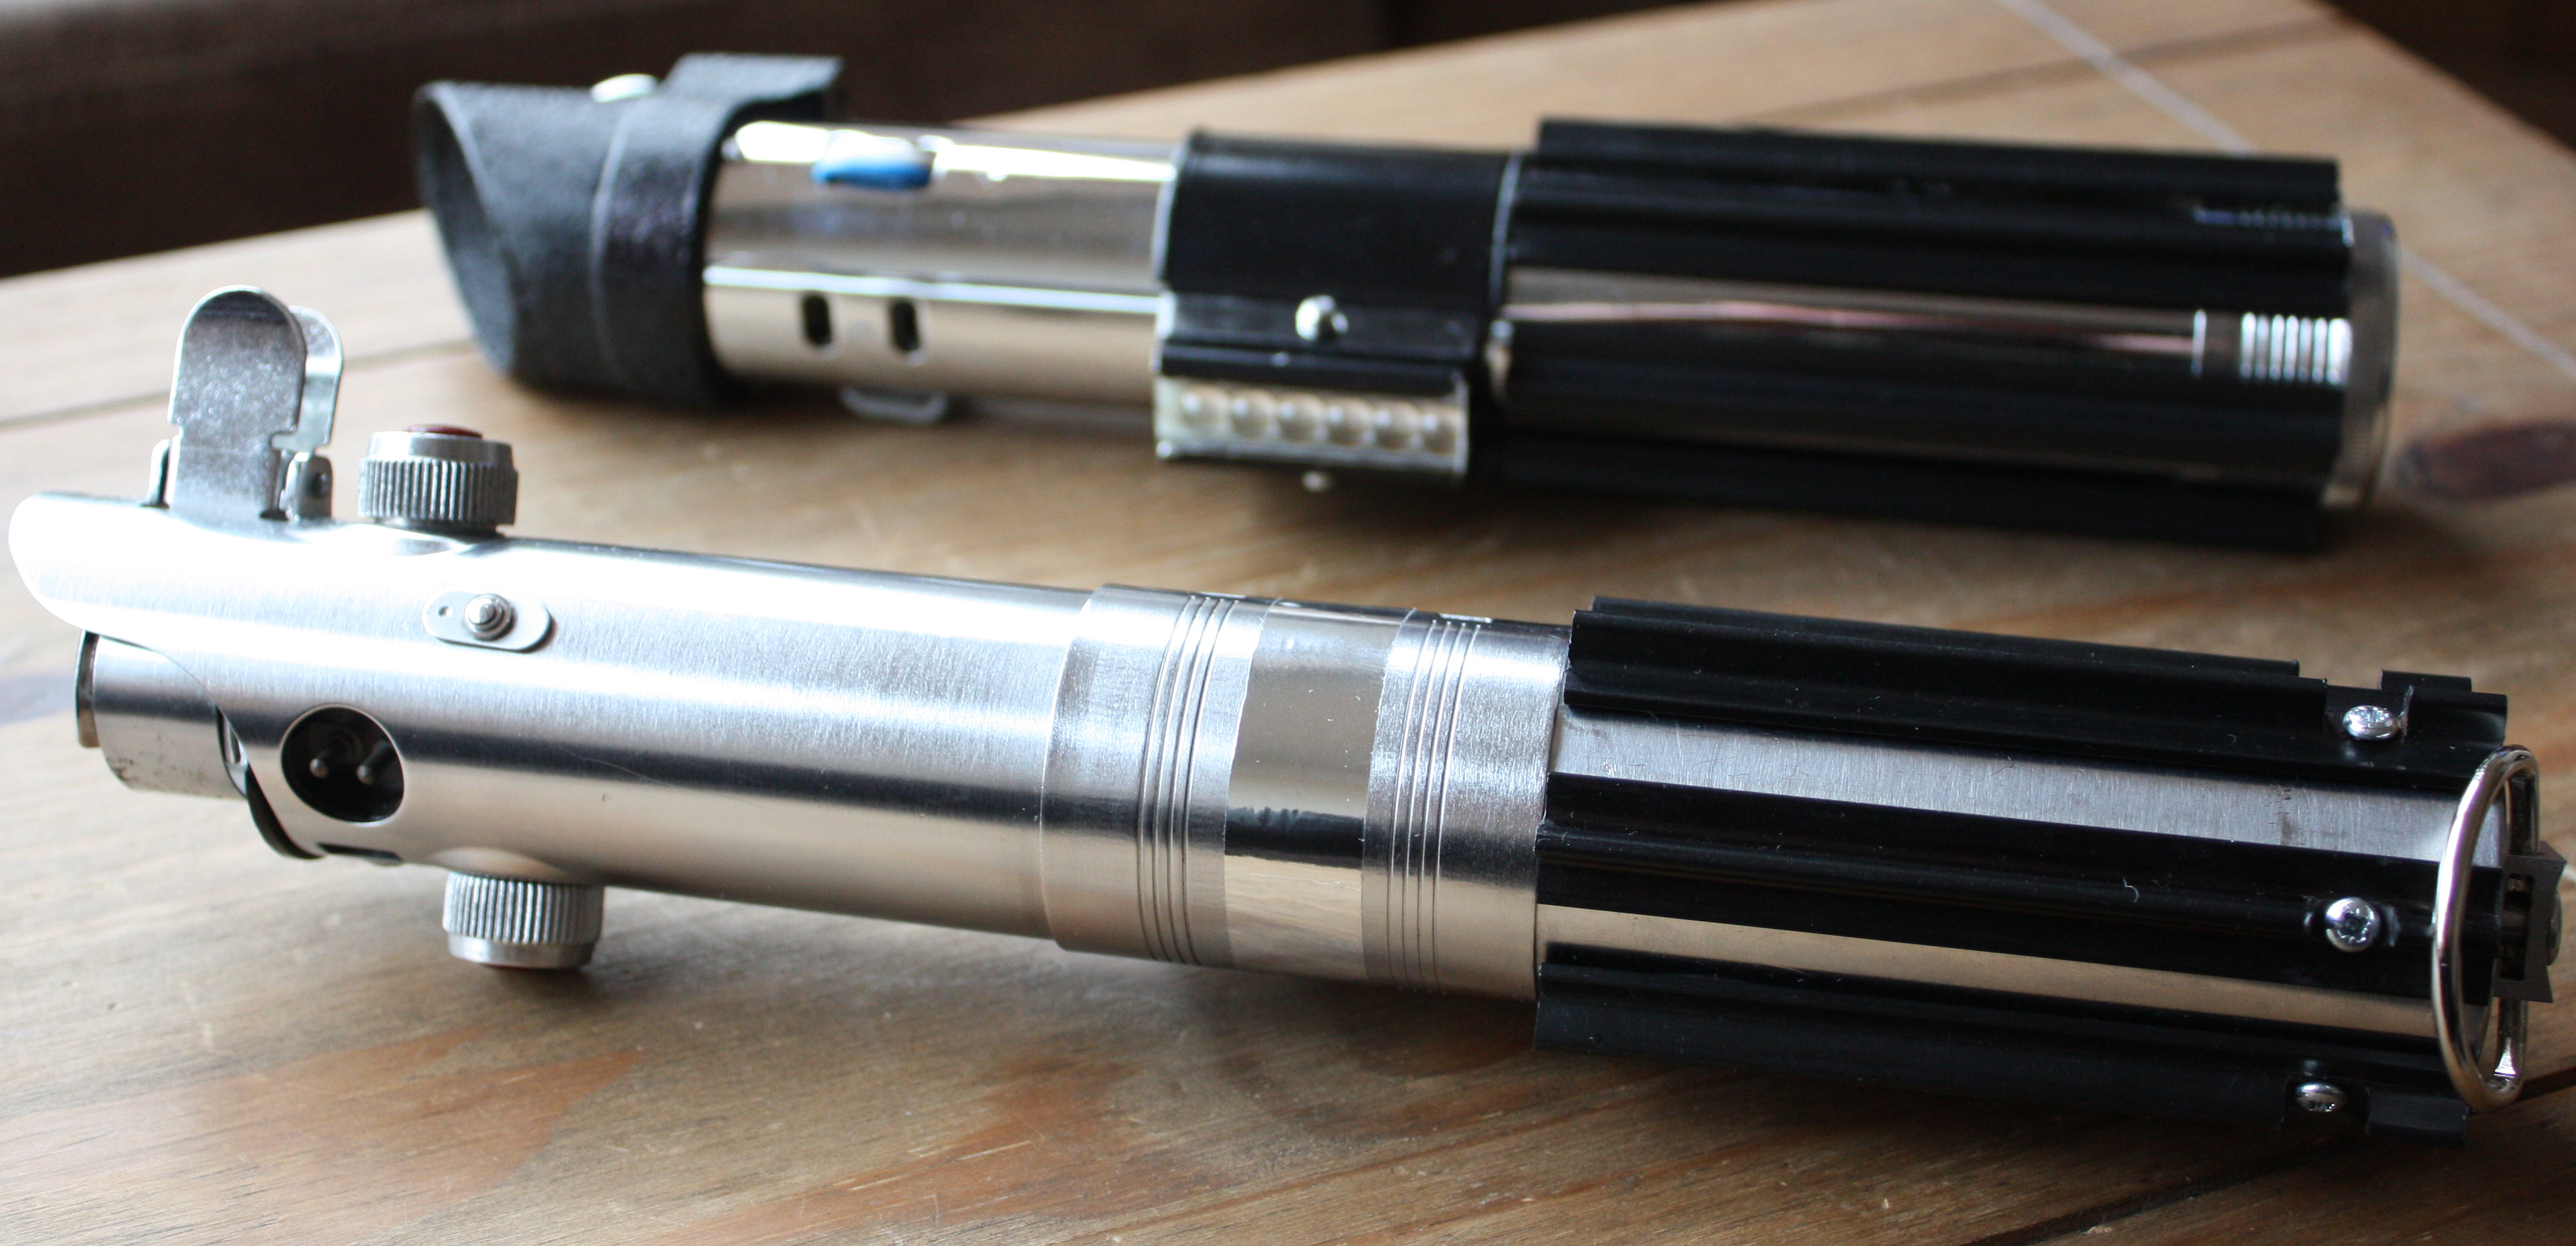
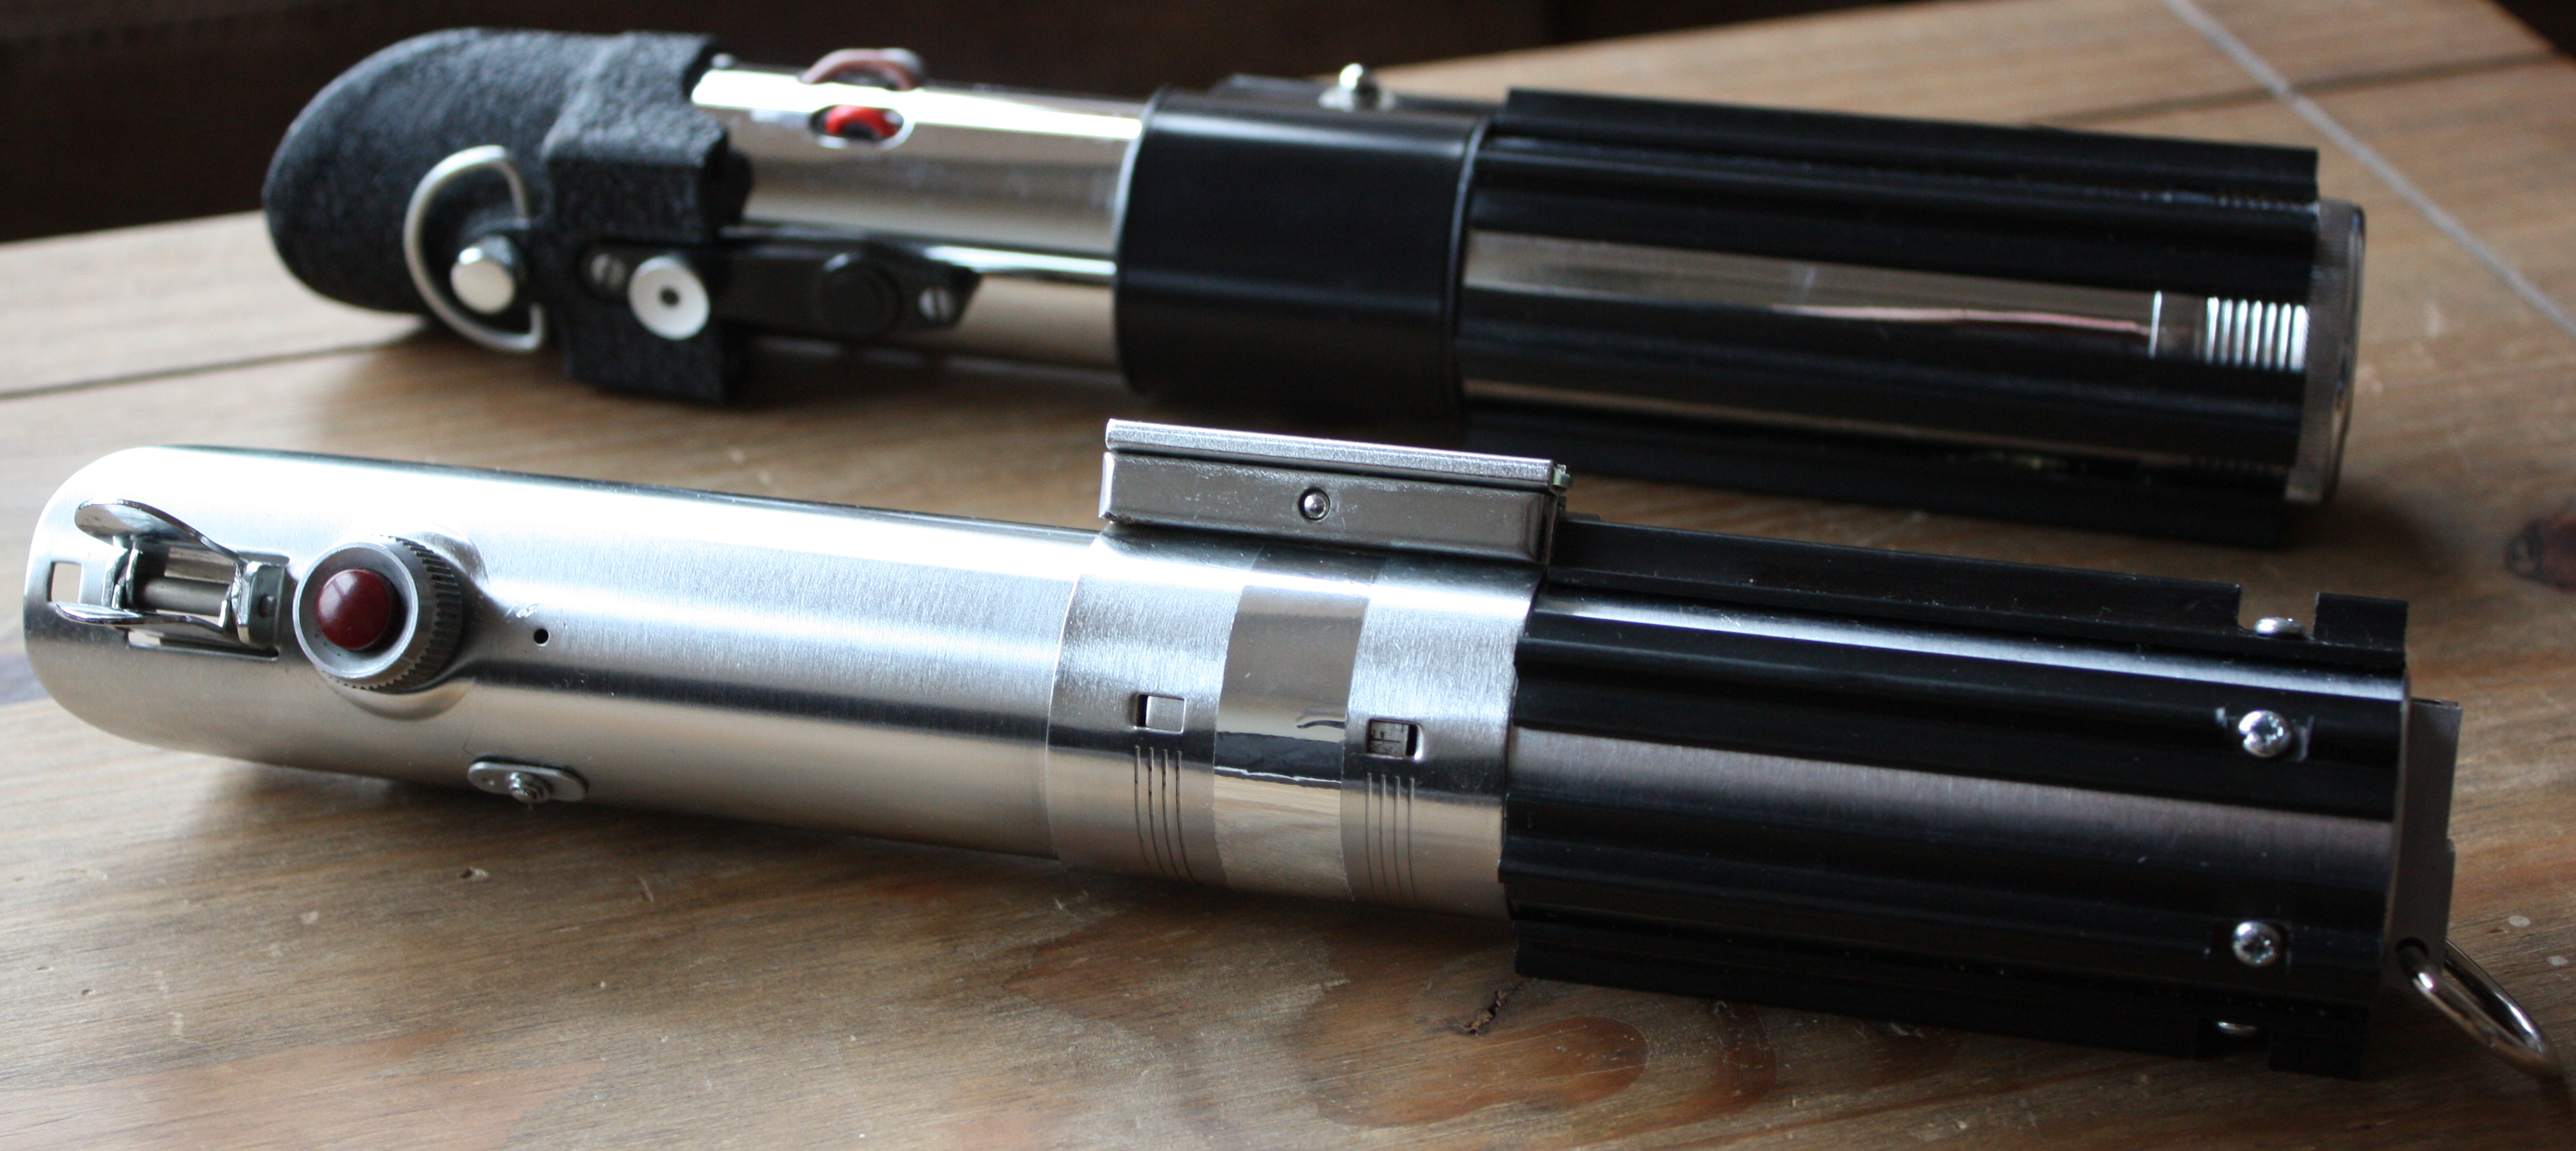
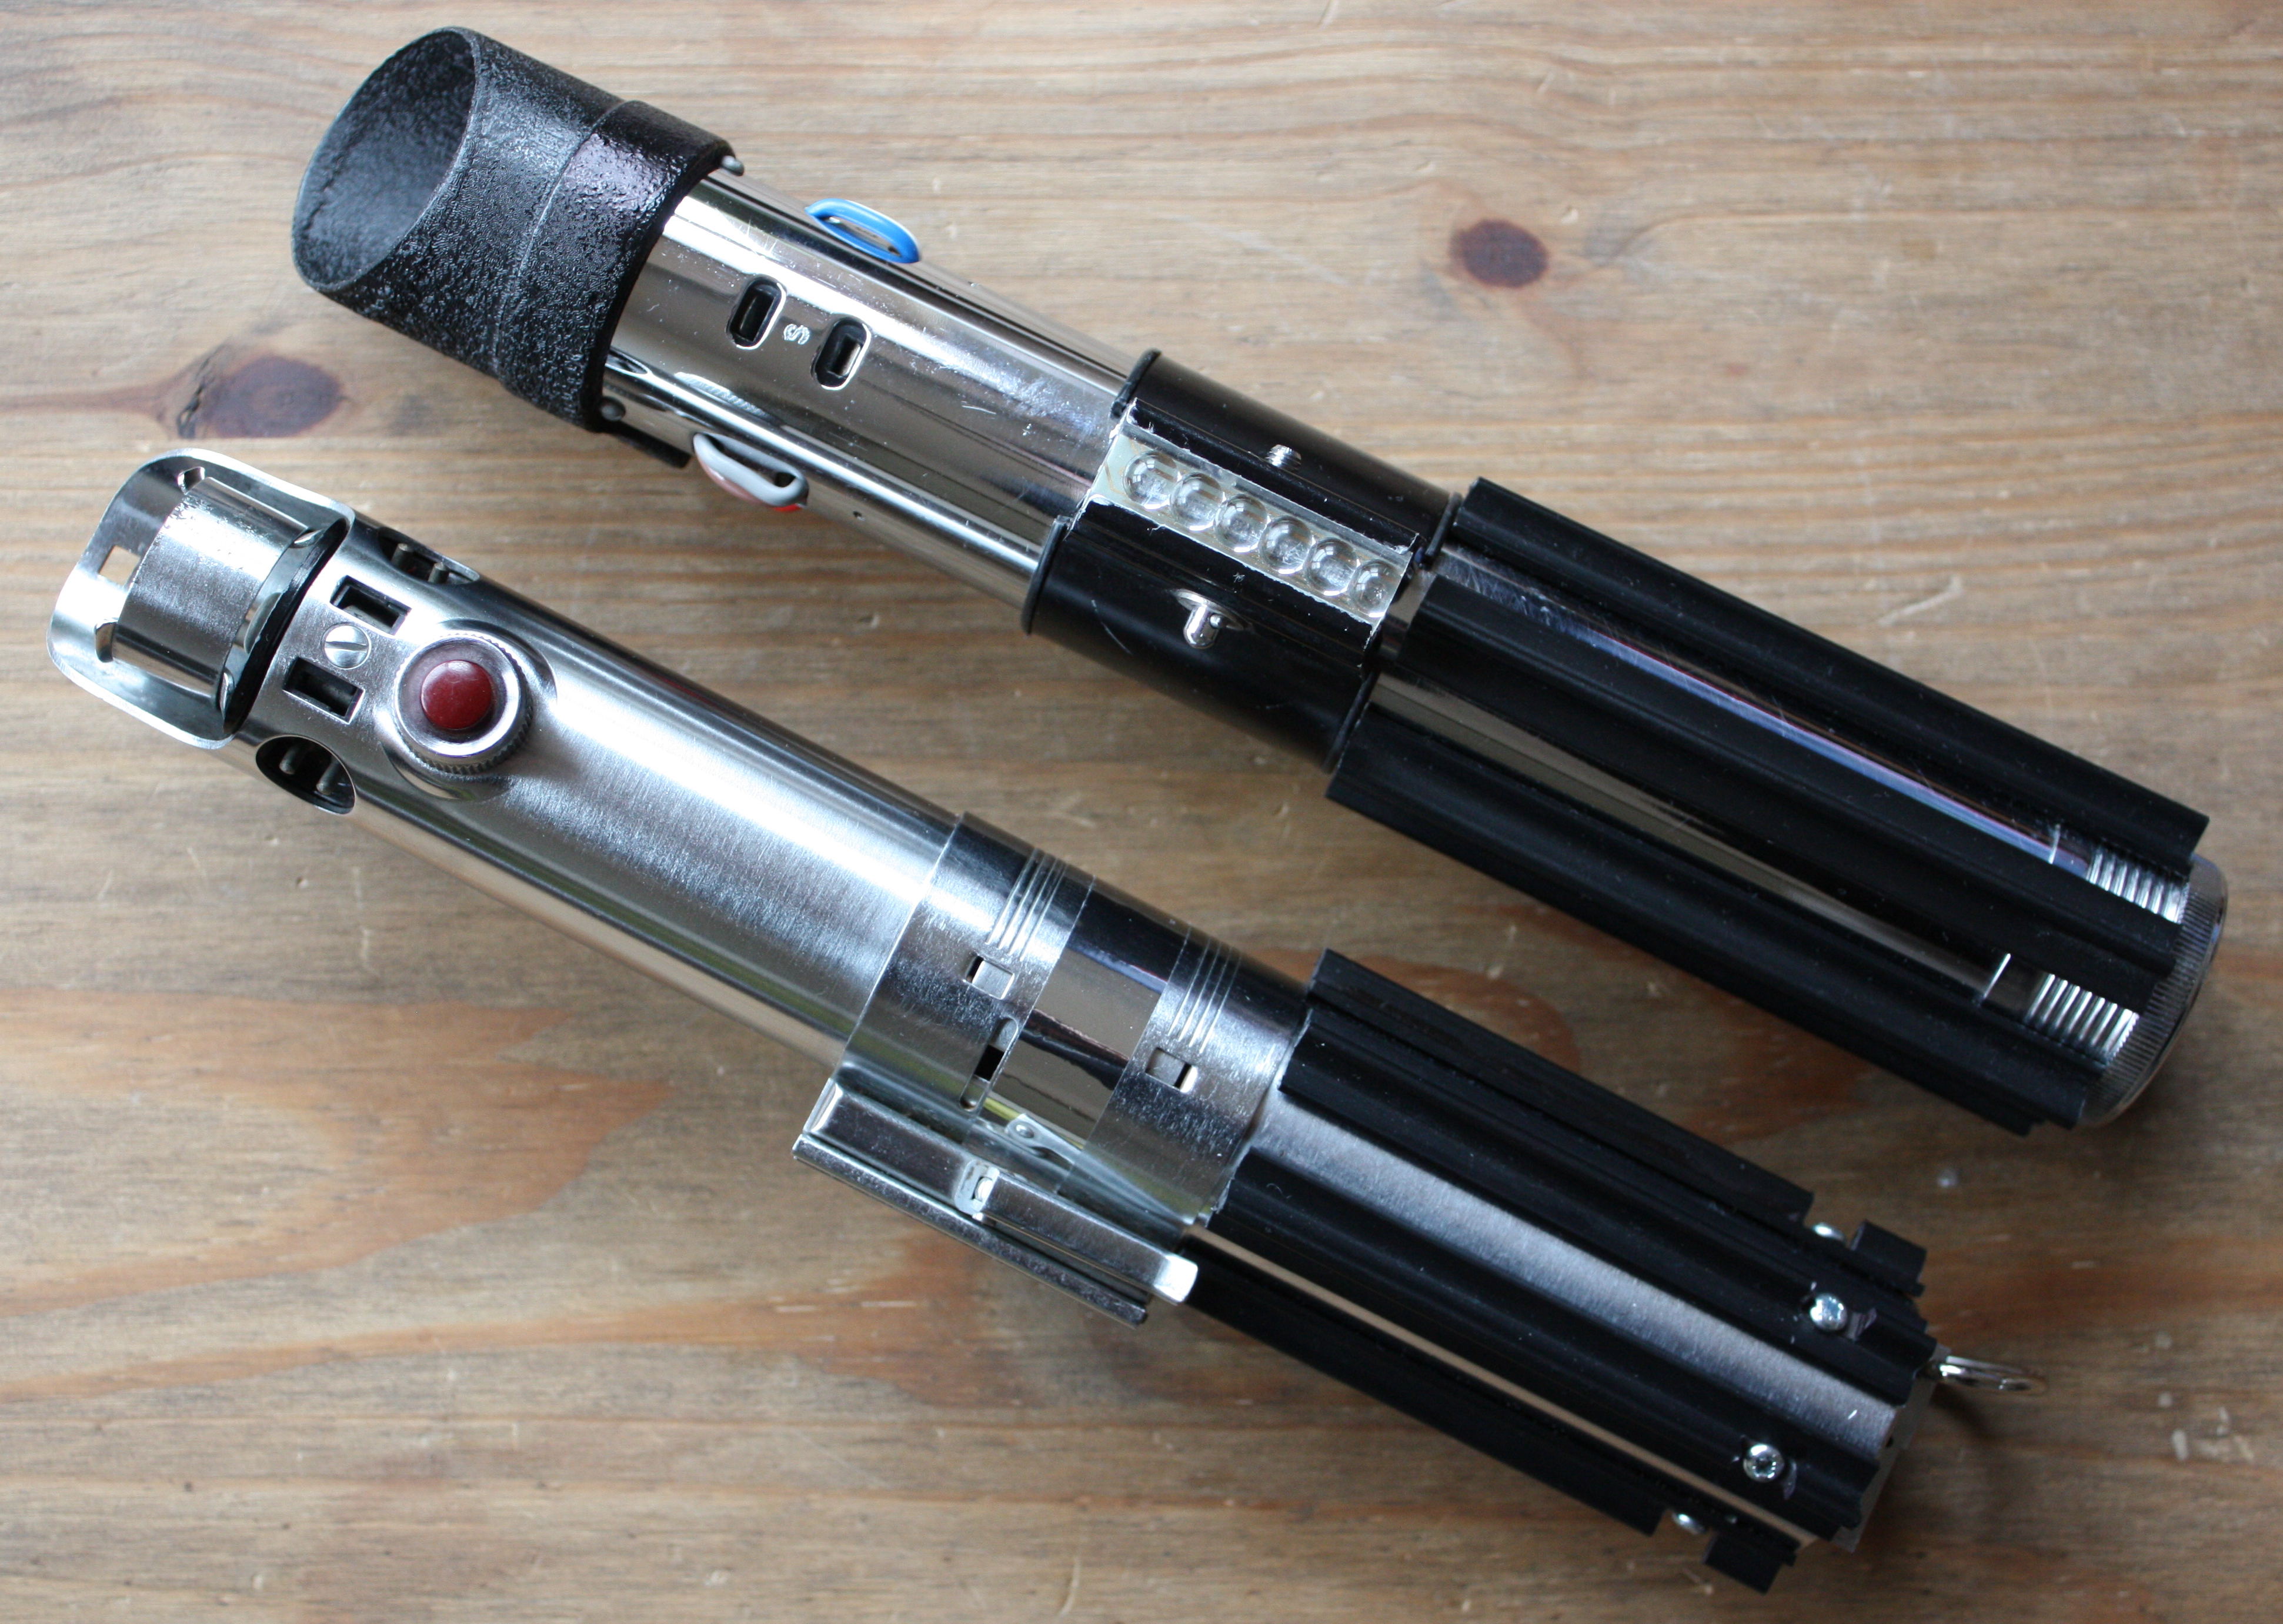
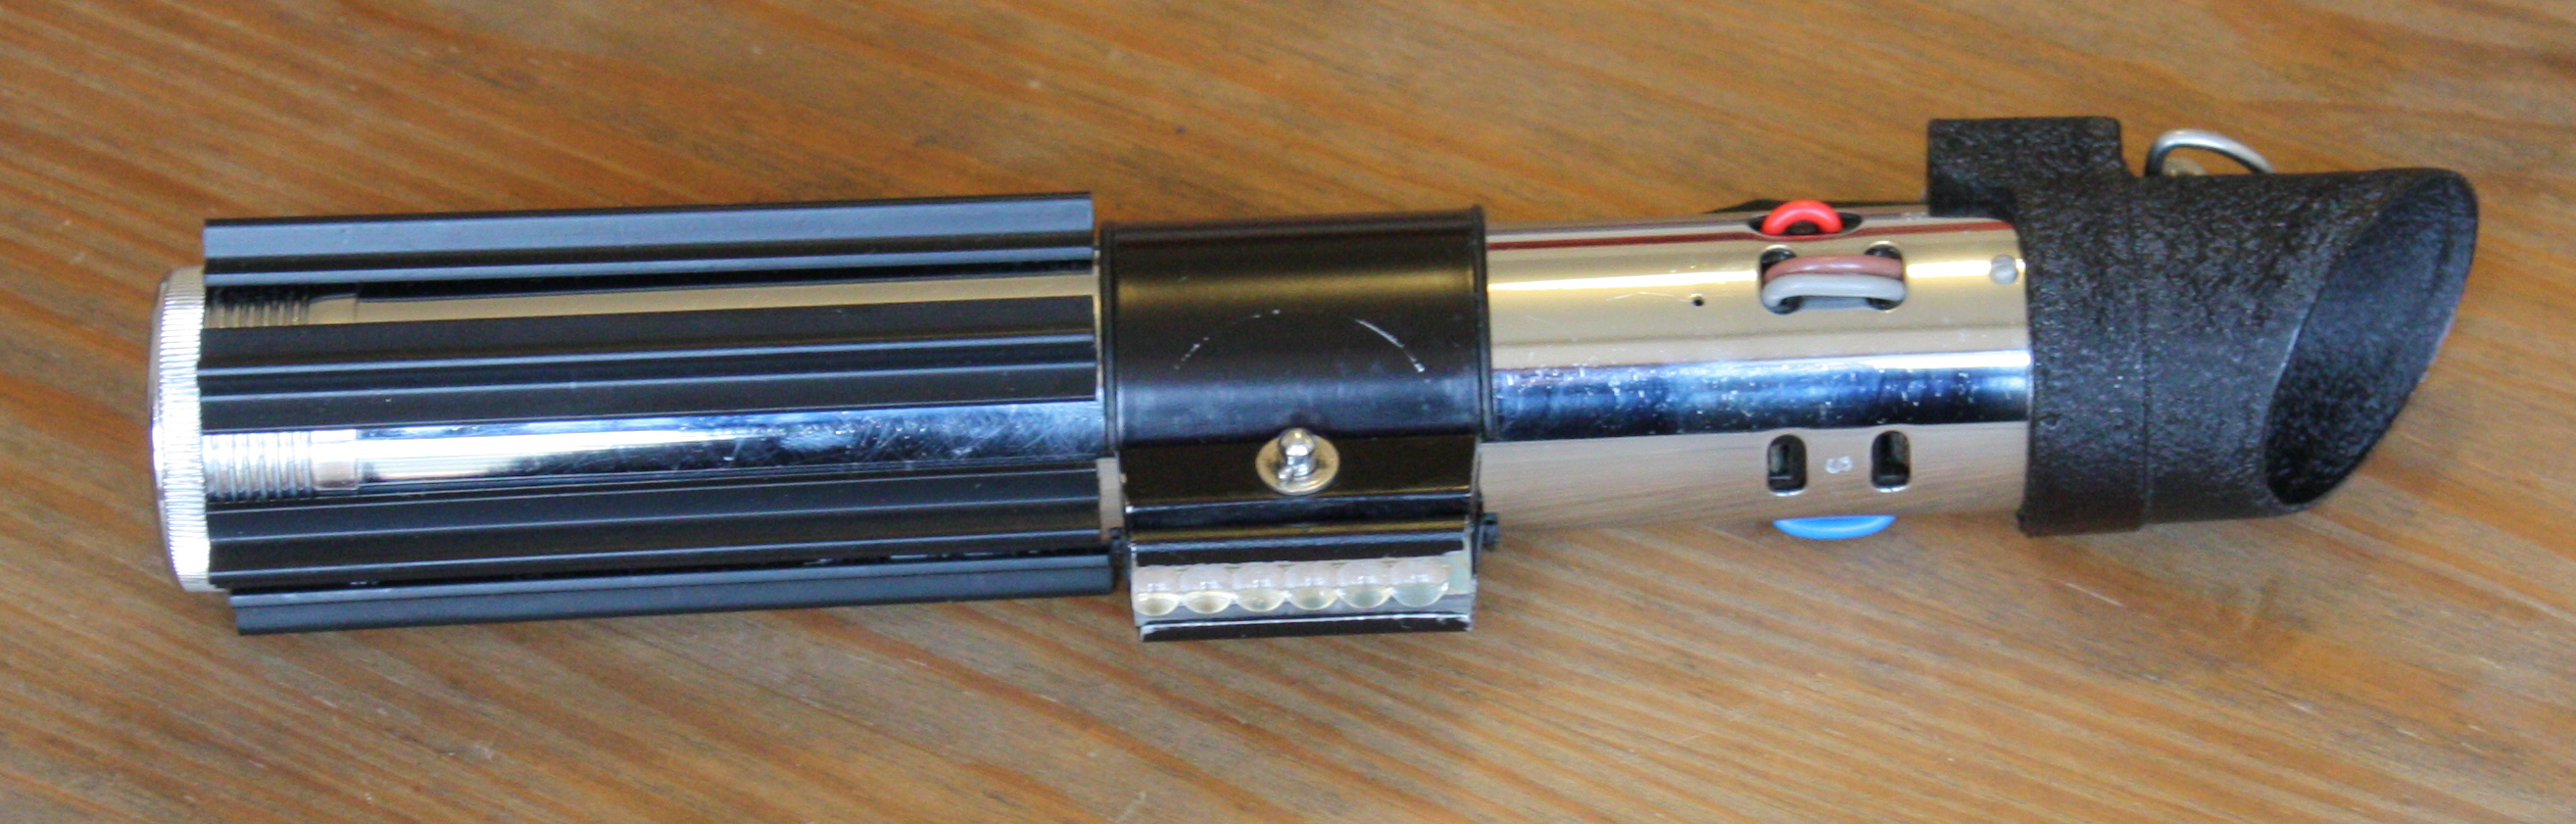
Here’s the finished lightsaber.
Darth Vader Empire Stikes Back Lightsaber made from a real MPP.


The Luke Skywalker ESB Lightsaber
Luke’s Lightsaber in the Empire Strikes Back and the original Star Wars is based on a Graflex Flash unit. From a story point of view this is supposed to be the same weapon owned by Anakin years before and that later ends in Rey’s possession in The Force Awakens. Thankfully Graflex Flash units are pretty common. Unfortunately the arrival of new Star Wars films has driven prices of these Graflexes through the roof and now they frequently command prices in excessof £700 but luckily for me I bought this one seven years ago for eighty seven quid. MPP flashes being rarer are even more costly. There’s an incorrect MMP model on ebay right now with bids over £1100; I would expect the correct versions could now reach thousands. Several people have asked to buy mine. I digress.
There are believed to have been several Luke ESB lightsabers in existence, probably four. Only one exists in the Lucasfilm archives at Skywalker Ranch and it is generally referred to as the ‘Ranch Saber’. Certain features of the Ranch saber lend themselves to it being the same as the lightsaber prominently displayed on Luke’s belt whilst on Dagobah. One particular feature tells us the Ranch saber is definitely not the saber that is seen half buried in the snow in the Hoth cave. My build is an amalgamation of the different versions and, I believe, the prop as it woudl have started before bit fell off and became lost during filmings.
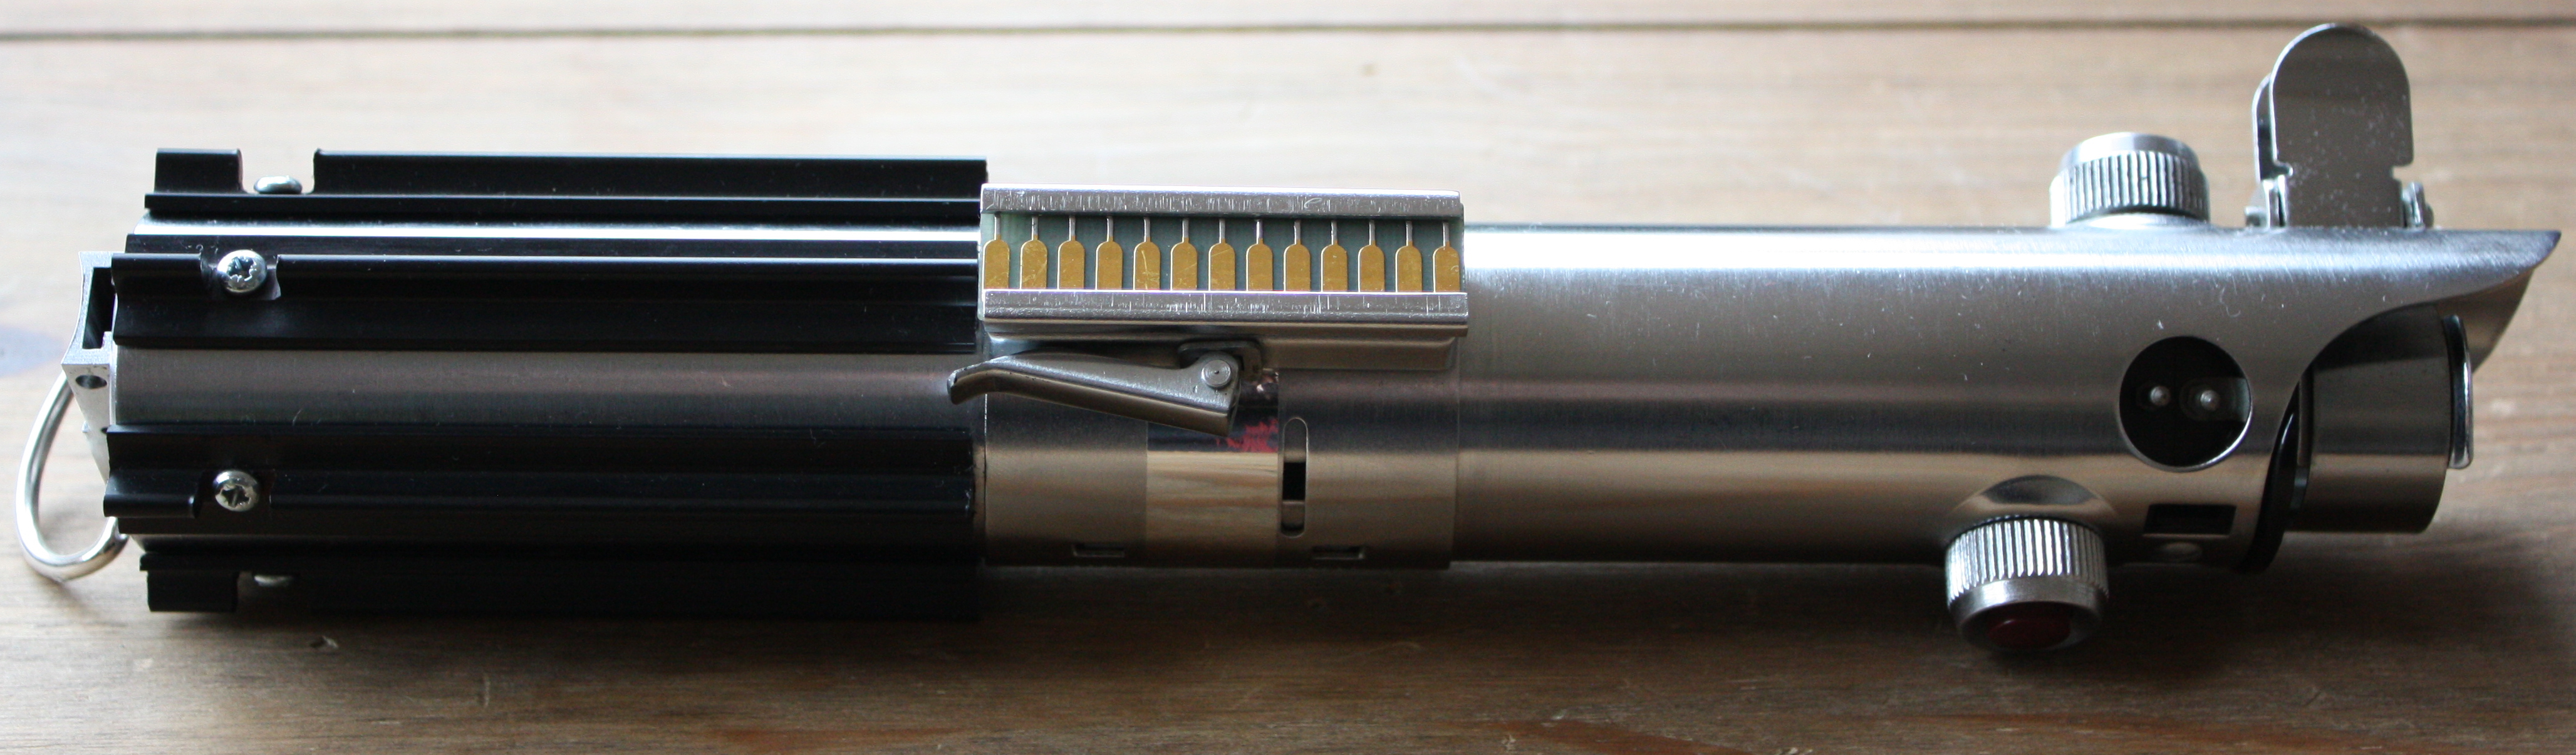
This is my unaltered Graflex flash.
The Luke ESB lightsaber is a little more complicated than the version seen in Star Wars and a trickier to make than that version. Once the reflector is removed there’s a small tab rivetted under the read button on the rear that needs to be cut off and then the red button replaced in the hole. Then the glass eye (above) is removed from the front of the flash unit. That then needs to be replaced with another Graflex Red Button. You can by pretty convincing replicas of these Graflex red buttons because spare real ones are now very expensive however I was fortunate that I bought my spare red button some time ago.
There’s a detailed thread at The RFF about how you can spot the various differences between the fakes and the real ones. Here are mine in situ.
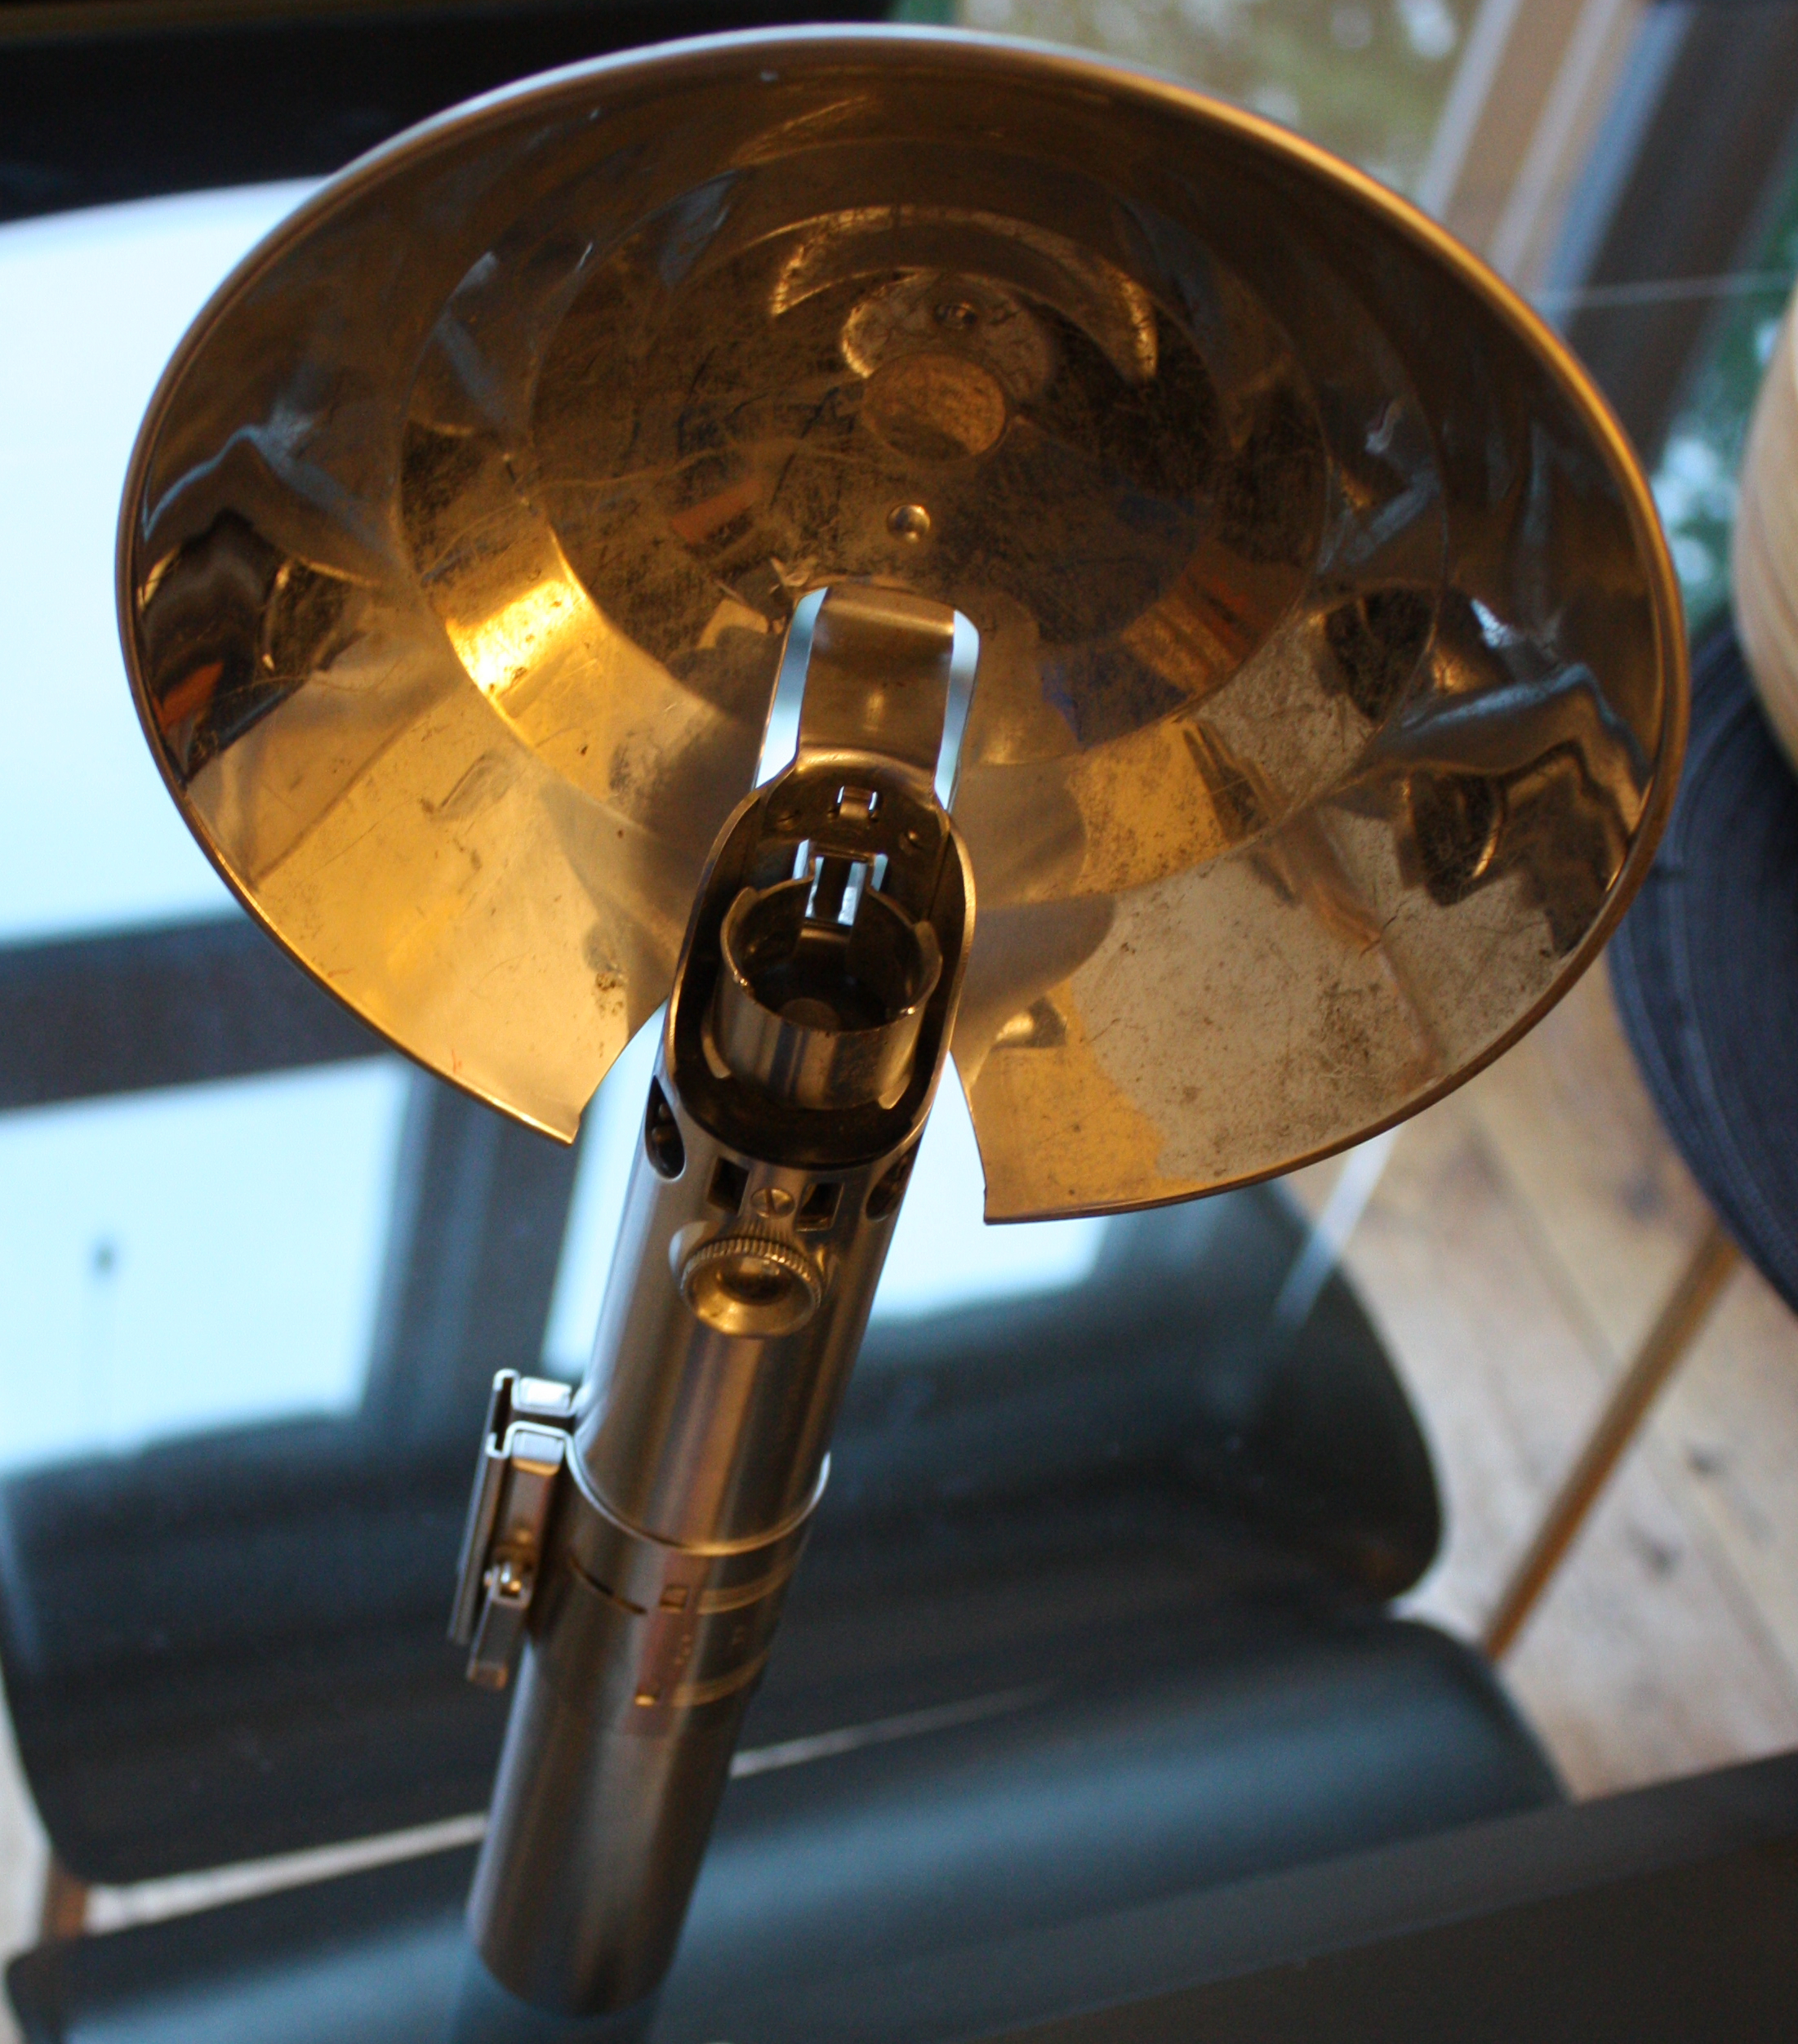
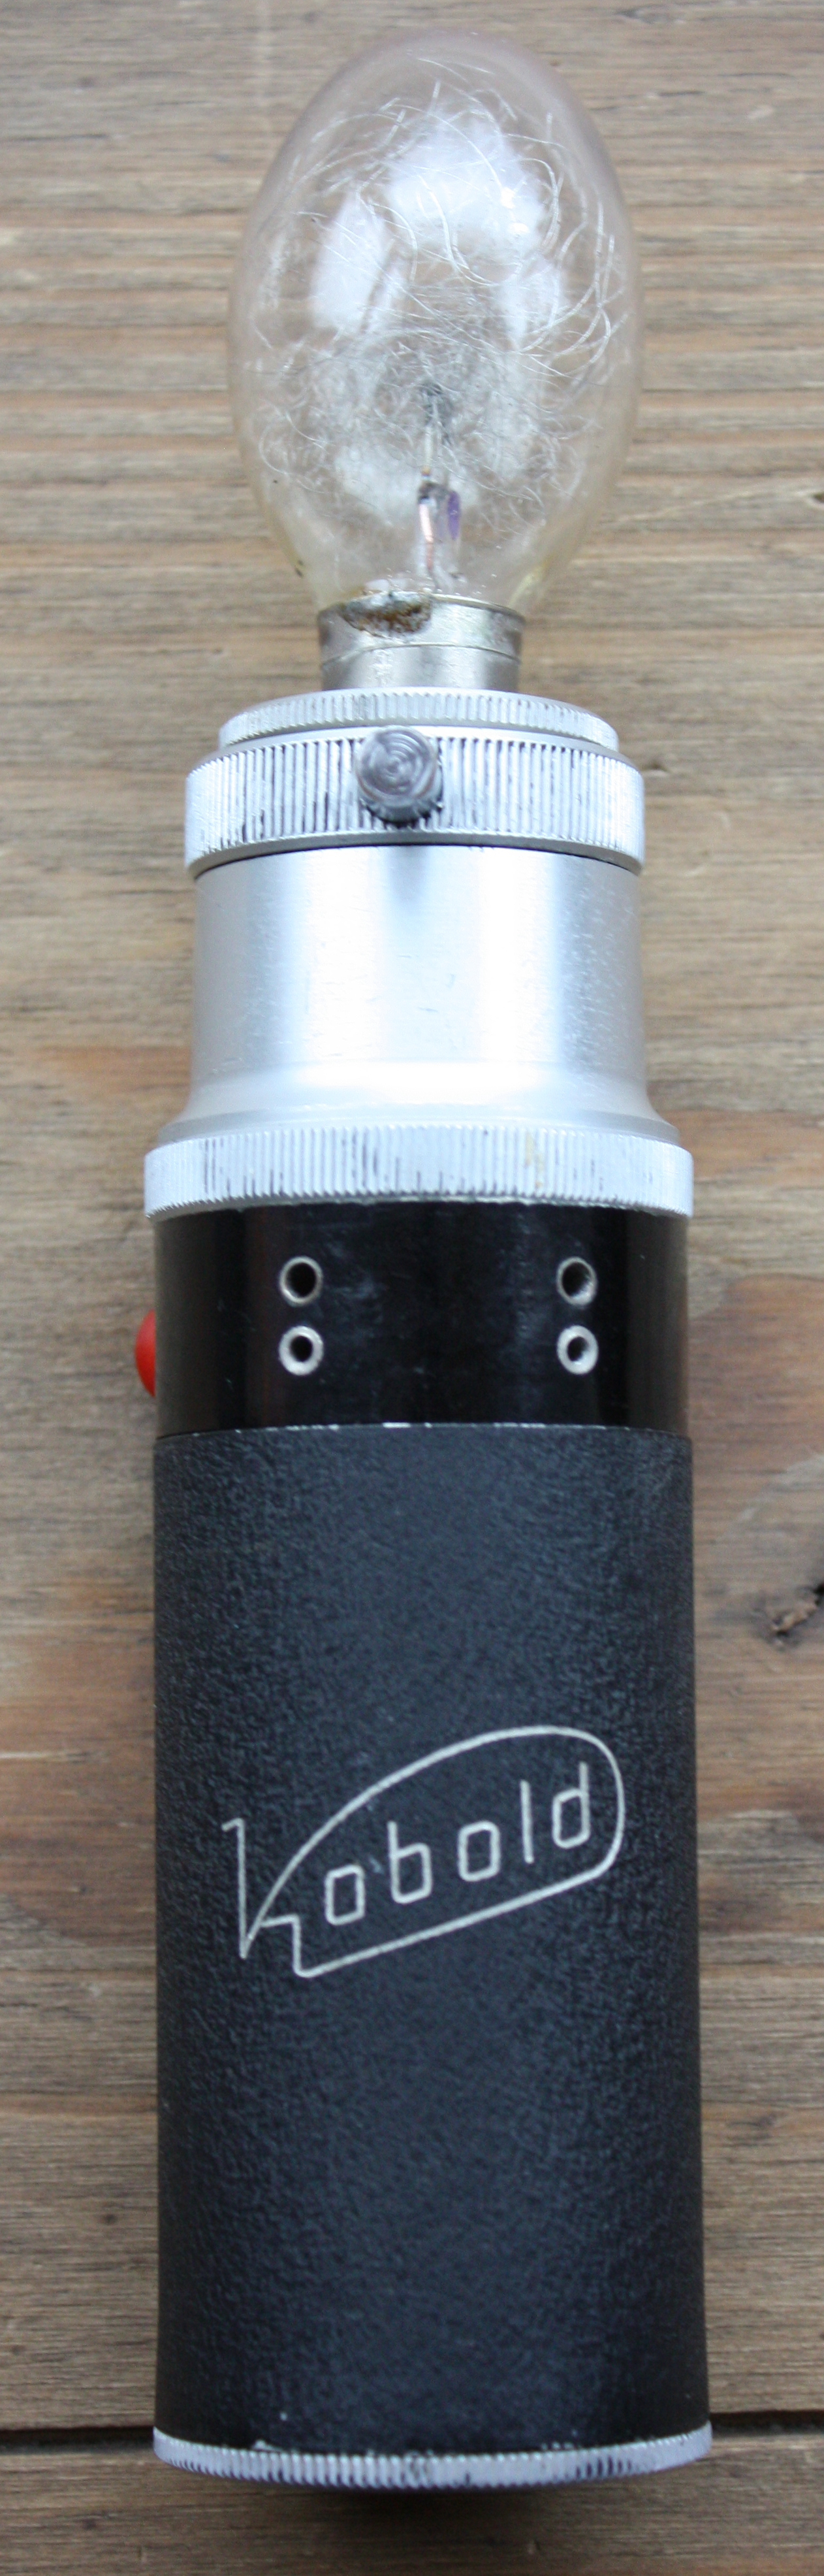
The next step is to attach the D Ring clip housing and D ring to the bottom of the Flash unit. The D ring clip housing is a slide attachment from a Kobold Flash unit like this one:
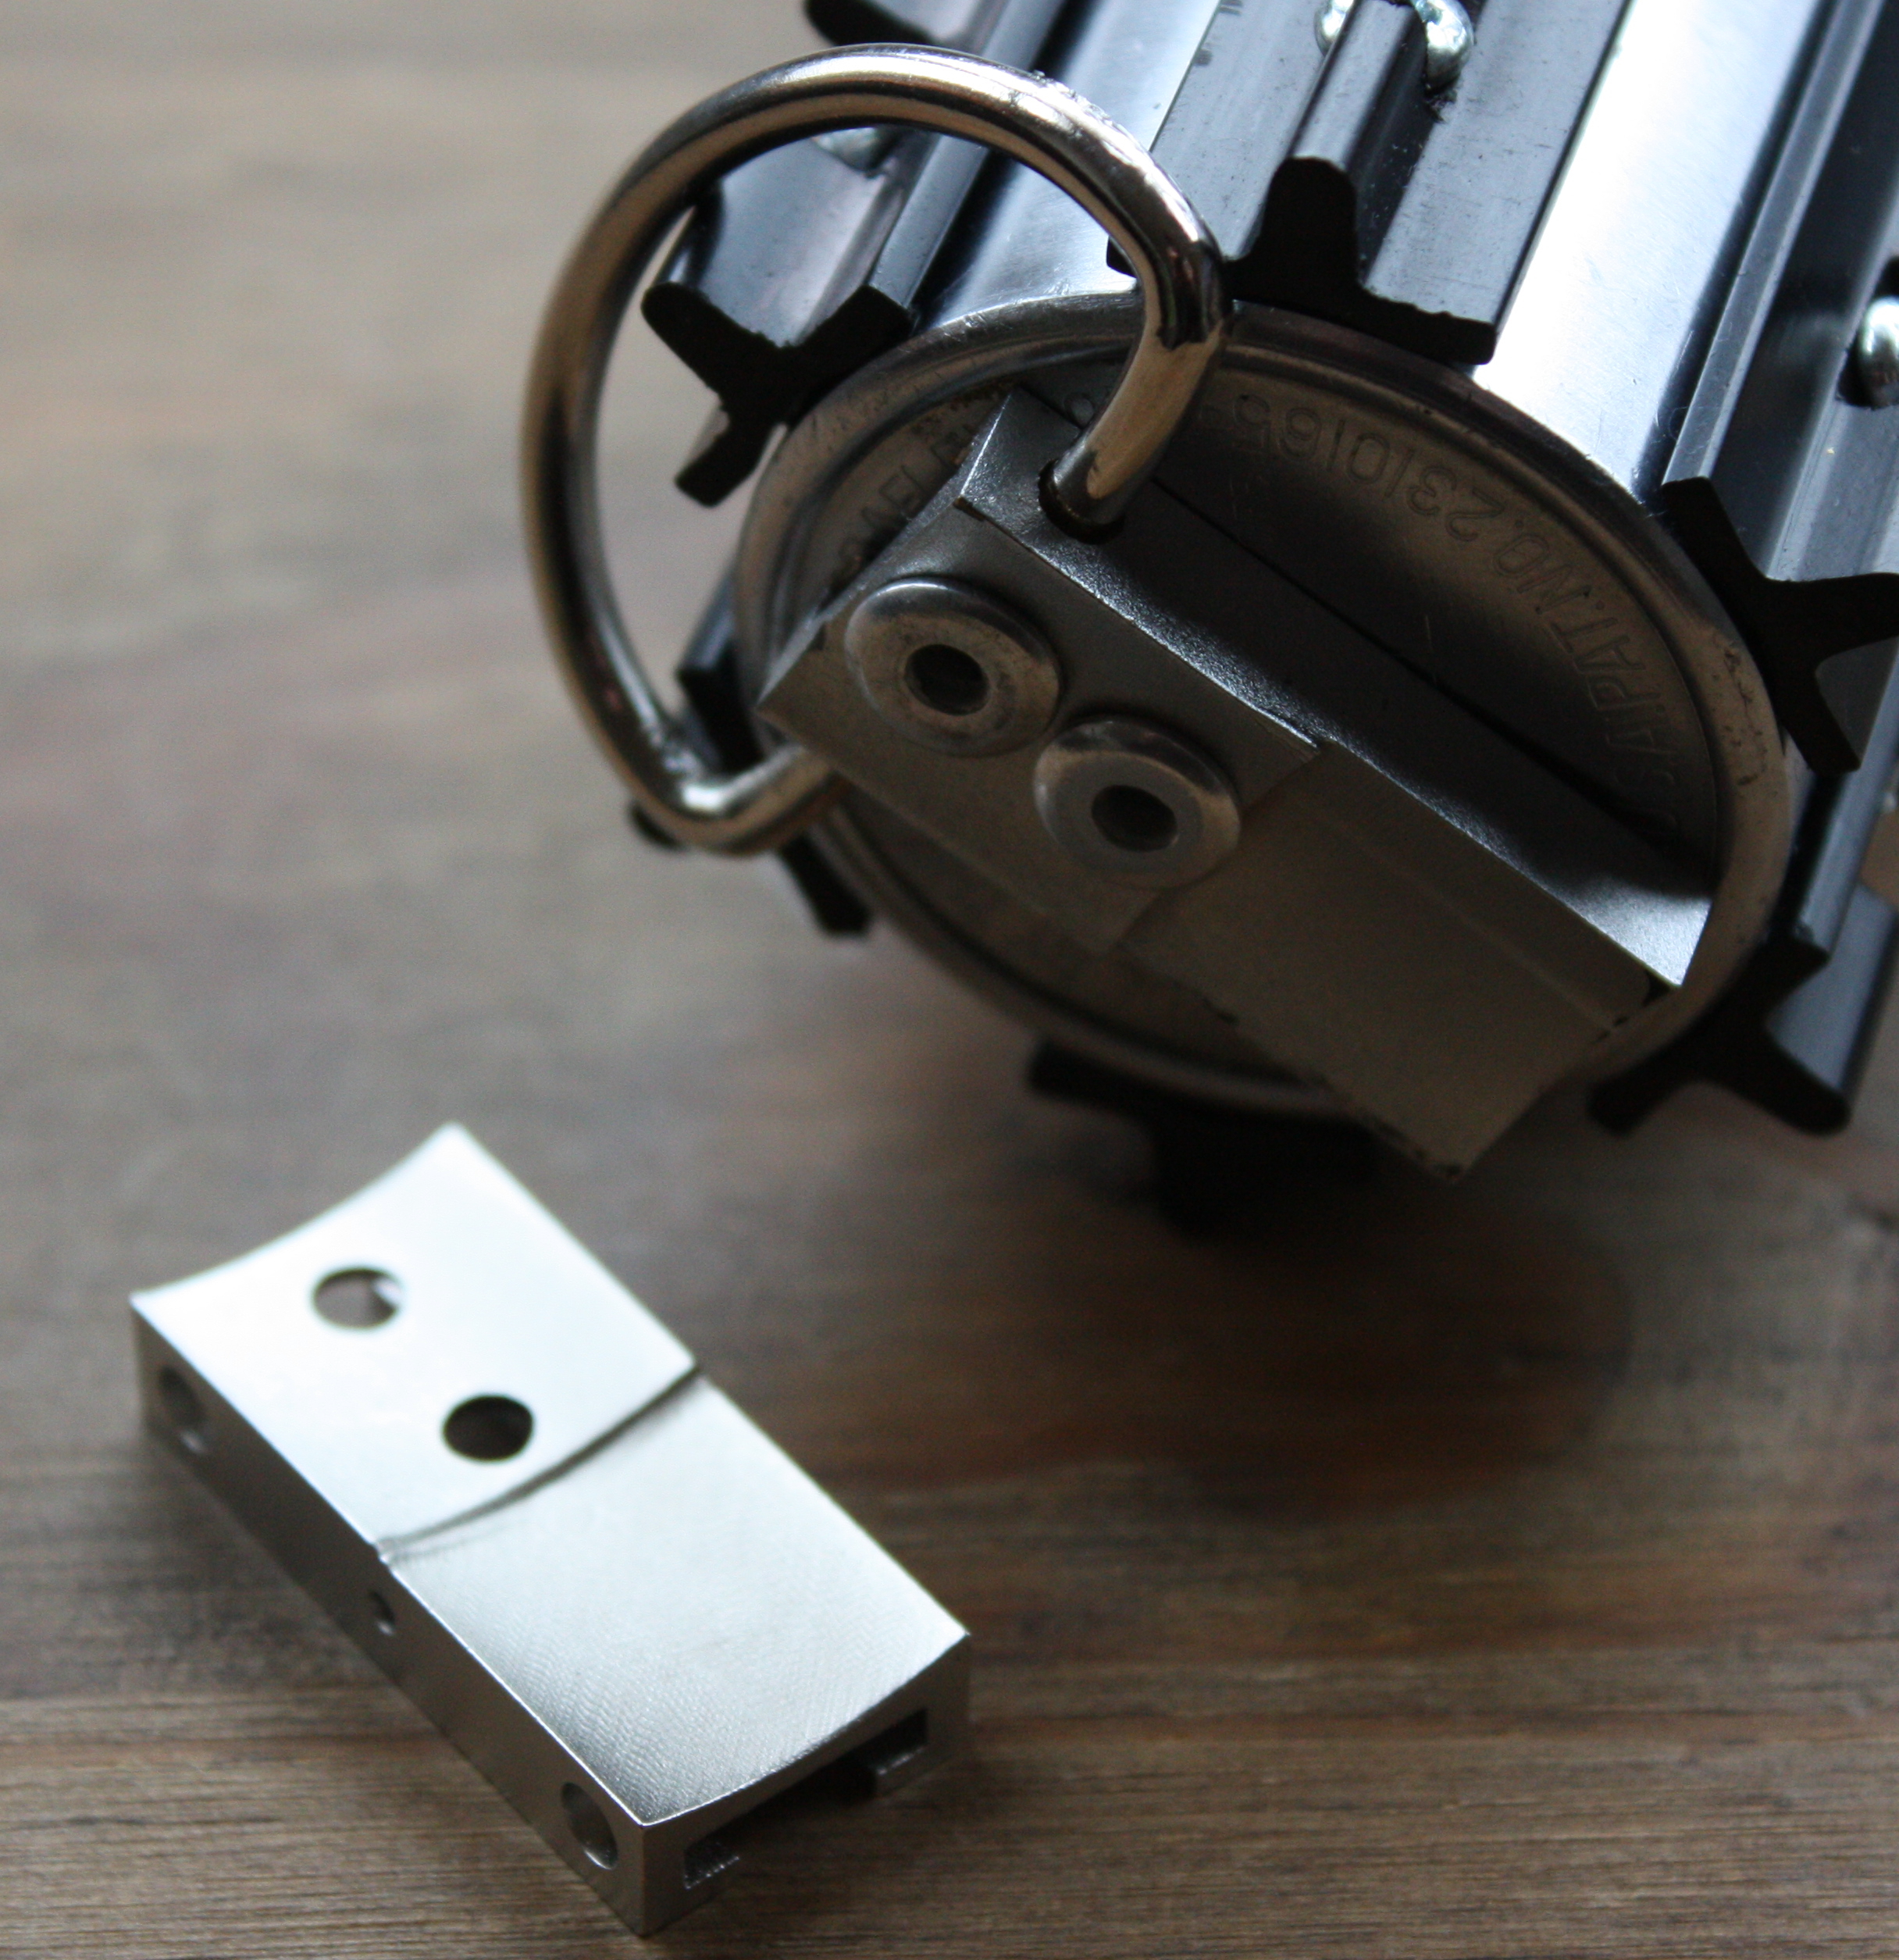
Again, convincing replicas are available. I bought one from Roy Wannawanga and I think his attempt is an absolute triumph. However it’s not exactly the same but even if it was that’s not the point so I used the real one from the Kobold.
Here’s Roy’s replica next to the real one rivetted to the bottom of the flash as per the Hoth Cave Prop.
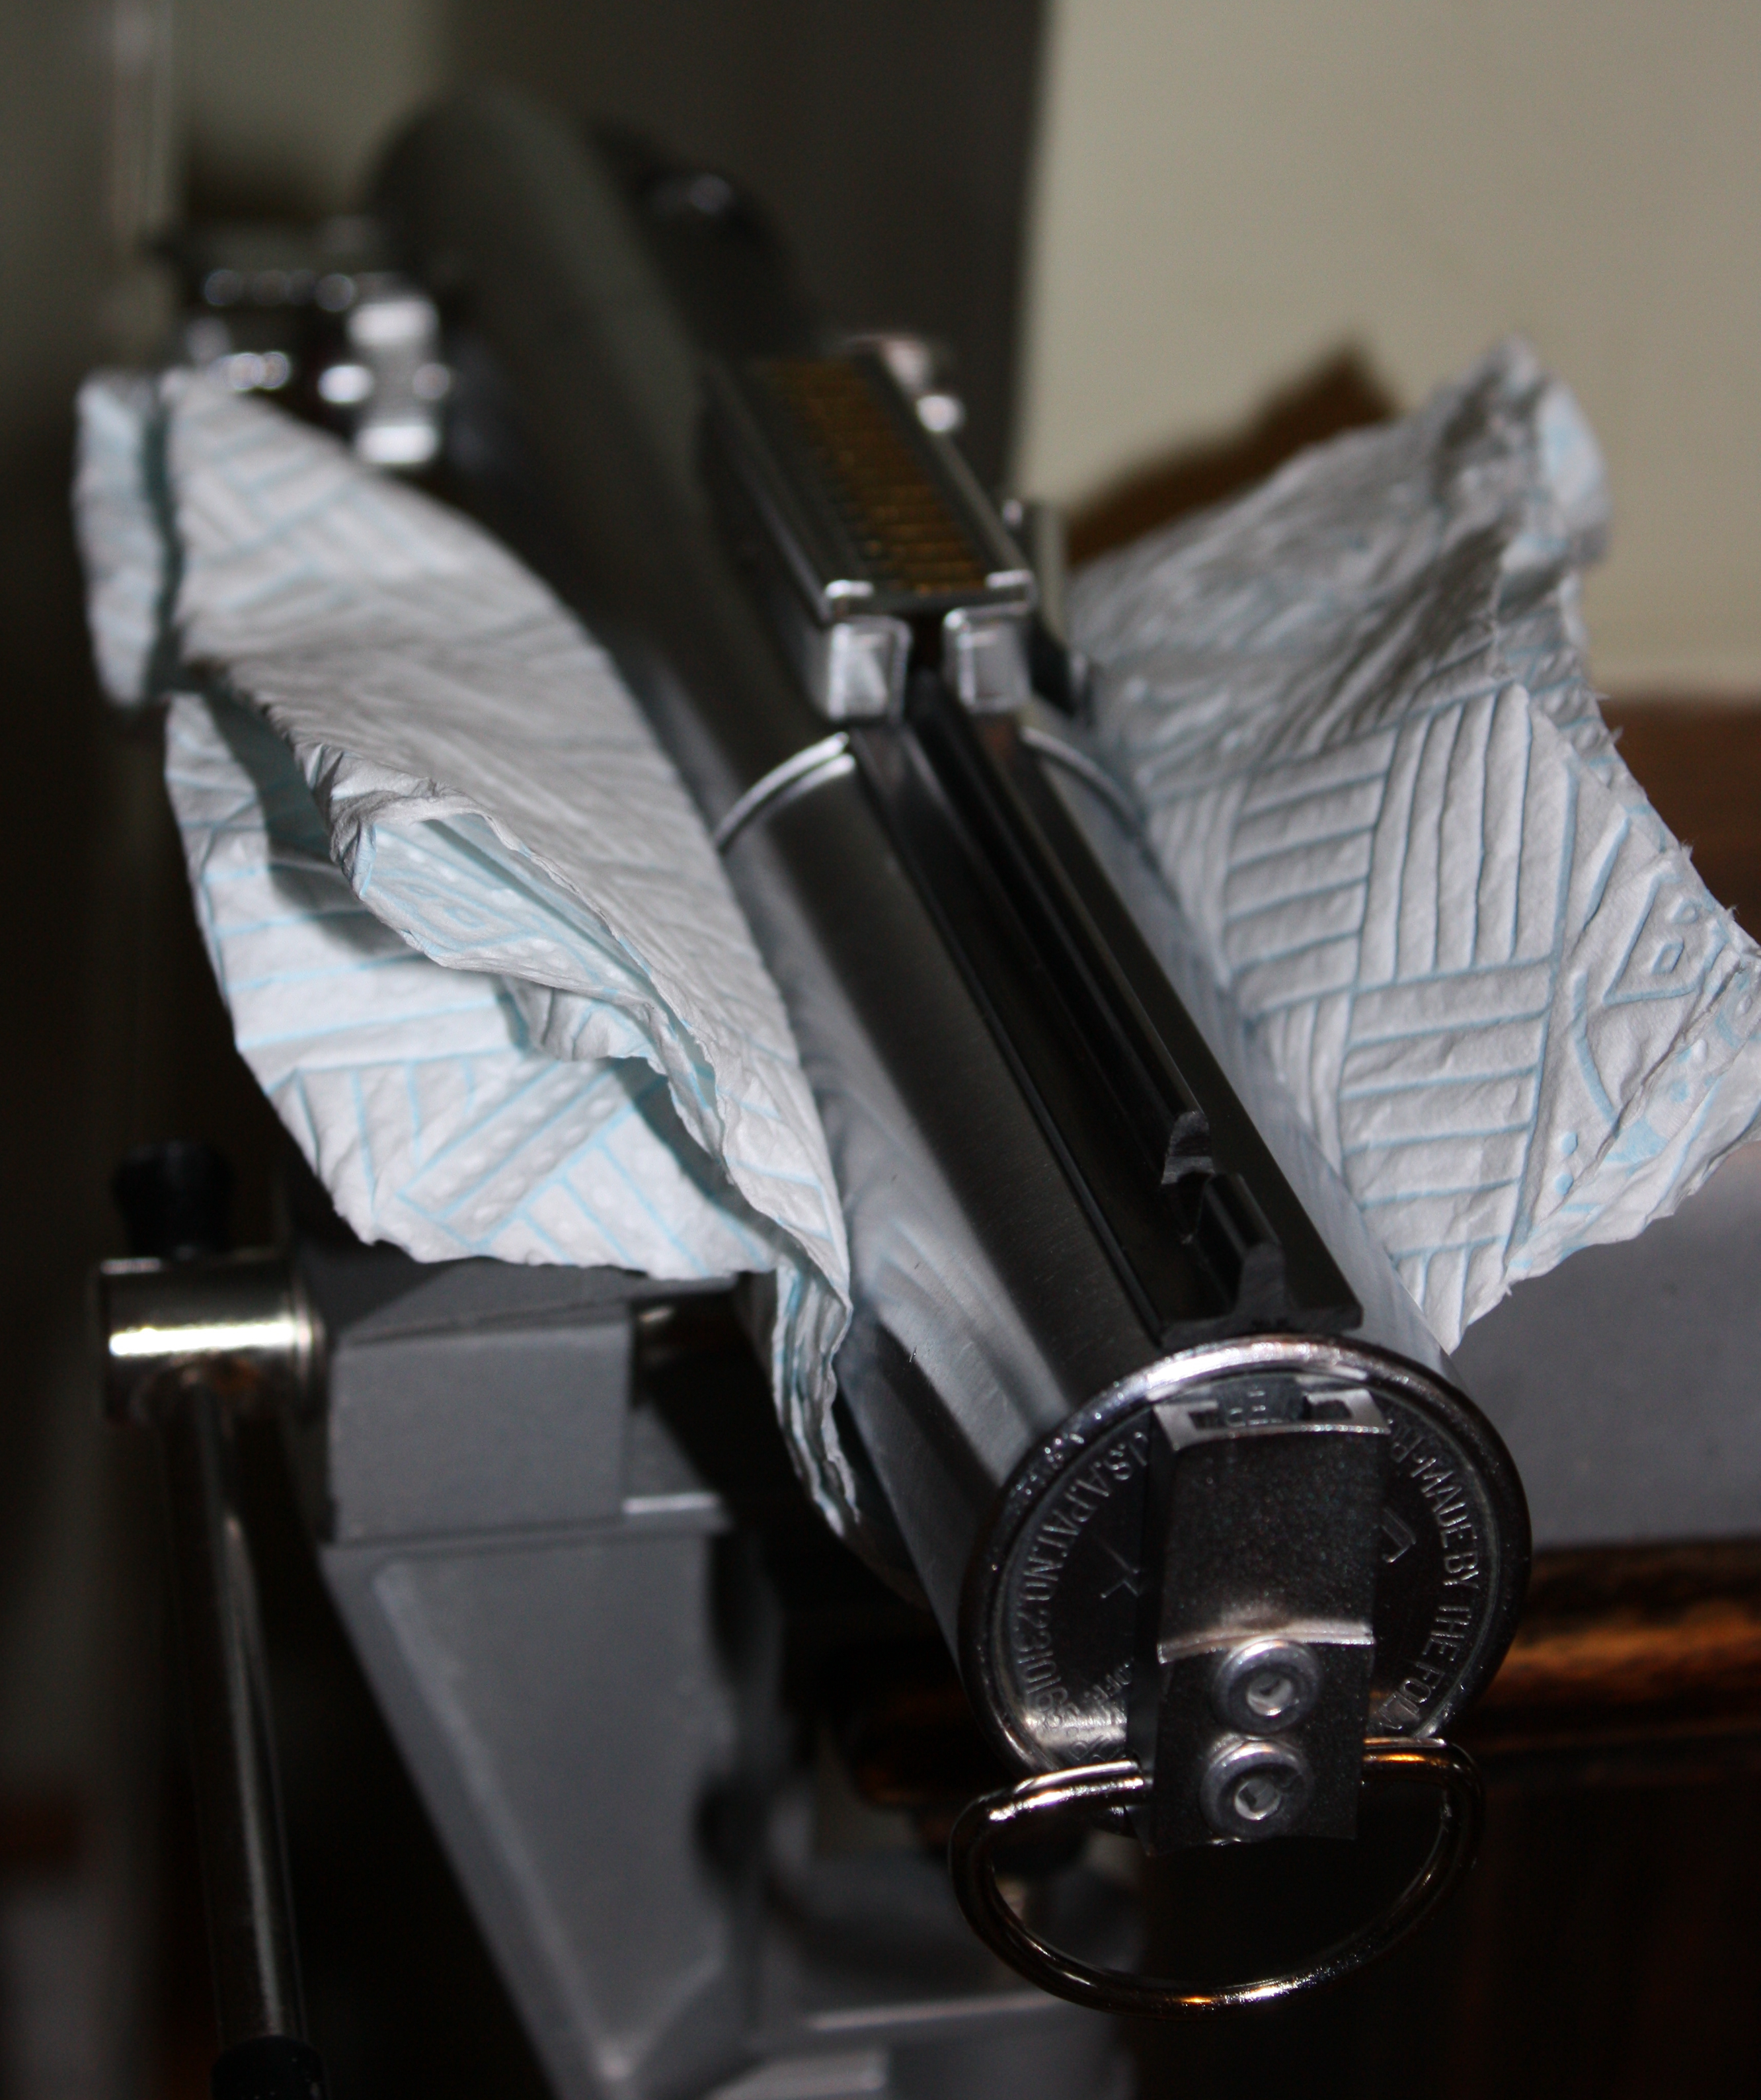
The next part is to cut the six plastic T Tracks to length. That’s pretty easy but what isn’t is cutting out the little notches at the end of each track; it was pretty time consuming.
I used two part epoxy to hold each one into place before drilling the holes for the securing screws.
The circuit board in the ‘activation switch’ is from a vintage HP44 Buscard.

The last step is to use some Mylar tape to cover the distinctive Graflex brand name on the clamp.
Luke Skywalker Empire Stikes Back Lightsaber made from a real Graflex.
Darth Vader and Luke Skywalker Empire Strikes Back Duelling Set made from Real Vintage Parts.
and here they are in all their finished beauty. You can buy some fine replicas of all of this stuff but nothing I’ve yet seen gets this close.
Live the Dream.